The news quite often mentions 3d Printers. 3D printer companies were the darlings of the stock market not too long ago. Mainstream press is full of little interest stories of the latest thing to be printed out. Technology websites and social networks have many mentions of the “Maker” movement and that movement includes 3D printing and printers.
I am somewhere in the “tech” scene or at least in a few smaller segments. You can tell that by a few things), but having the username “michael” on the an old school computer technology site (Anandtech) is a good sign of how long I have been involved. I have seen mentions of 3D printers for years and occasionally checked prices to buy a printer, but they were always well over $1,000 which seemed too much to me.
One day I noticed this campaign on Kickstarter:
The Kickstarter ended a while ago, you can find the products for sale here:
http://www.drivethrurpg.com/product/166074/DRAGONLOCK-Dungeon-Starter-Set
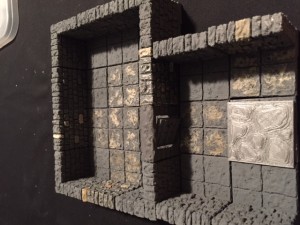
For those of you too lazy to click the first link, it is plastic terrain used when playing a roleplaying game to build up a dungeon. If you are not familiar with tabletop roleplaying games like Dungeons and Dragons, the players often use 28mm scale miniatures to more easily run the fights that happen within the game rules. I guess you can say they are the
dolls the players use but the players tend to be men so they would at least claim action figures.
If the miniatures are the dolls, then products like Dragonlock are the dollhouses. I have played in a couple of games where the DM had very nice hand drawn maps that were drawn to scale and I have played in a couple of games with folding cardboard terrain, but I had only seen the full out plastic modeled dungeons in pictures from conventions. The existing products are interesting in theory but quite expensive and hard to use because you never seem to have exactly the right combination of pieces to build what you want. A set that is meant to be 3D printed solves those two problems. The cost per piece is small and you can custom print what you need.
I signed up for the Kickstarter and then started researching the current state of the 3D printer market. I quickly discovered two things. There were a fair number of printers below $1,000 today and that reviews on them were all over the map.
I will save myself typing a long description of the different printers out there. Here is a fairly representative list with examples from owners actually using the printers:
http://fatdragongames.proboards.com/board/24/3d-printers
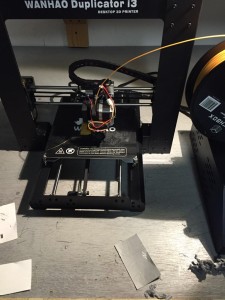
I selected the Wanhao Duplicator I3 V2. I mainly selected it for two reasons. The first is the cost (it was under $300 for me) and the other was the strong user community that could be found in a Google Group. The brand was recommended to me by my friend Gabriel who runs a small drone business in Singapore called Sensory Robotics (www.sensoryrobotics.com ). I had asked him for an inexpensive printer that would meet the specifications needed and he said if I was willing to tinker the Wanhao printers were popular. I was able to find them direct from the manufacturer via Taobao in China for just under $300 shipping included (they are between $350 and $400 in the USA) so I decided to give them a try. The Wanhao I3 is basically a pre-built open source kit printer. It really is not much different in price than buying parts and assembling it yourself, and the design itself is somewhat well tested.
Before I pulled the trigger and bought the Wanhao, I looked through Amazon.com and read the message boards of many of the more popular printer brands. I was quite surprised at the results. For a product that had been sold to consumers for several years and had made it into popular press, reviews were surprisingly bad every printer brand out there.
I am not talking the occasional disappointed buyer on a crusade, I am talking about bad review after bad review. Even even the Printerbot Simple that is recommended by the Fat Dragon, the company that made the Dragonlock pieces, has quite a few bad reviews on Amazon and in the Dragonlock boards. Some printers appear to pretty much never work. Some printers use proprietary printing materials that are much more expensive than standard printing materials. All the printers I researched had very disappointed customers.
Why so much disappointment? Let me explain a little how 3D printers work and what easily goes wrong with each step.
The first is that all of the consumer level printers (under $1,000 and meant to be used at home) are made by smaller companies. The bigger companies that make printers for commercial use all have quite expensive models that are far out of reach of the average consumer. A cottage industry sprung up around some of the older technology that was open sourced by larger commercial companies, and lots of little start-up, mainly of pretty young entrepreneurs were created. Kickstarter still sees 3D printer designs show up on a semi regular basis and two years ago they were very popular on the crowdfunding sites. So that means lots of people with little or no real manufacturing experience started modifying designs or trying new but pretty much untested designs out on the public. Full of Open Source circuit boards and designs that sort of worked but that really were not close to optimal and often had serious flaws.
Before I get to some of the flaws of my particular printer, let me give an overview of the printers and what is done to make a 3D print.
The first thing you need is an actual object to print. This comes in the form of a computer aided design (CAD) file. Typically this is in an .STL format. You can find these files on various internet sites or you can create them yourselves. Many of the people making the files are new to CAD, are using free and not so powerful CAD programs, and probably do not have a lot of 3D printing experience. That means you get a lot of files that very honestly are not set up well to be printed in the first place.
You load the computer design into a program called a slicer. 3D printing is done layer by layer, and a slicer takes the CAD file and slices it into as many thin layers as you have instructed the printer to use. It then generates a series of commands that tells the printer what to do to actually print the device (generally in the form of a printer language called GCODE) and saves that file. A popular free slicer is called Cura. A more powerful but costly program is called Simplify 3D.
Right away, you may have ruined your print. The programs need to have the exact right settings or the code they write does not work. Some files are not well set up to print but an experienced user of the slicer can either change the orientation, break the object into smaller and easier to print. None of this is well documented and the documentation that does exist is written using terms that someone new to 3D printing is unlikely to understand. You even need to measure the diameter of the filament and input it into the slicer program. I hope you have a digital caliper.
Once you have the file ready to print, you then are faced with the printer itself. 3D printers work by melting plastic and depositing it in thin layers. The printer head (the part that melts and deposits the plastic) needs to move in all three dimensions in a consistent and controlled manner. The surface needs to be flat and level to the printhead and the starting distance between the print head and the surface needs to be small but not zero. The basic way of setting the distance is using a piece of paper to slide under the print head and go by feel. If you are a beginner, you have no real idea what it is suppsoed to feel like. The surface must have something to help the first few layers of plastic stick. The print head will move in at least two and maybe three dimensions on rods, gliding on bearings or moved by what essentially are large screws, The file with the instructions needs to be read from a memory card or the computer needs to maintain a good connection for what might be 24 hours or even more.
The rods I mentioned about are often held in place by just a little set screw. Shipping the printer has a good chance of working a rod loose or maybe even bending it. The electronics and cabling are so so on average and shipping may jostle a connection loose.
The standard advice for the printer I bought is to take the extruder assembly apart and replace the gear that moves the plastic filament through it with another one. While you are at it, rotate the heating block to give more clearance when it is at the top. Before you print one item, you have already taken the printer apart. I guess I should mention that the wiring in the older models is defective and can cause a fire. Plus it has been determined that the main circuit board does not properly ground the electricity running through it and it causes temperature readings to swing by about 10 degrees when the heater switches on and off. The suggested fix is to solder a wire from one place on the board to another.
I wish that these types of issues are only from a cheaper kit based one like the Wanhao I bought. However, I would be lying if I said that. I could not find one printer aimed at consumers that did not have a large number of design issues and frustrated users.
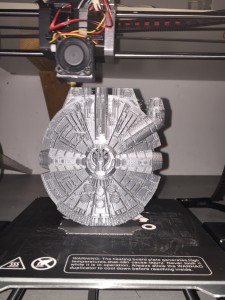
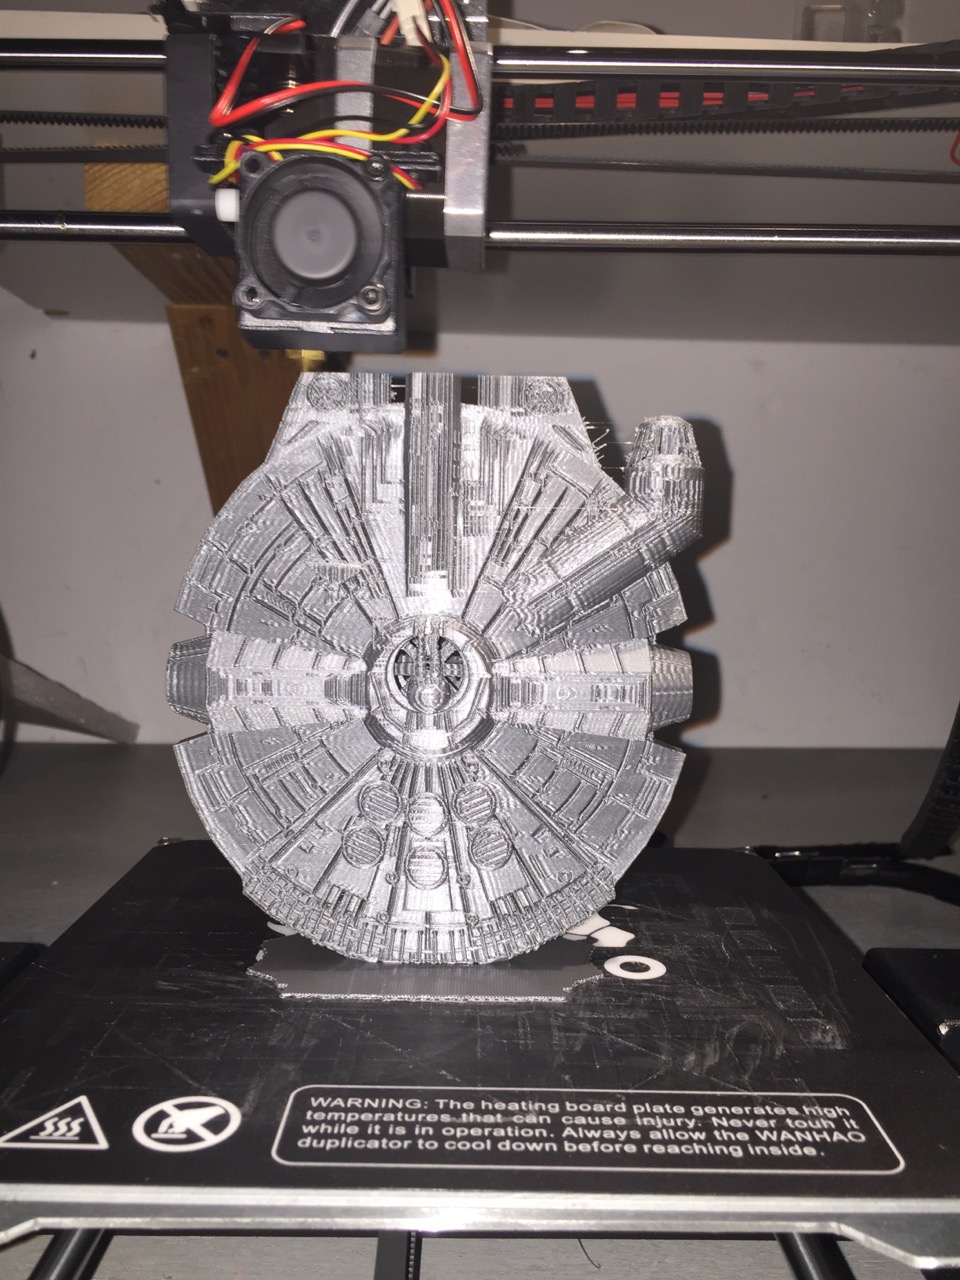
Now if you ask me if I like the printer I bought, the answer would be yes. Once I learned and worked through some things, I actually was able (very quickly) to print out the Dragonlock pieces with no issues at all and other files as well. A 3D printer is a fun thing to have and my kids like it and want me to print more things for them. However, these are not even close to being a consumer product. Be prepared to spend time scouring the internet for training tips, to be watching youtube videos showing you how to use your computer and software, and generally spending a lot of extra effort to make the device that you paid for work.
Here are a few pictures of what I have been able to do with my printer. A well known space ship, some Dragonlock pieces (painted and unpainted) and the printer itself.