Kingdom Death: Monster ran two successful Kickstarters. The second has just completed delivery and the game is available in the KD:M store (https://shop.kingdomdeath.com). I thought that I would do detailed play throughs as I go through the game so you can see what $400 will get you. I will warn you, the game is somewhat of an RPG, and learning what is coming up is part of the fun of the game. The first encounter (this one) is the same for everyone and no big mystery, but the further you get into the game the more and more the “surprise” of what you encounter is part of the fun.
What is the game?
It is a horror/fantasy cooperative board game with RPG elements. It uses cards and the rulebook to reveal the story as you go. You start off as a survivor (4 is the standard number, you can play up to 6 in the game) without any backstory except for you are in a wasteland and a lion attacks you and your companions. The game is cooperative – the players against the game. In combat, the players take turns commanding the enemies and the enemies use an AI deck to control them. You roll dice to hit or to see if you are hit and you use dice to see where you get hit whereas you use cards to determine where the enemy gets hit. The monsters ramp up in power over time.
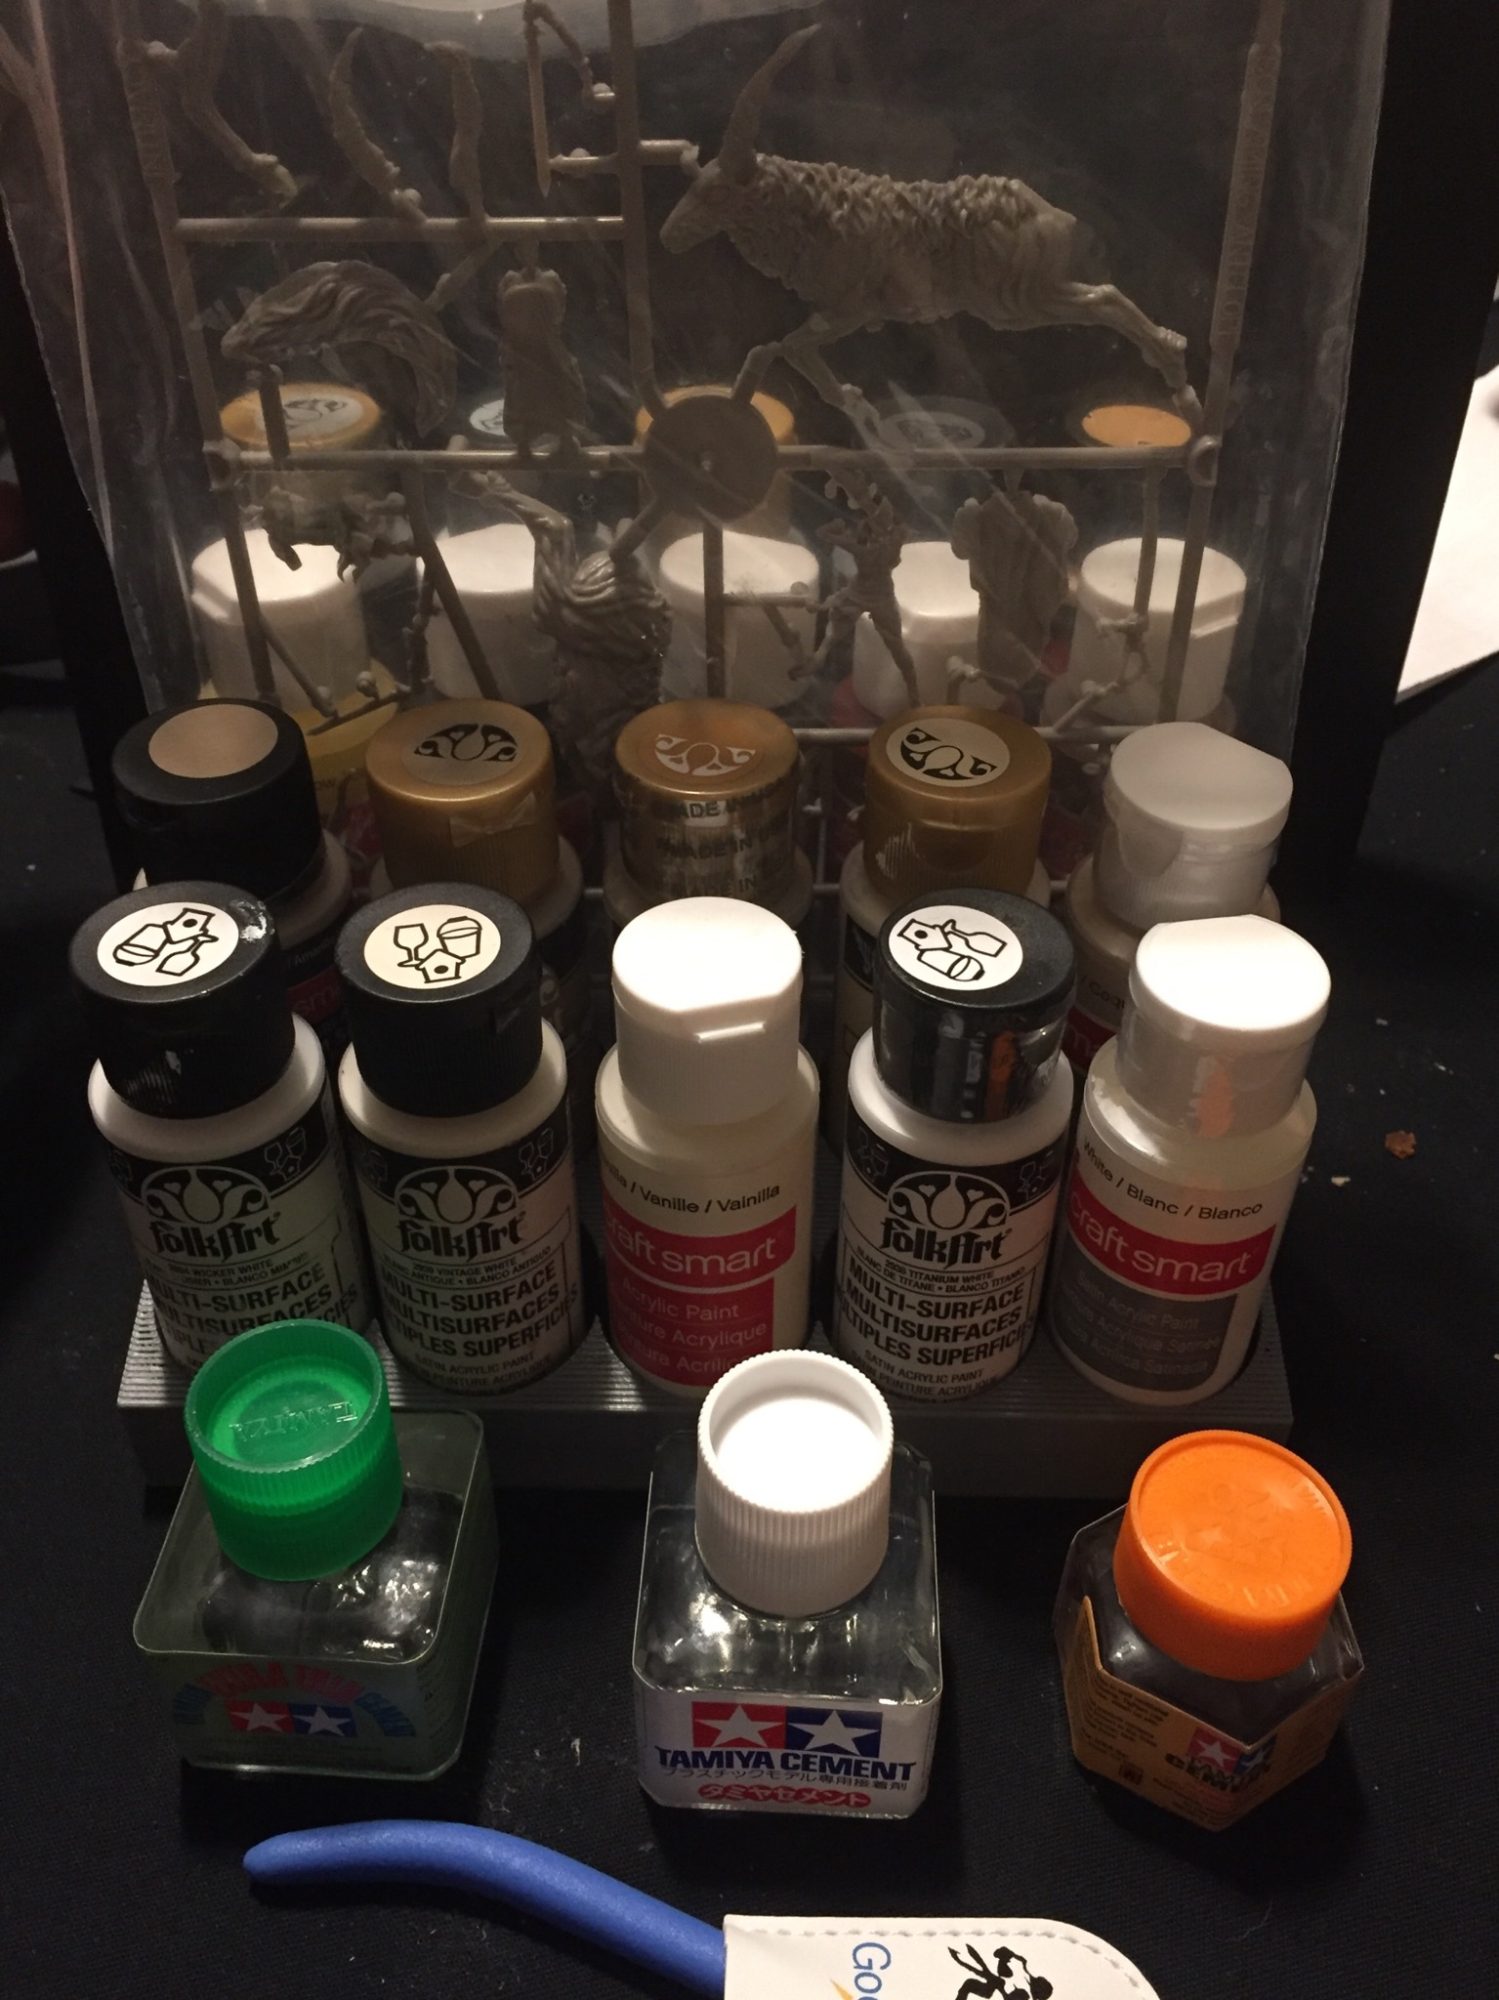
The game is very miniature heavy and the miniatures come unassembled on sprues. You need to clip the pieces off of the sprues and glue them together. Many people paint the miniatures, but it is not required.
Miniatures and supplies
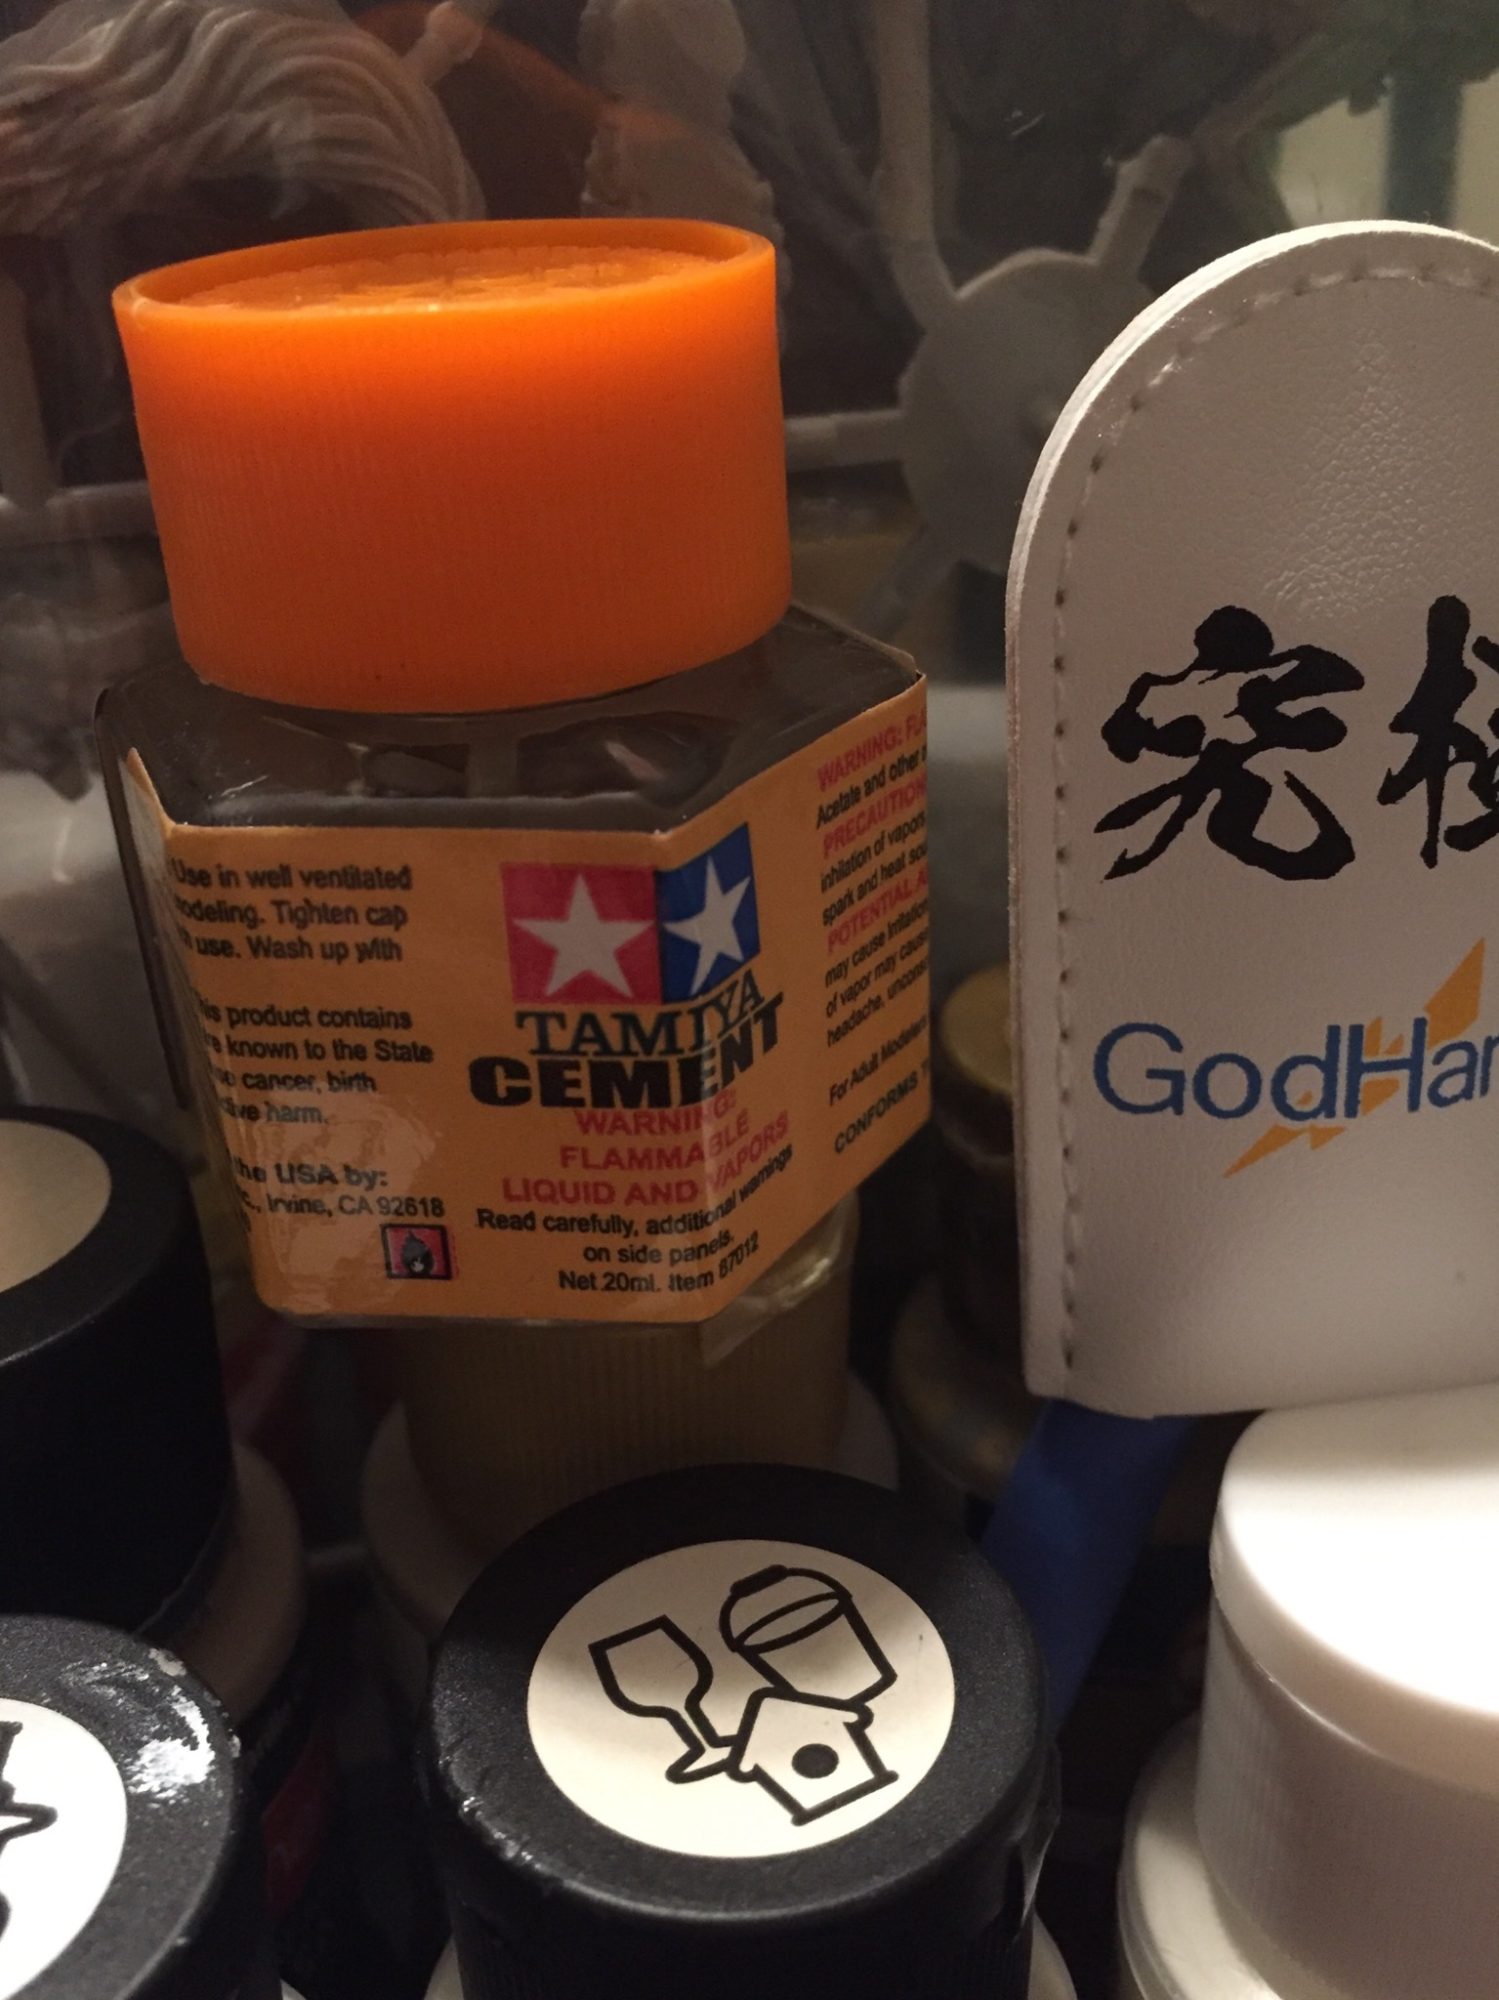
To assemble the miniatures, you will need to cut them away from the sprues and glue them together. You can use an hobby knife to cut them off, or you can use a set of cutters. Something that cuts flush is best and the “God Hand” cutter is expensive but made for the job. They are available on Amazon.com (God Hand), but you might be able to find them cheaper on eBay or from a hobby shop. They are expensive, but work very well and cut very flush. It will save you a lot of time later on cleaning up the model pieces if you use a good tool in advance.
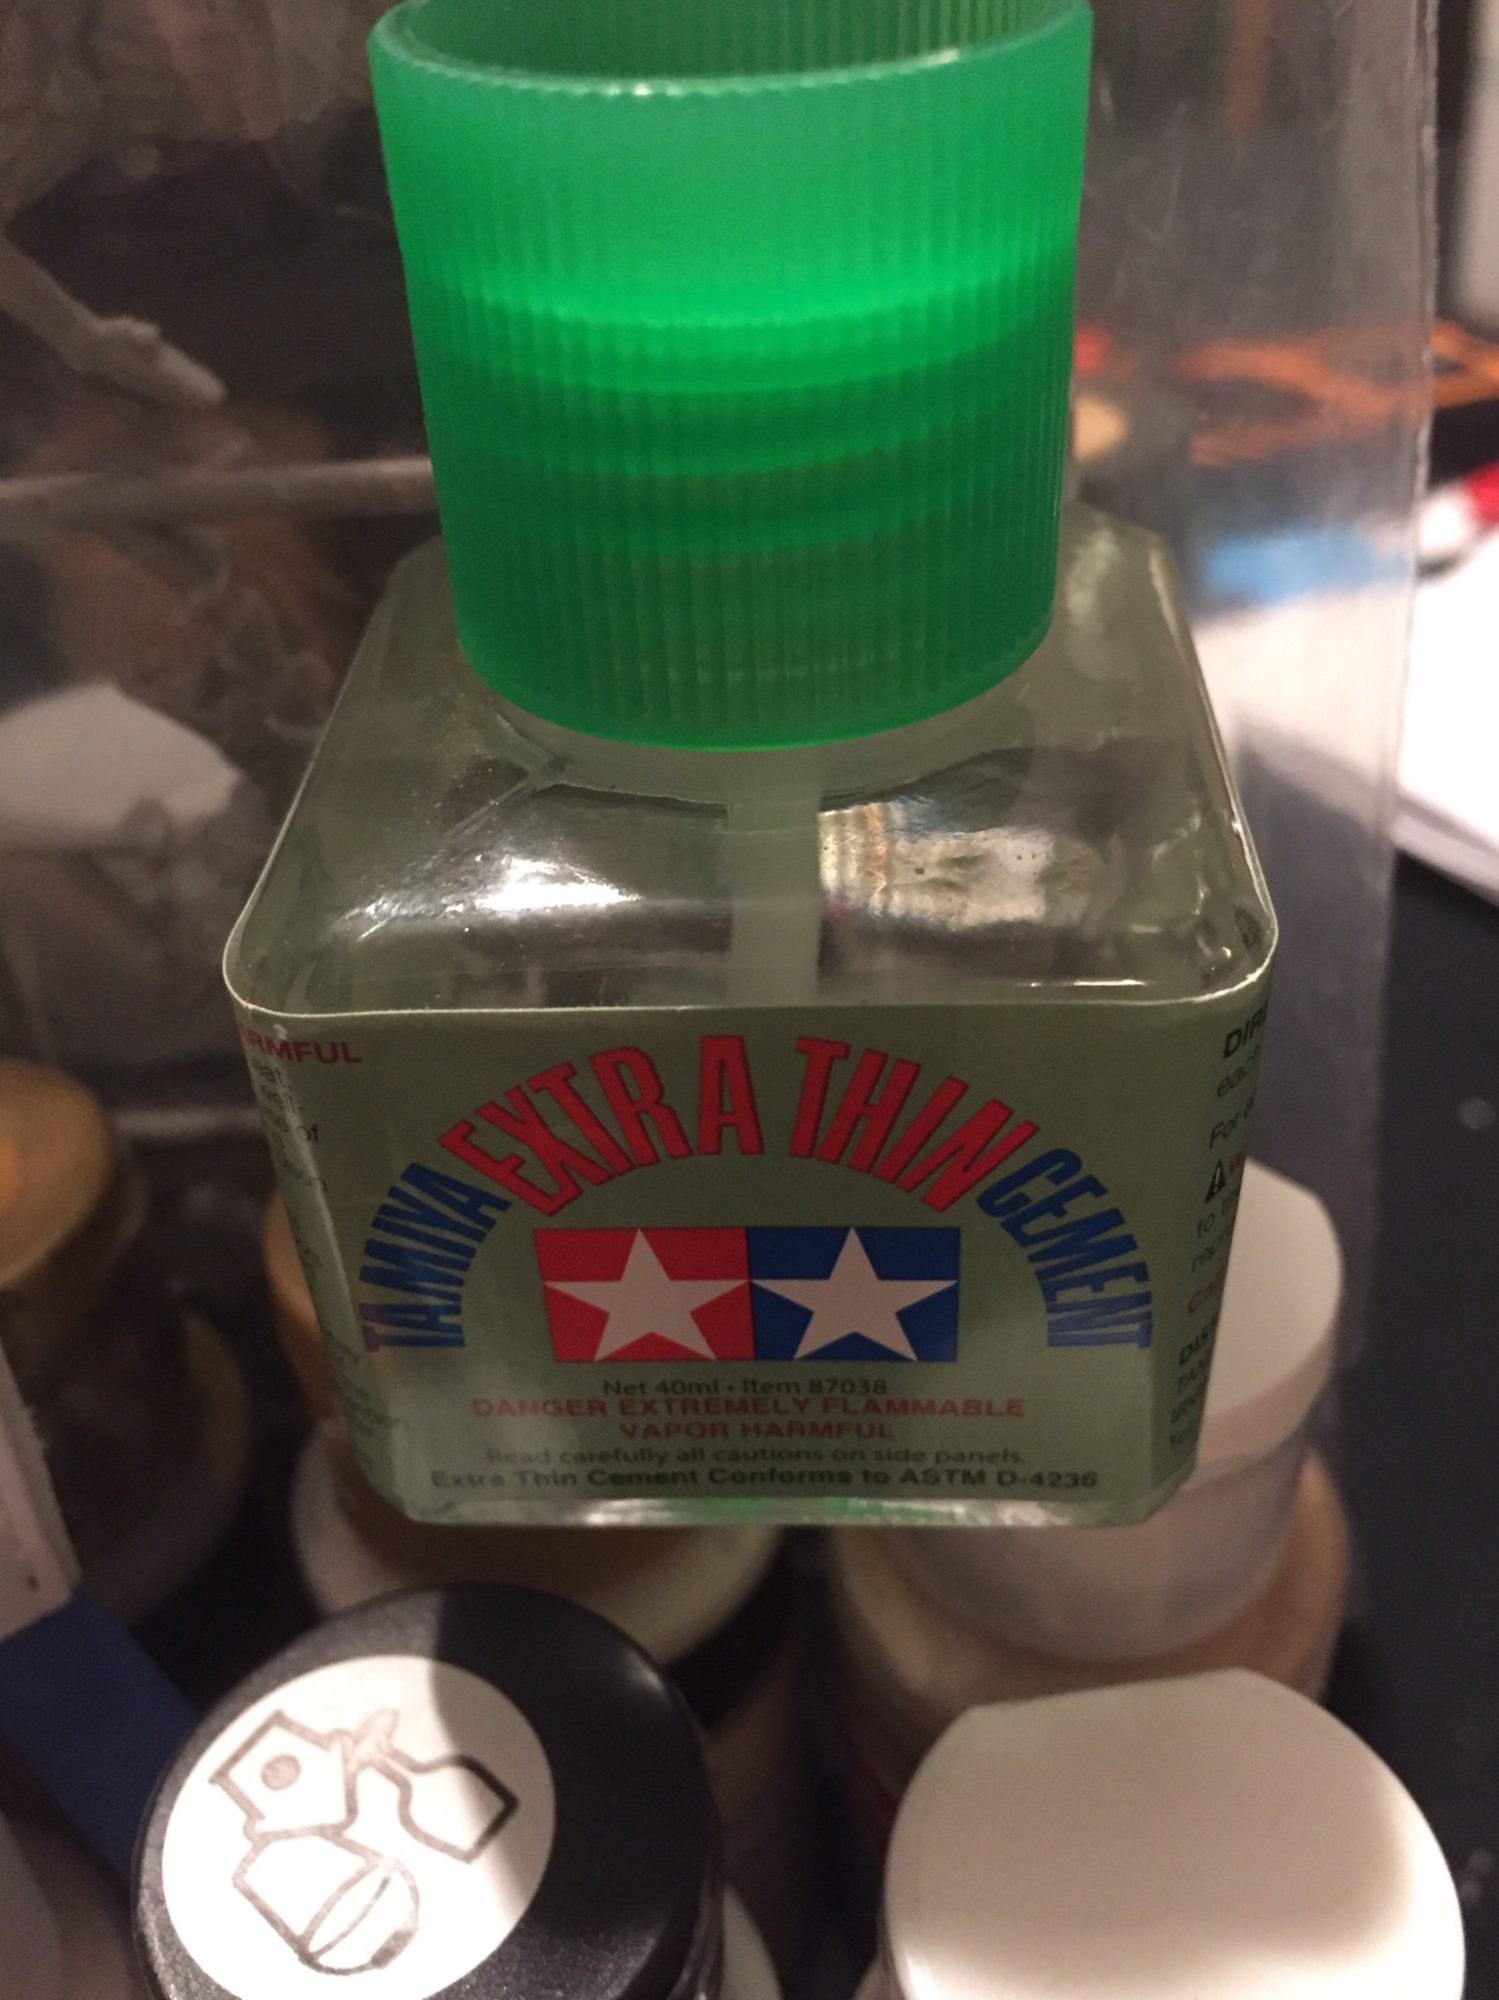
You also will want good quality glue. The best usually is the type designed to slightly melt the plastic and meld it together. I use Tamiya cement (Tamiya Cement). The green top is thinner and the white is a little thicker. The glue sets pretty quickly and you need to put bare plastic onto bare plastic because of the way it works.
Finally, if you want to paint your miniatures, you will need paints and brushes. There are various brands of paints made just for miniatures (this is one example Miniature Paints). The special paints work very well, but they can be expensive. Another option is acrylic craft paints that you can find at stores like Michaels or Hobby Lobby or even Walmart. They work well enough, but tend to be thicker than specially made paints and need more thinning and sometimes more coats of paint.
Cement and God Hand
Different Cement
This blog is not meant to be a painting tutorial, there are plenty on Youtube or other places on the Web. The basic process is to clean the models to wash off the chemicals used to help them release easily from the molds, prime them, typically with a spray primer, paint and then maybe use a protective coat. Painting can include using techniques like dry brushing and inks to bring out details and highlights.
I just use craft paints, but I have been painting for a while and know the consistency to aim at. I am also not aiming for public display of the models or to win an art contest. The miniatures in this blog were painted by me (White Lion) and my 15-year old daughter (the survivors). These were the first miniatures she had ever done. I did some touch up, but I think the pictures will show you what you can accomplish with just a little bit of effort, even if you are not experienced.
This is what what my starting group looks like:
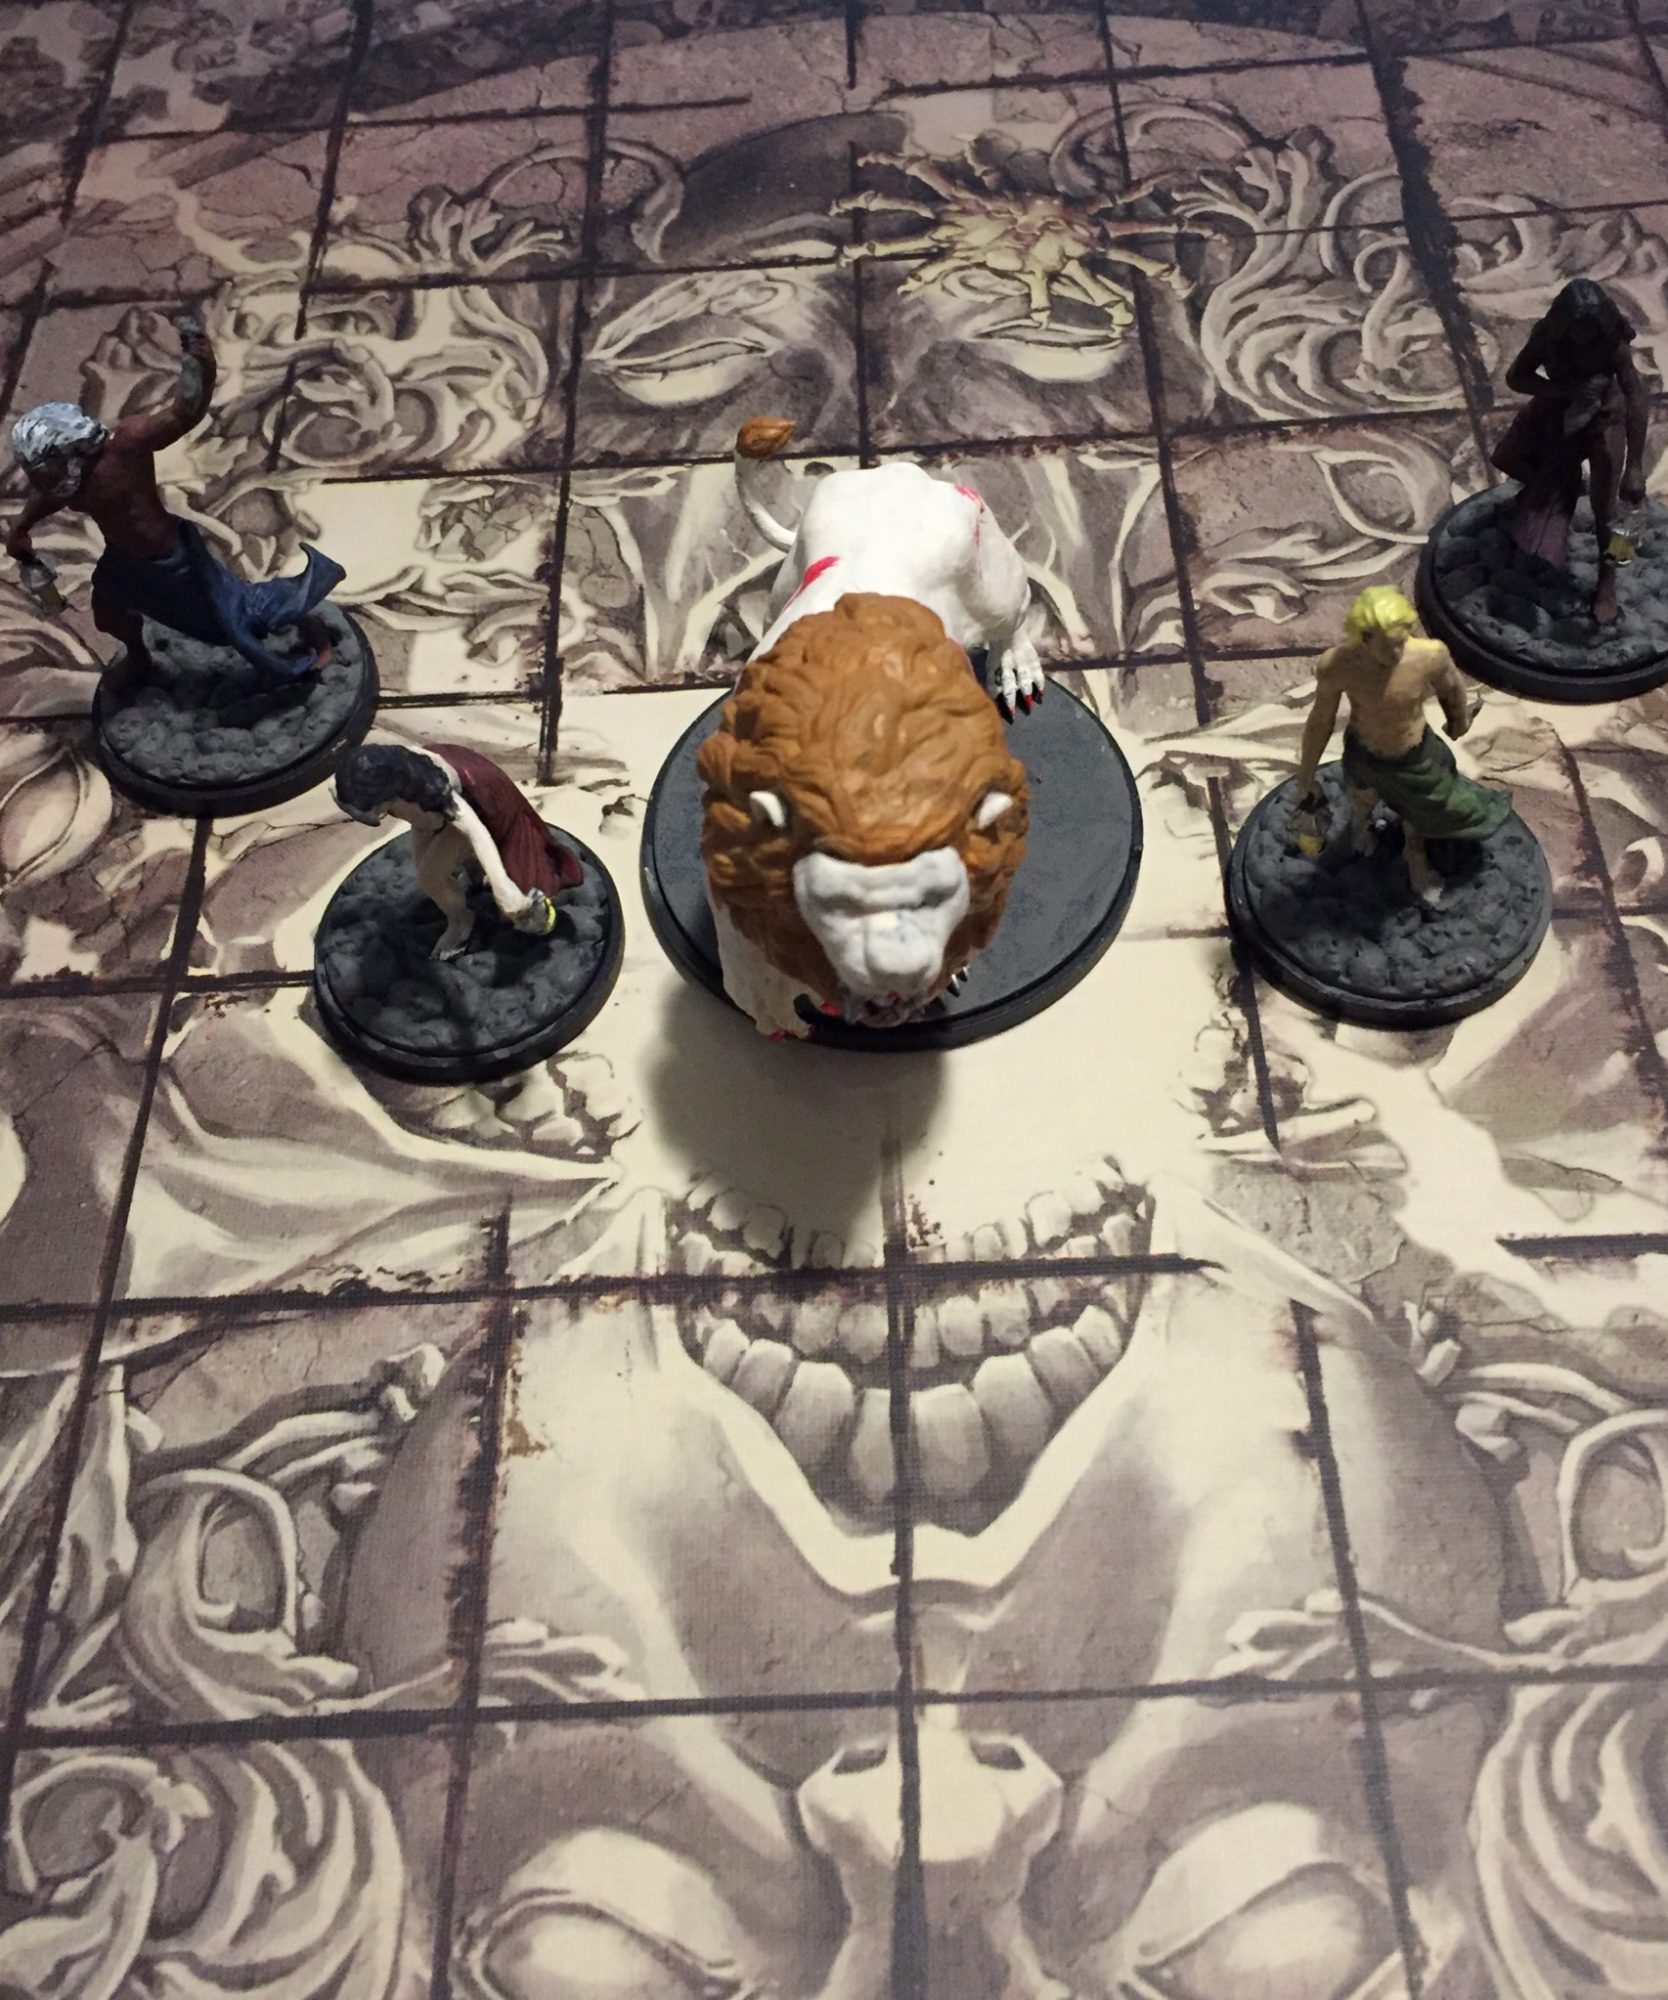
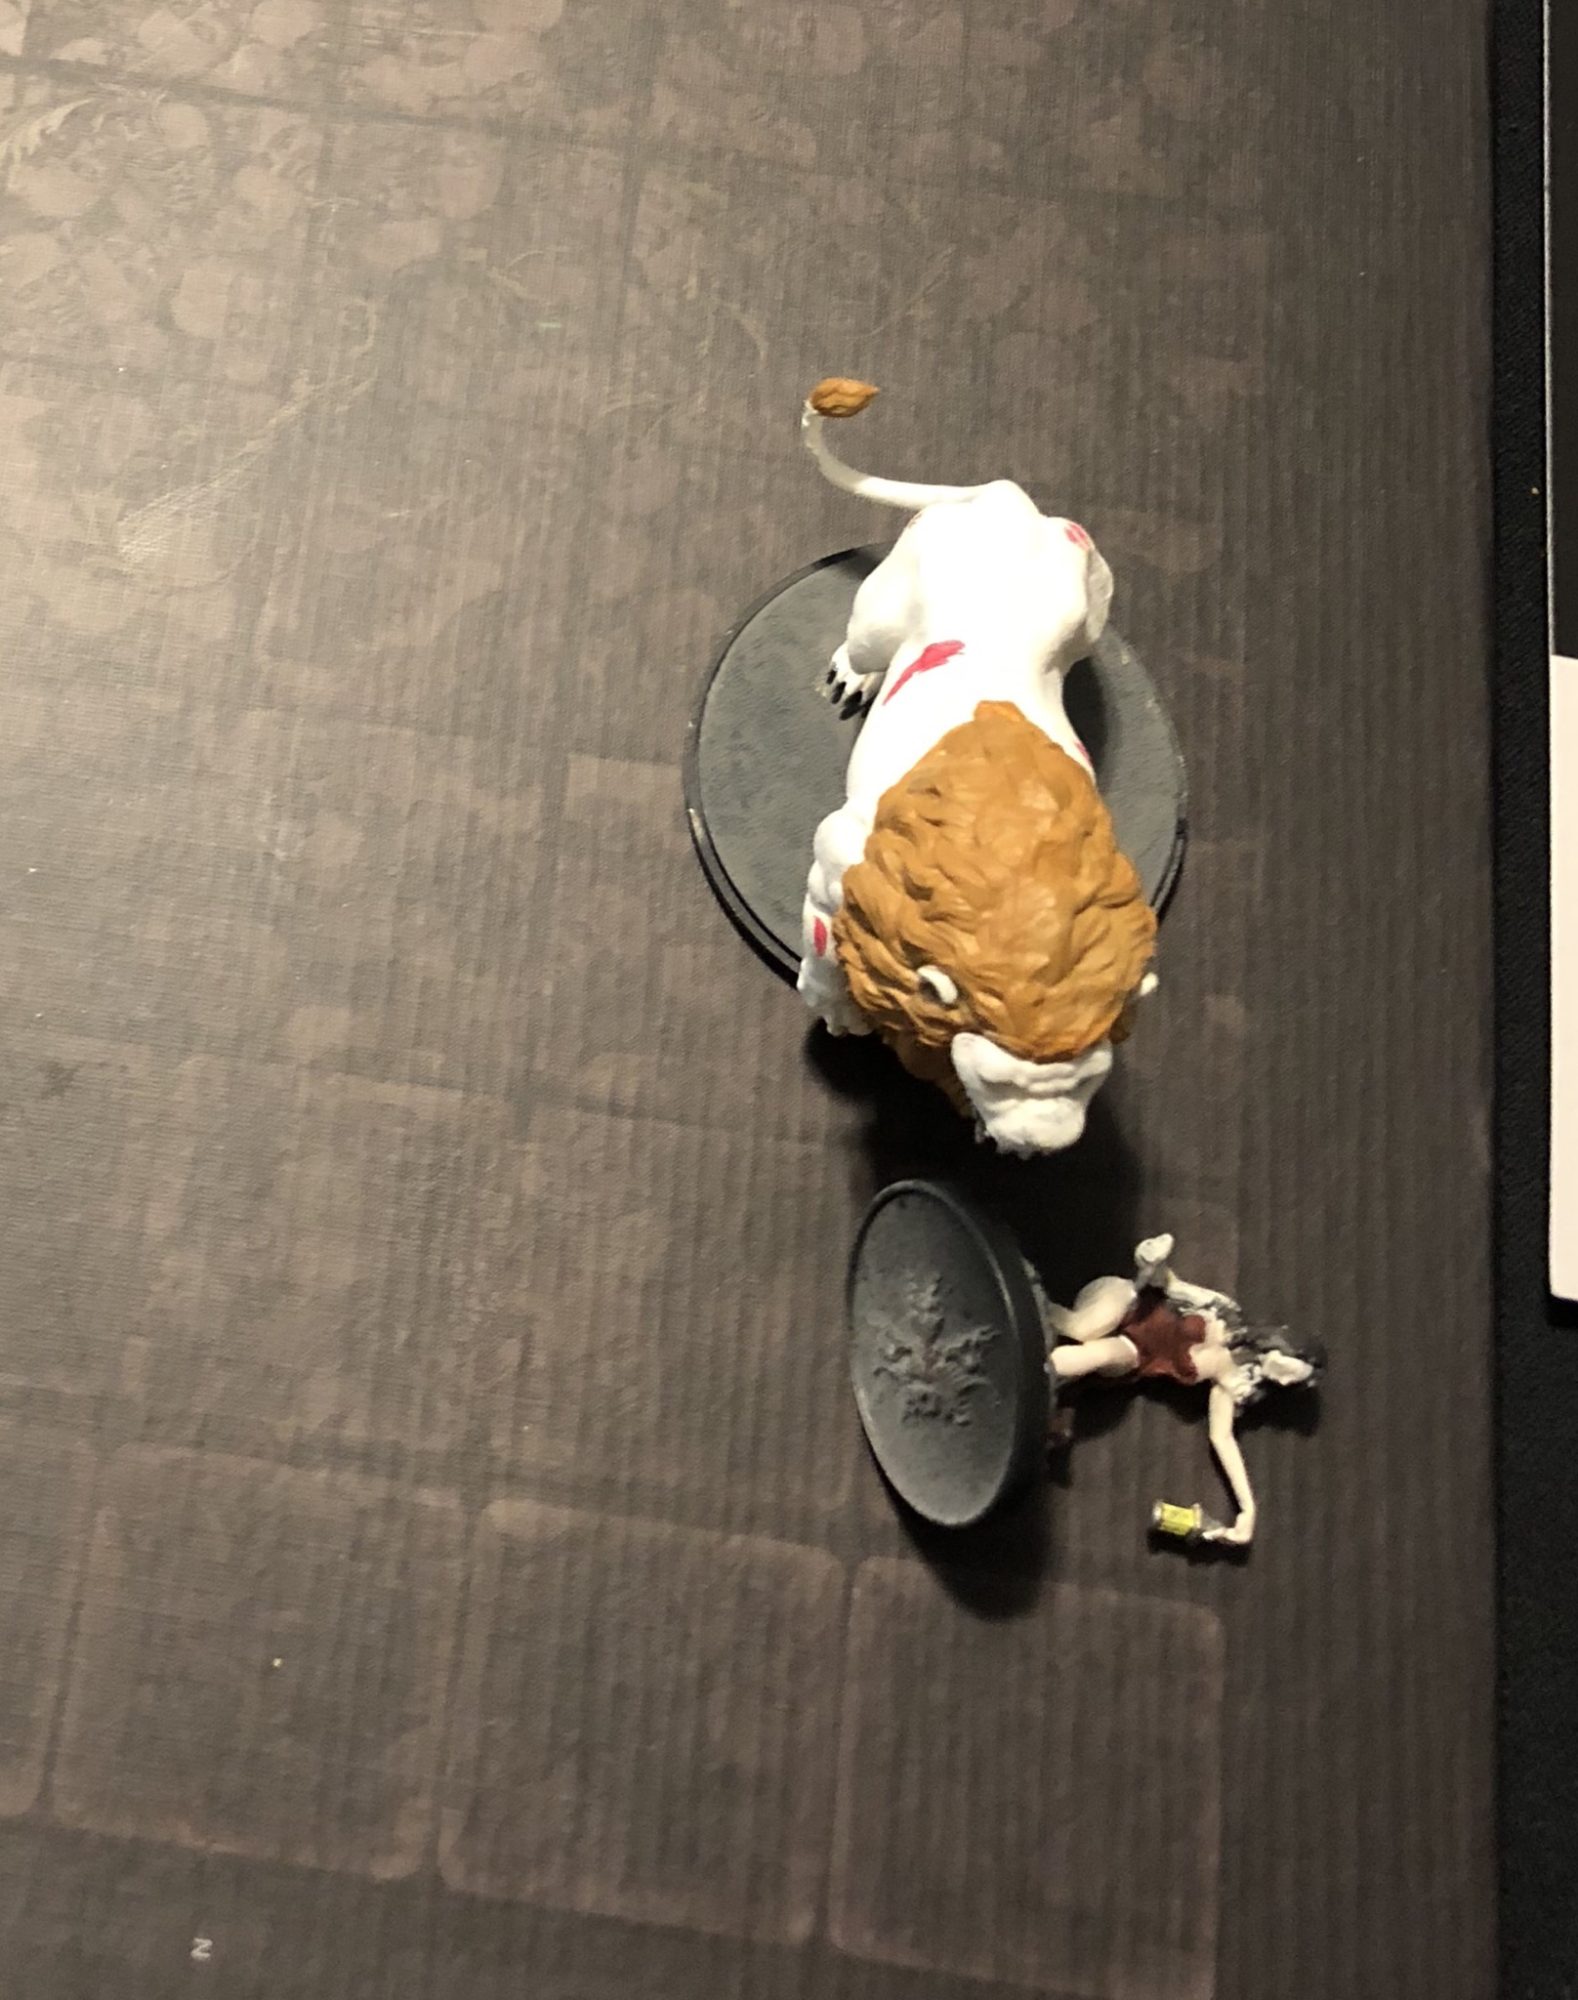
The White Lion and his prey
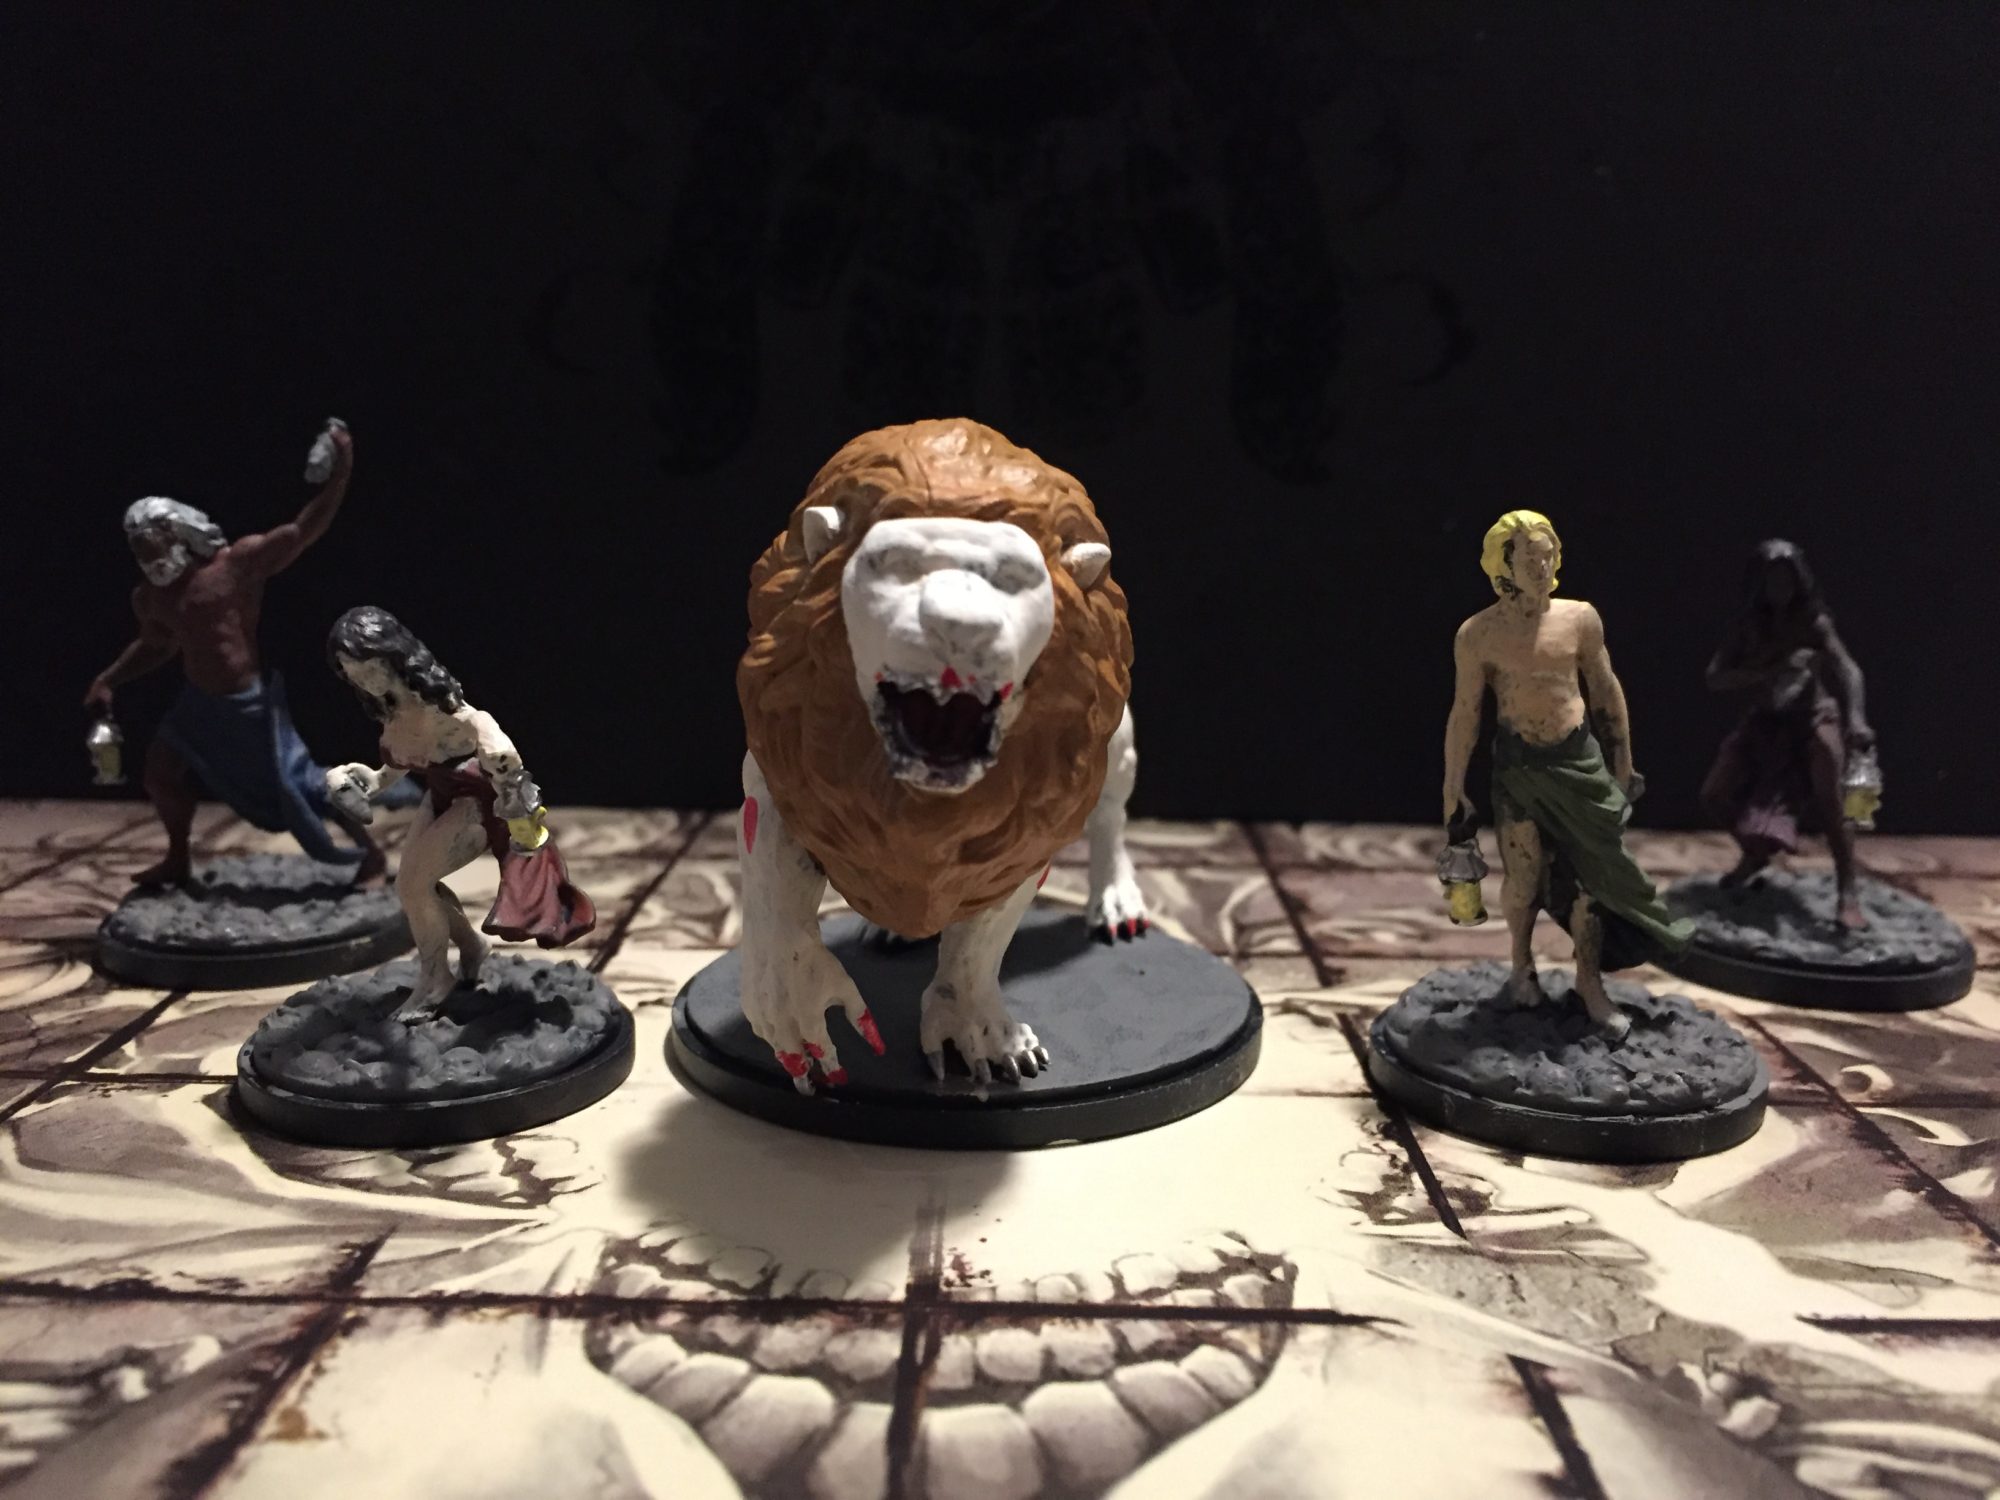
Starting miniatures
To play the first game, you will need to build the first 4 survivors plus the white lion. The directions can be found here (and it is a good site to see previews of the included miniatures):
Building Instructions
Playing your first game – Session 1
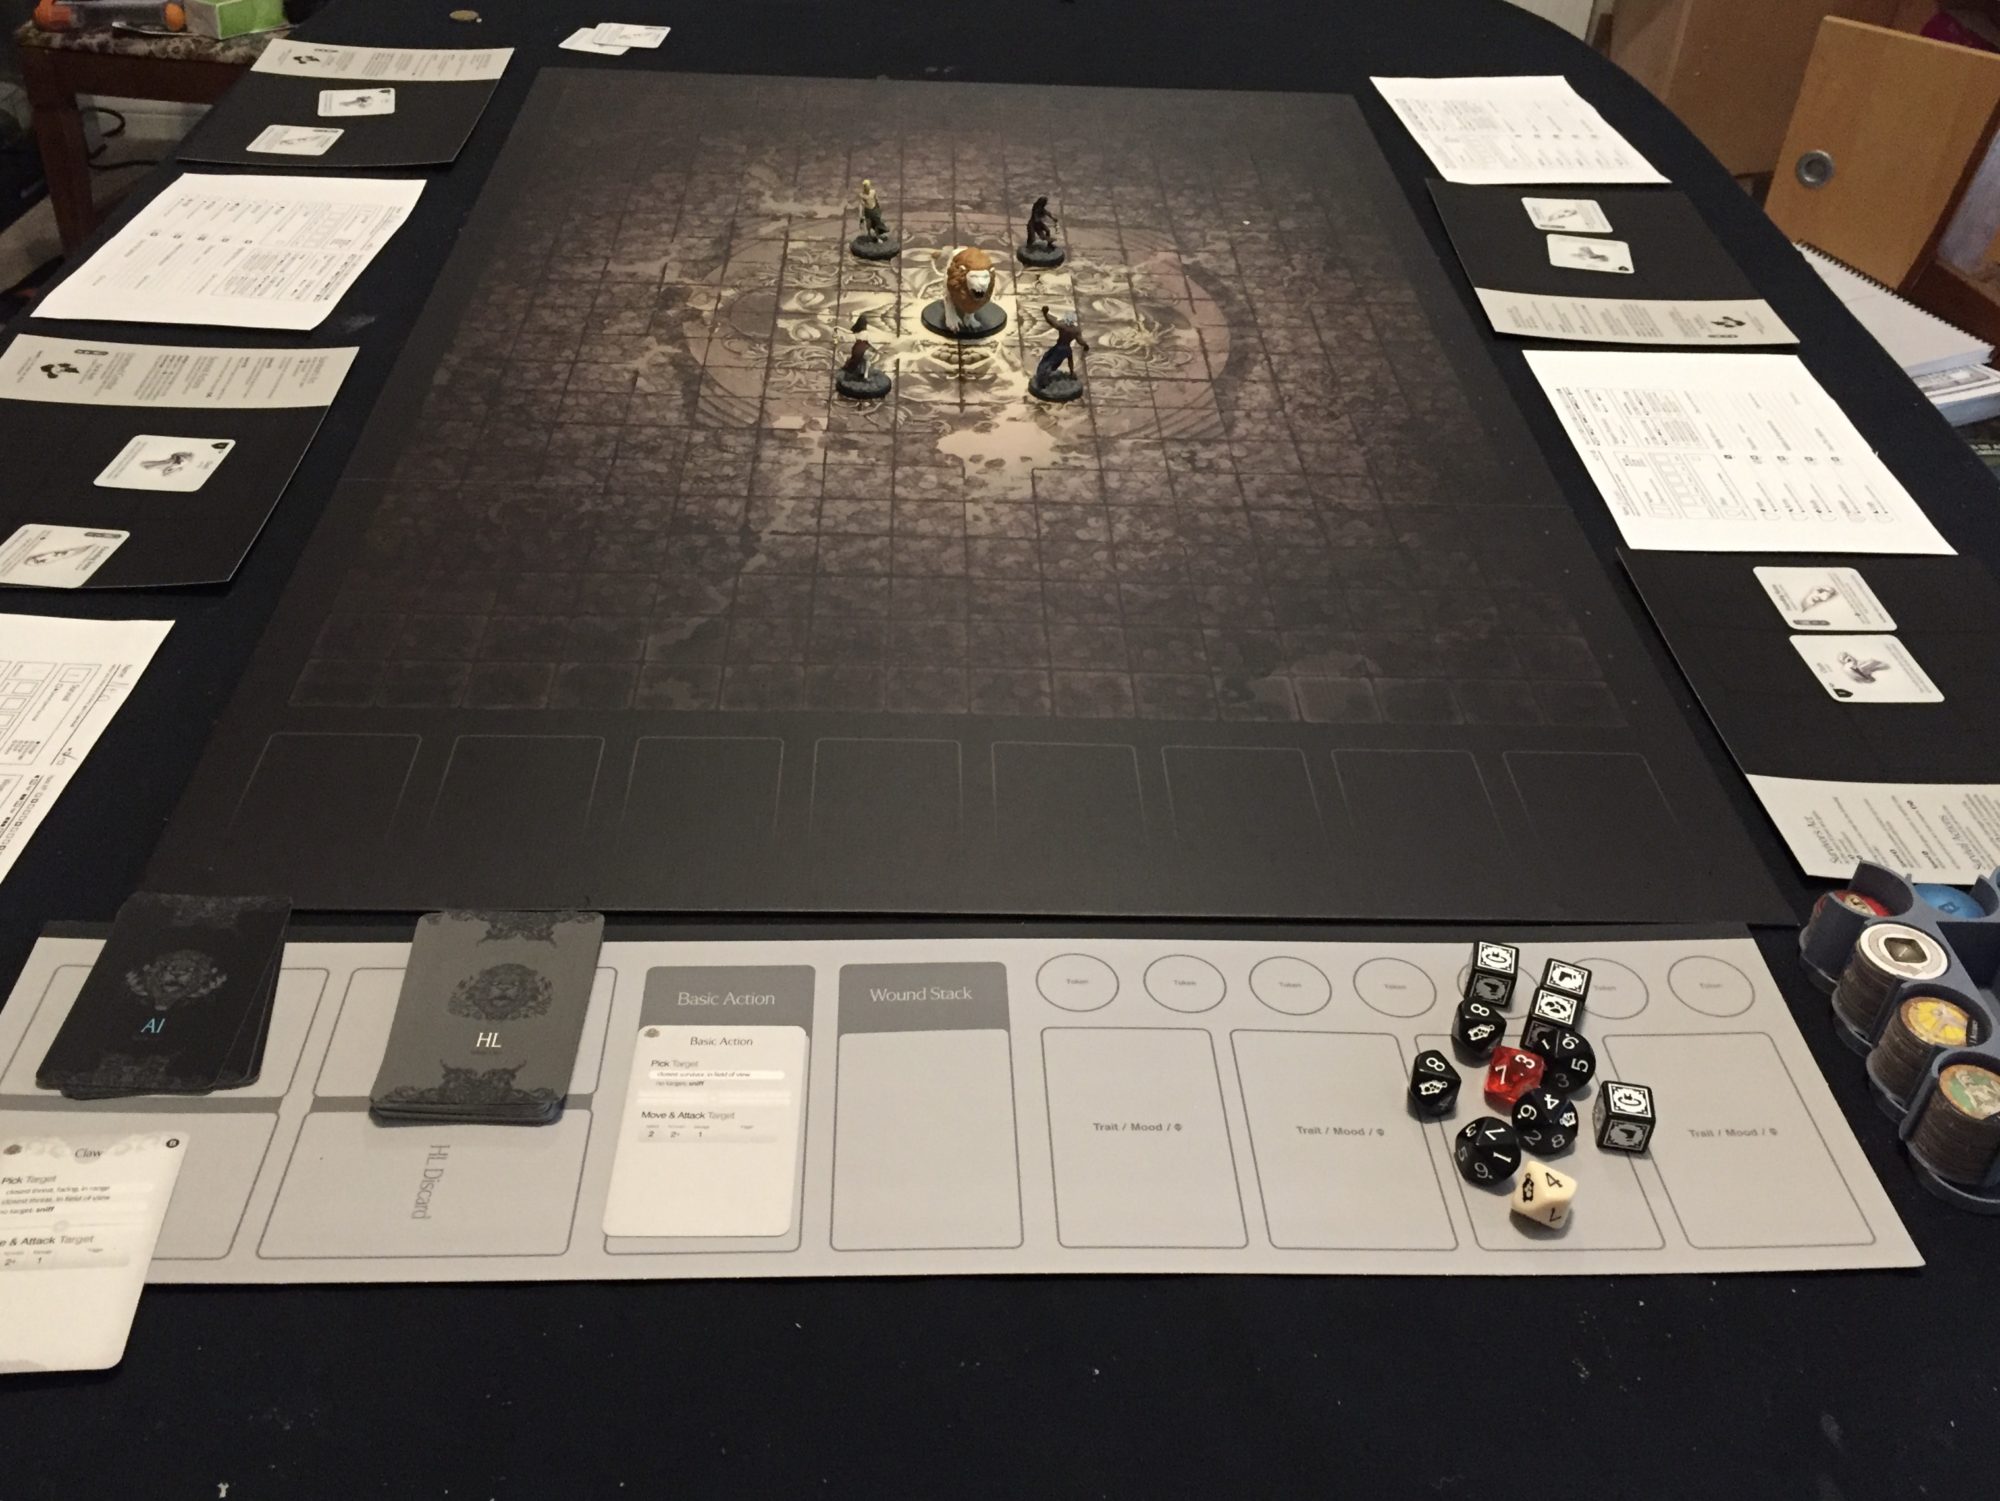
The first comment I will make is that the game board and the space needed around it is very large. You cannot play it on a small coffee table, you will need a big surface. The picture below has a letter sized piece of paper on it to give an idea of the scale.

The Game Board
You will need 4 copies of the survivor statistics sheet. I used my printer to scan and copy the sheet as I can imagine you can churn right through the included pad. The rule book suggests that you use a pencil to record onto the sheet as wounds and statistics change over time.
The rule book steps you through set up and play in detail. First, you set up the 4 survivors and their boards. You place cloth and founding stone cards on the survivor grid and pick names for your survivors. My first 4 are named Myrdin, Neo Linhong and Imani. The rulebook also says you will need tokens to mark status during the fight. I found a 3D printer token holder and printed one up to help keep the tokens organized during the game.
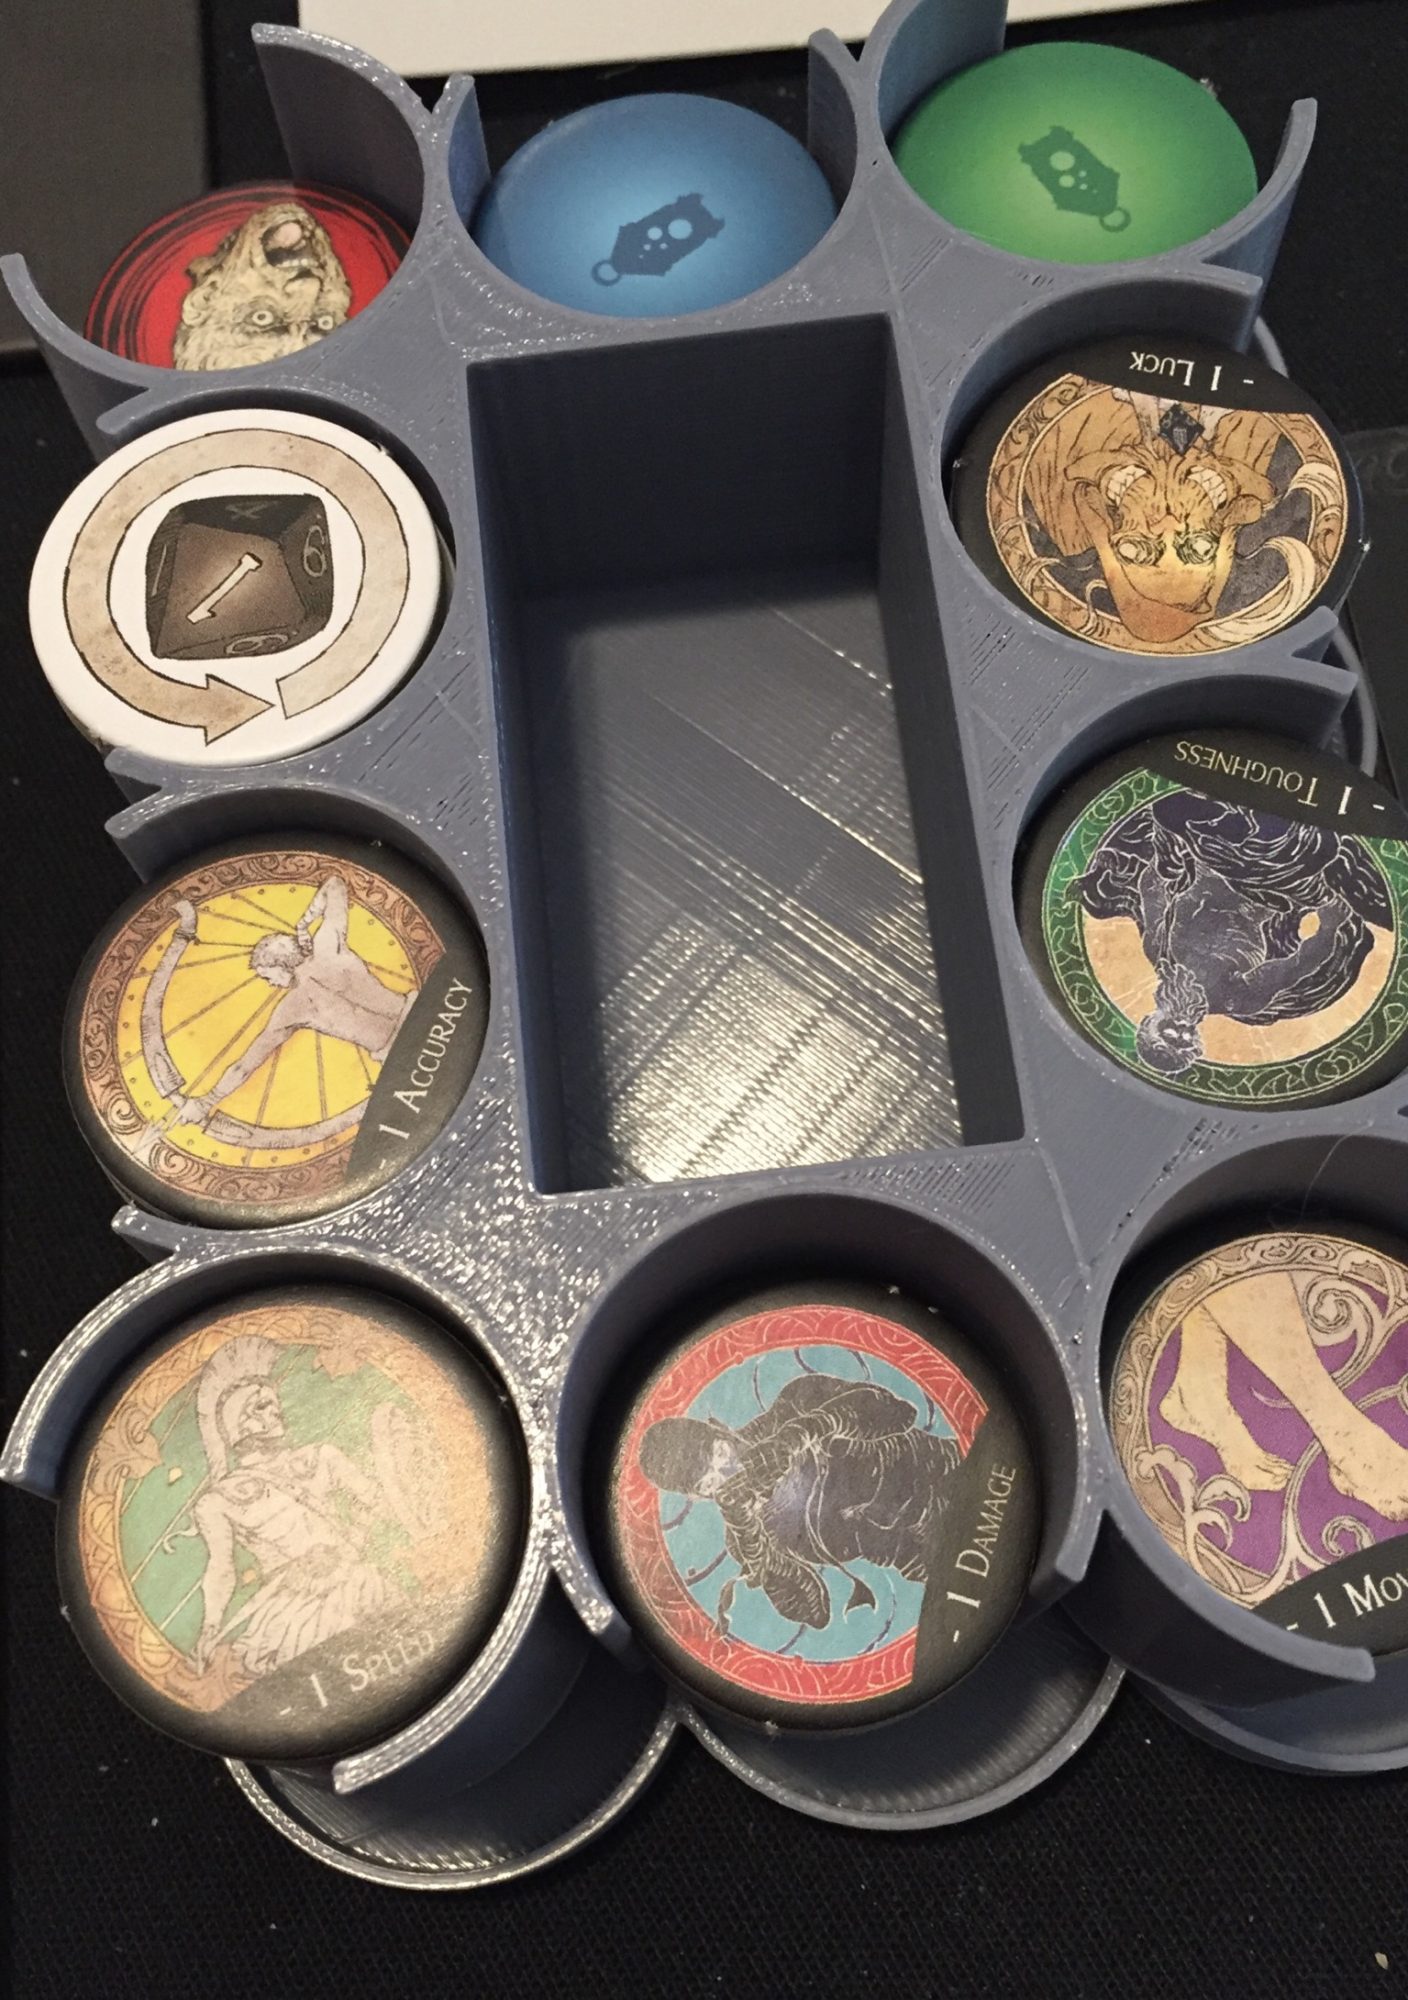
Token Holder
The interesting facts that I picked up from the starting components was that the Founding Stone can be thrown to automatically hit with a critical wound and that the survivors move 5 as their base movement.
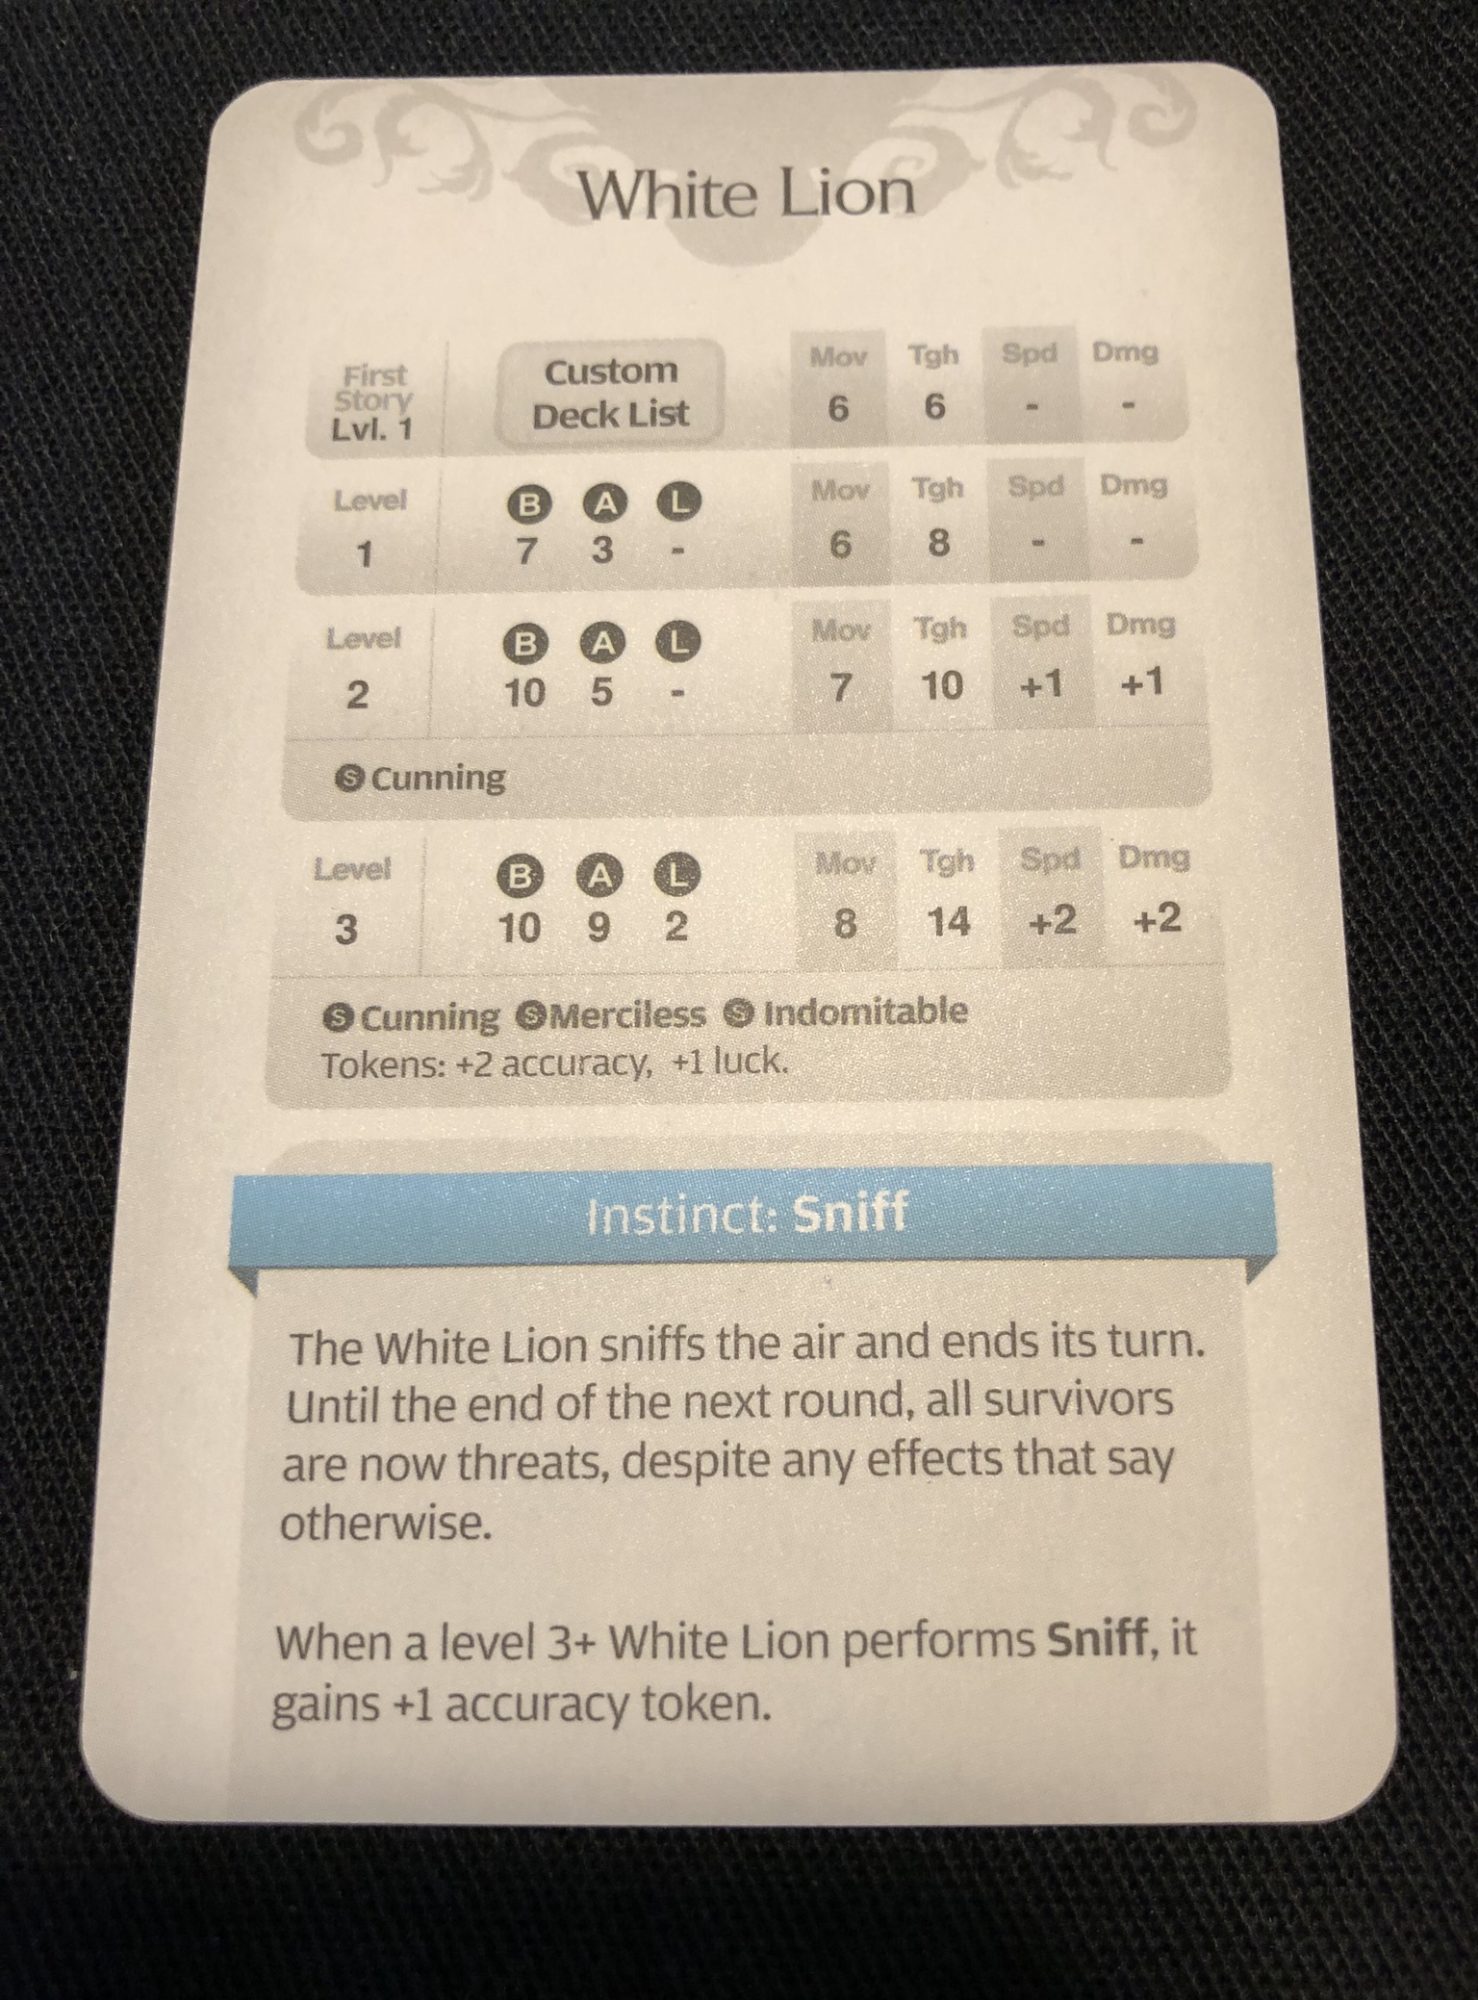
The next step to get ready to play is to create a custom AI deck for the White Lion. It starts with only 8 cards, and the “claw” action is placed on top. The different categories for the AI cards seem to be basic, advanced and legendary. The first session has 5 basic and 3 advanced cards and zero legendary ones.
Various Cards
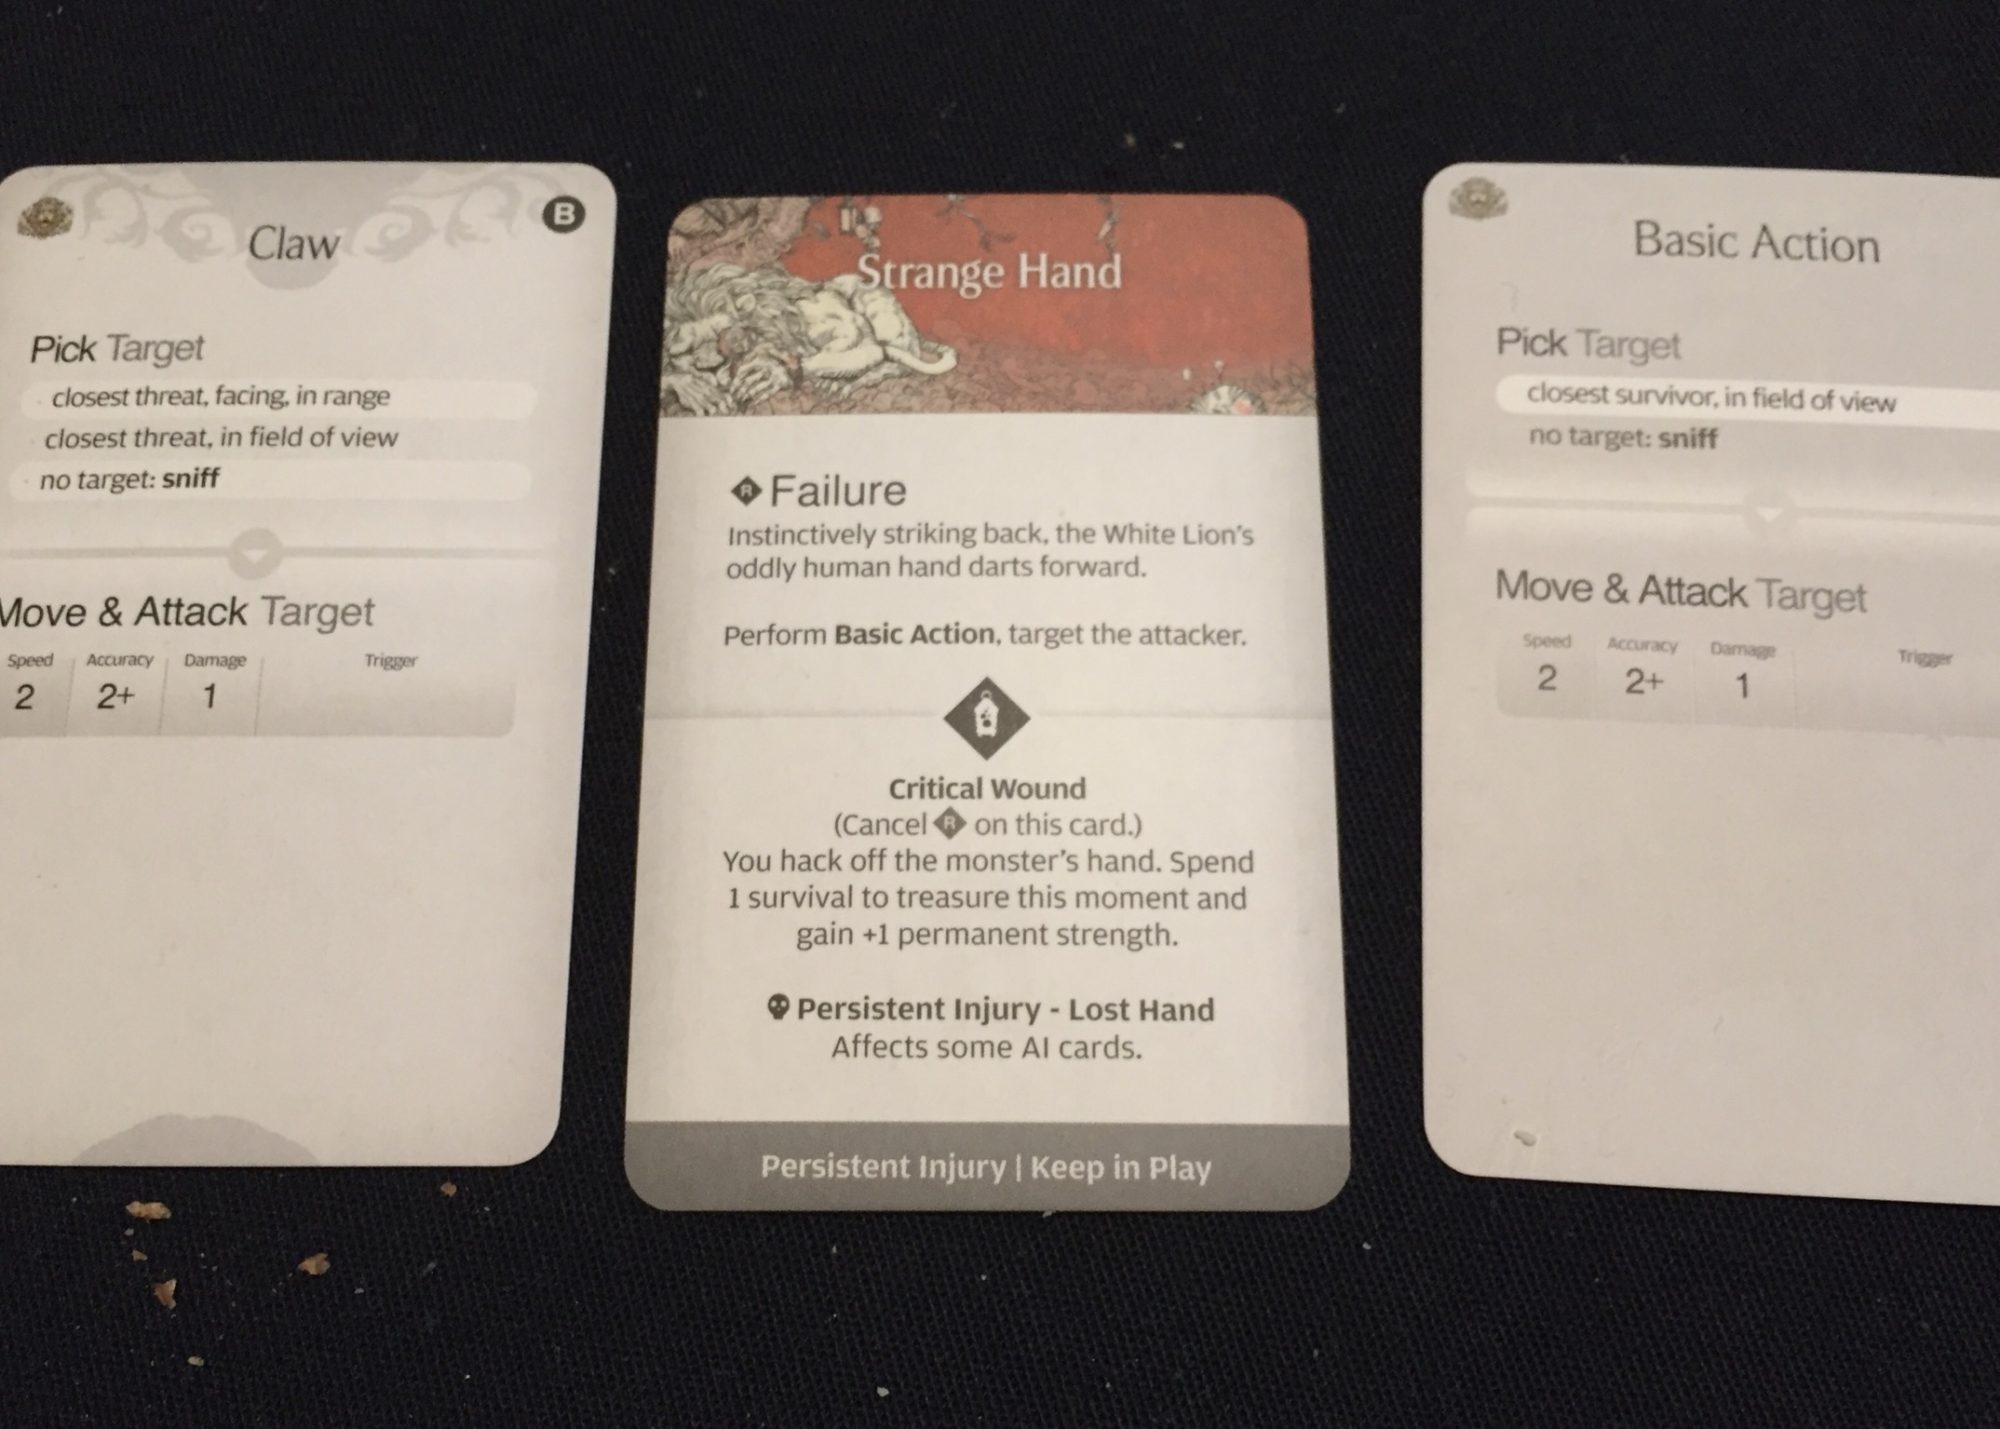
The next deck to get ready is the Hit Location deck. The only special instructions is to place the Strange Hand on top. Then you place the basic action card down for the white lion. These all go onto the monster control panel which also has spaces for a wound stack 4 traits/mood/skull and space for 7 tokens.
I noticed that if you score a Critical Hit on Strange Hand (the starting hit location card) you can spend your one survival point and gain a permanent +1 Strength boost. Other than that hit location card, you can only spend survival to Dodge in the first session. Dodges negate damage from a hit. I do not know the game well enough yet to decide if it is worth fighting with tooth and nail (survivor base attacks with no weapons) just to gain that permanent bonus.
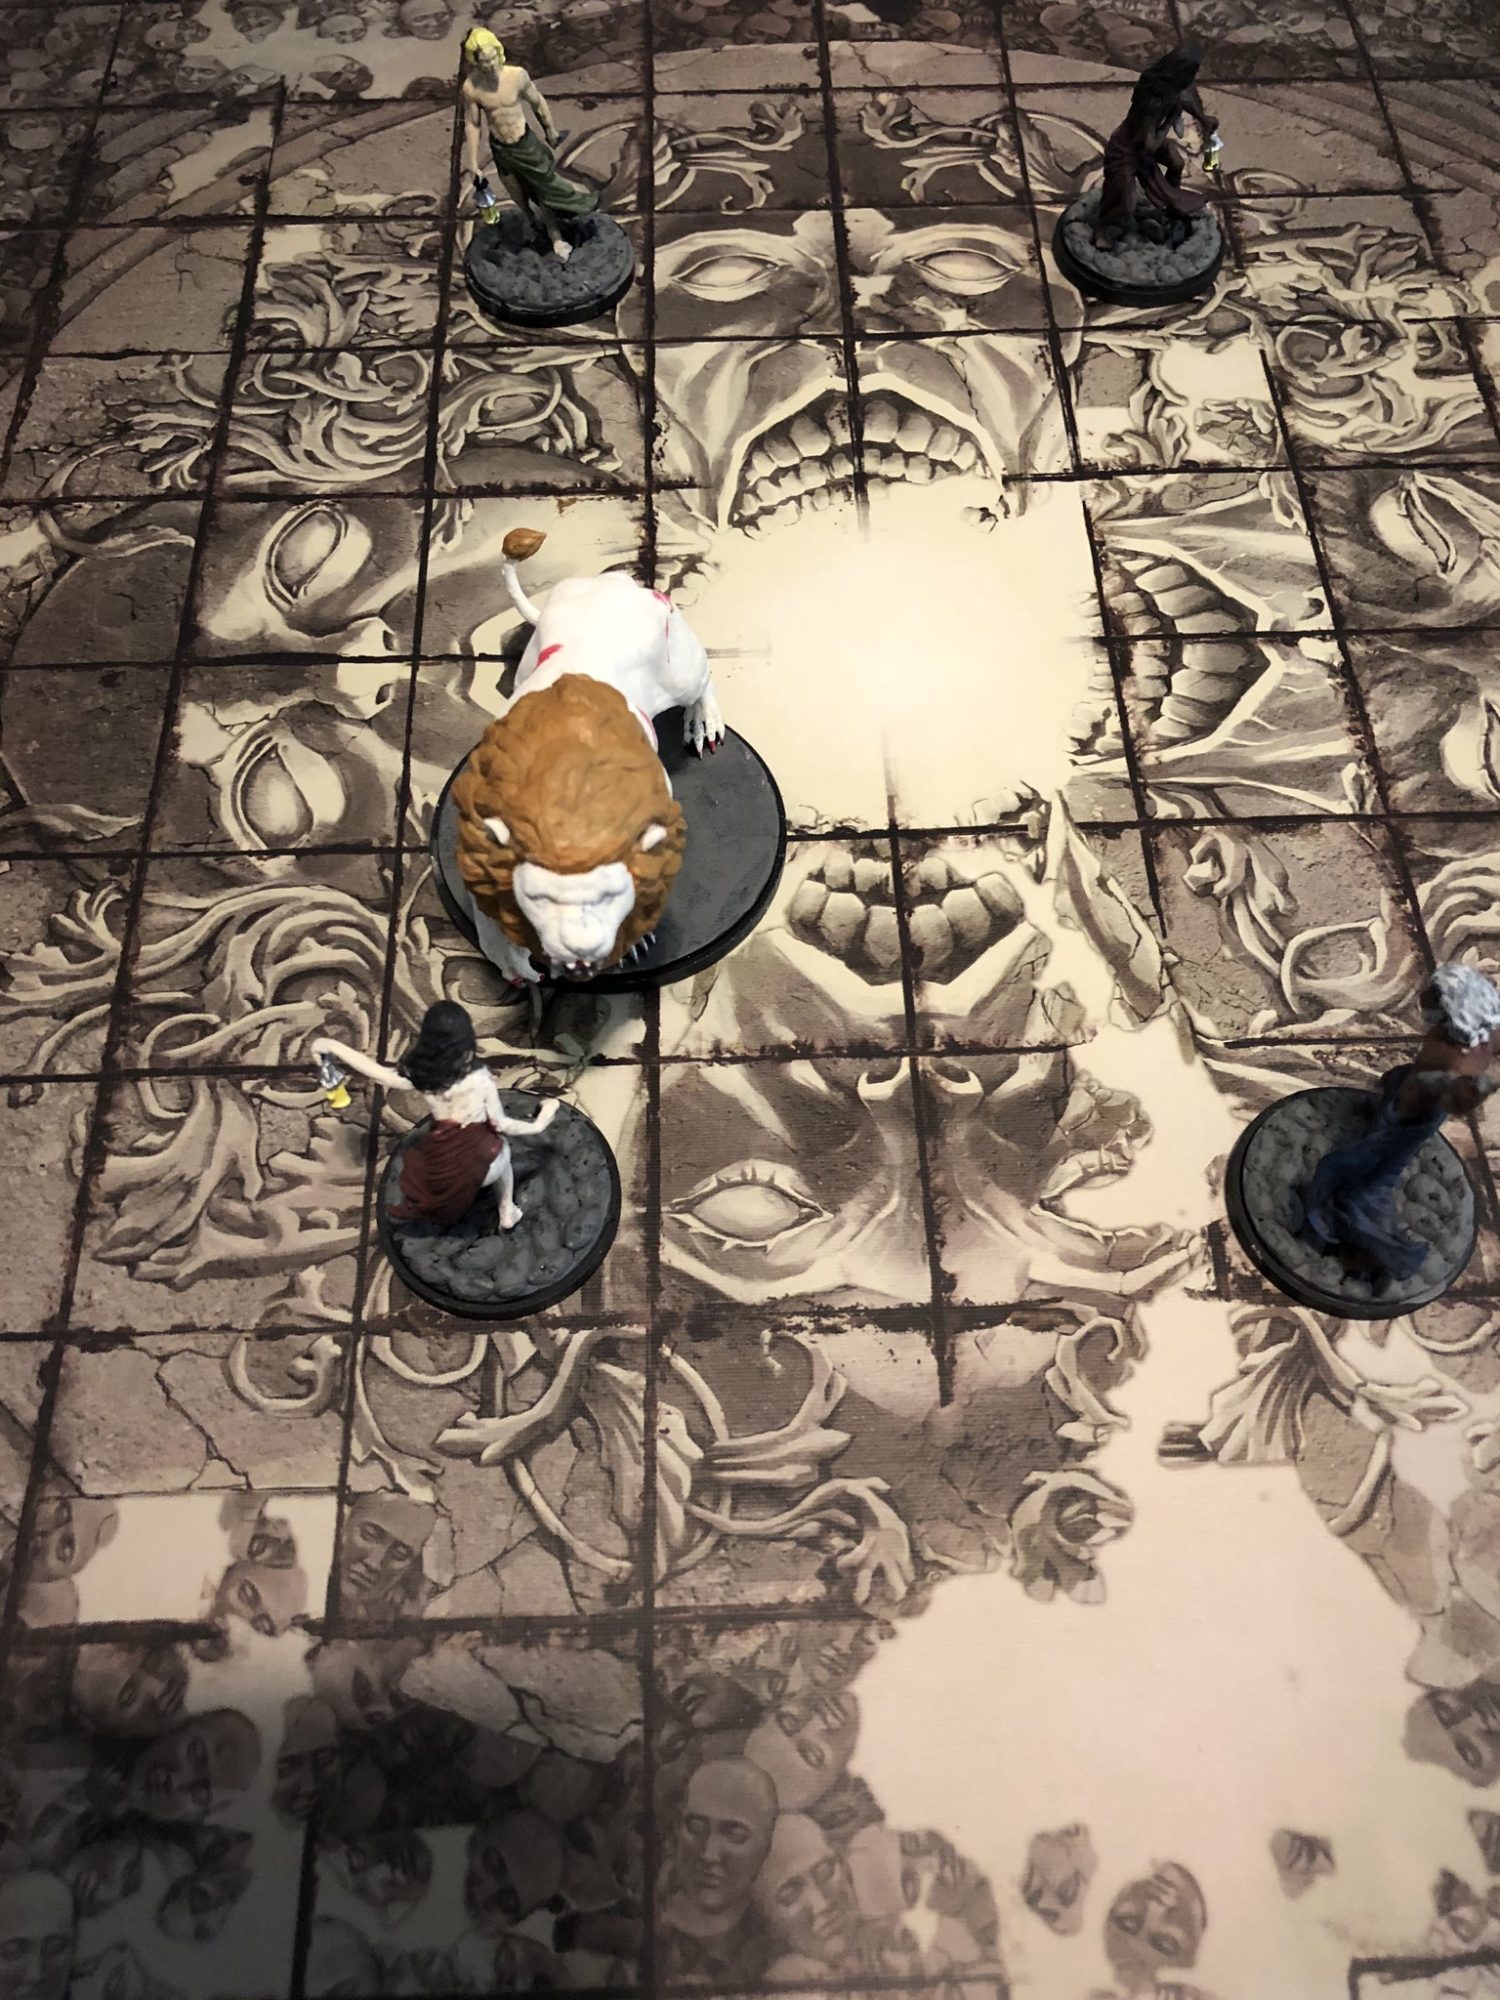
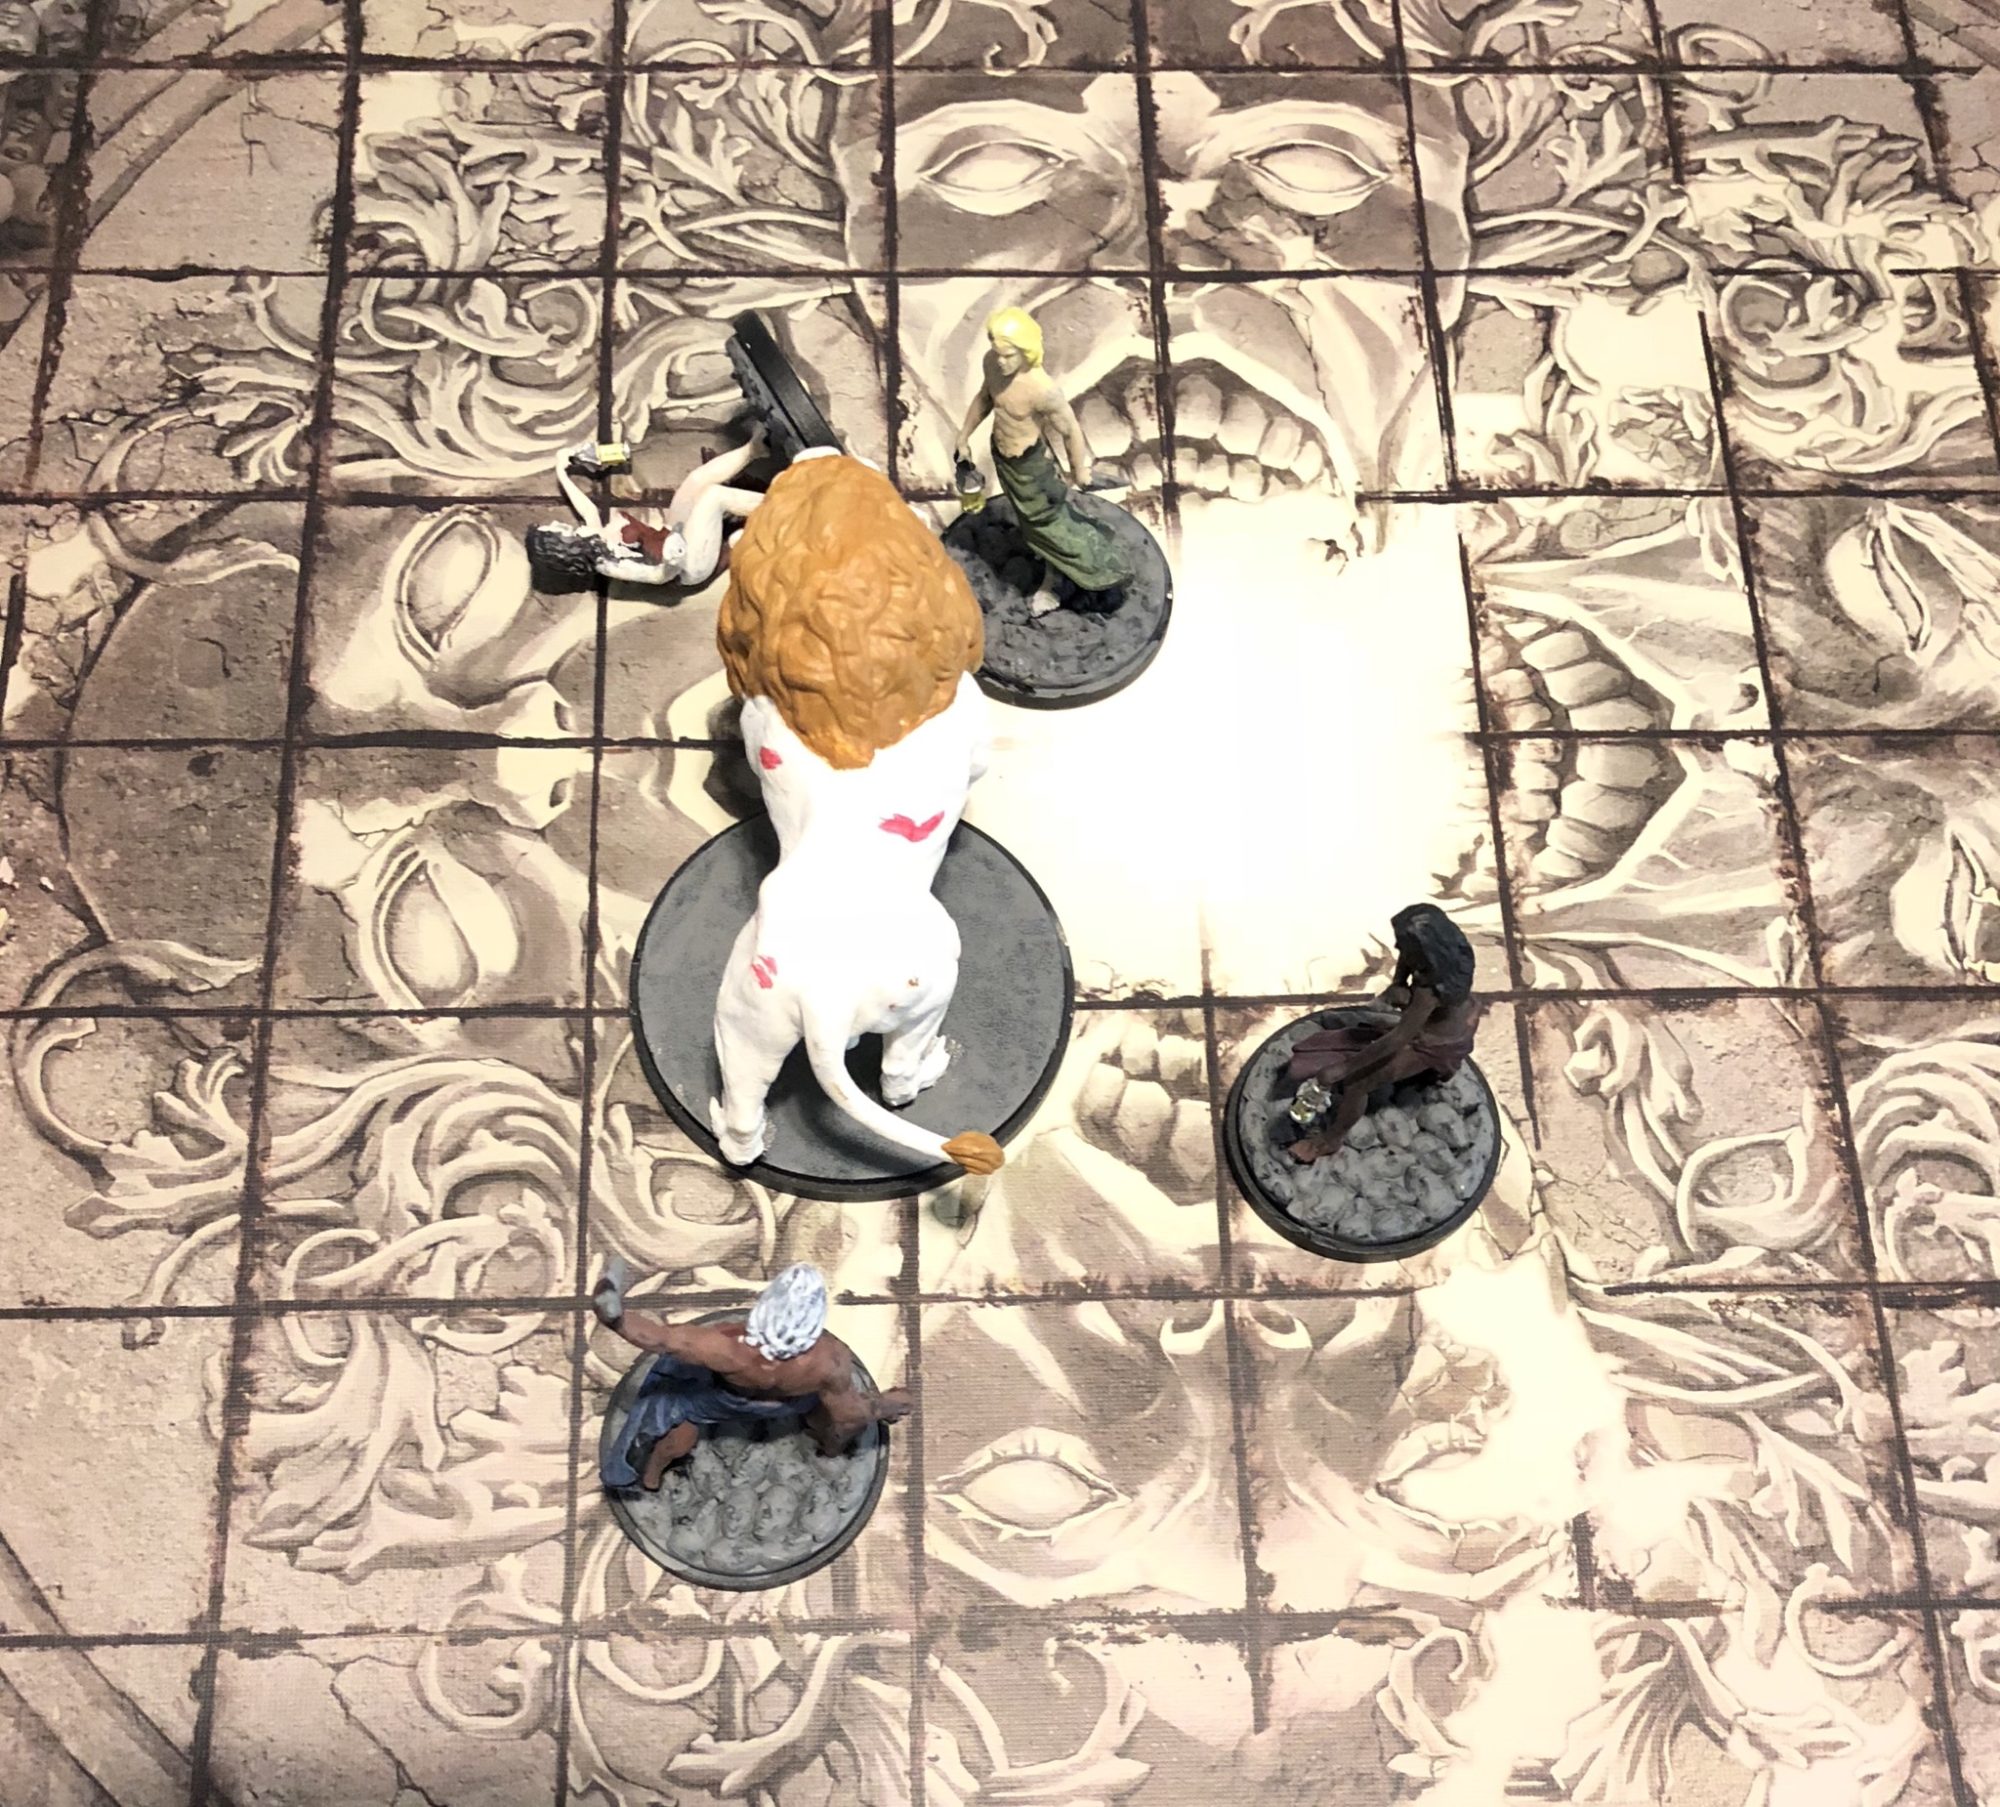
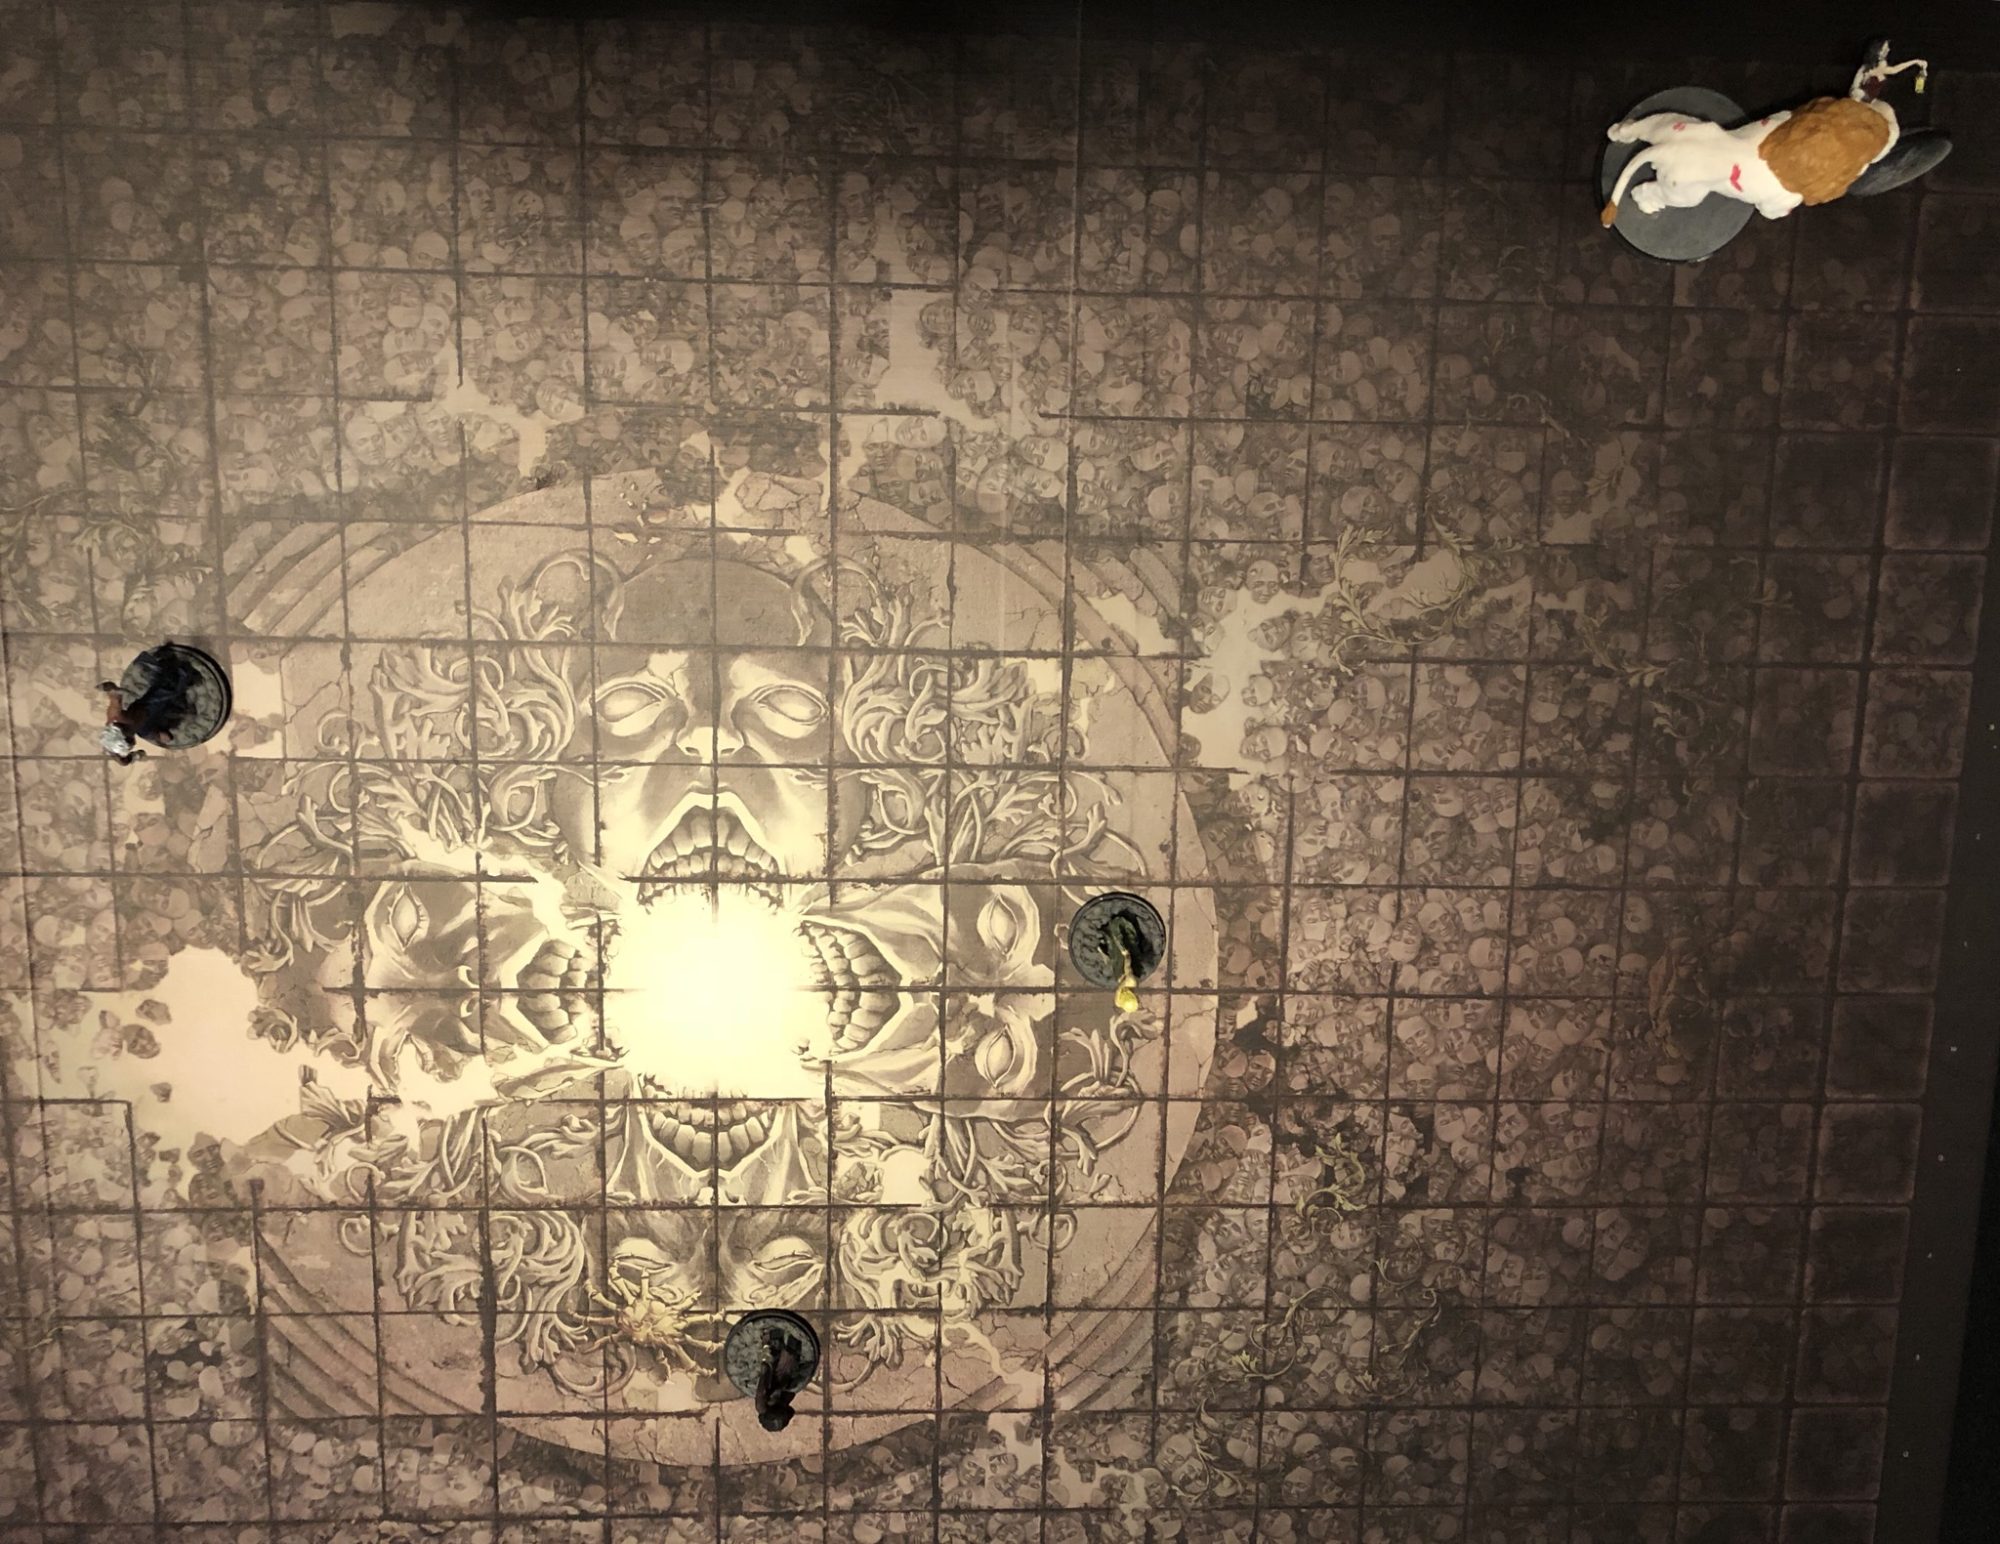
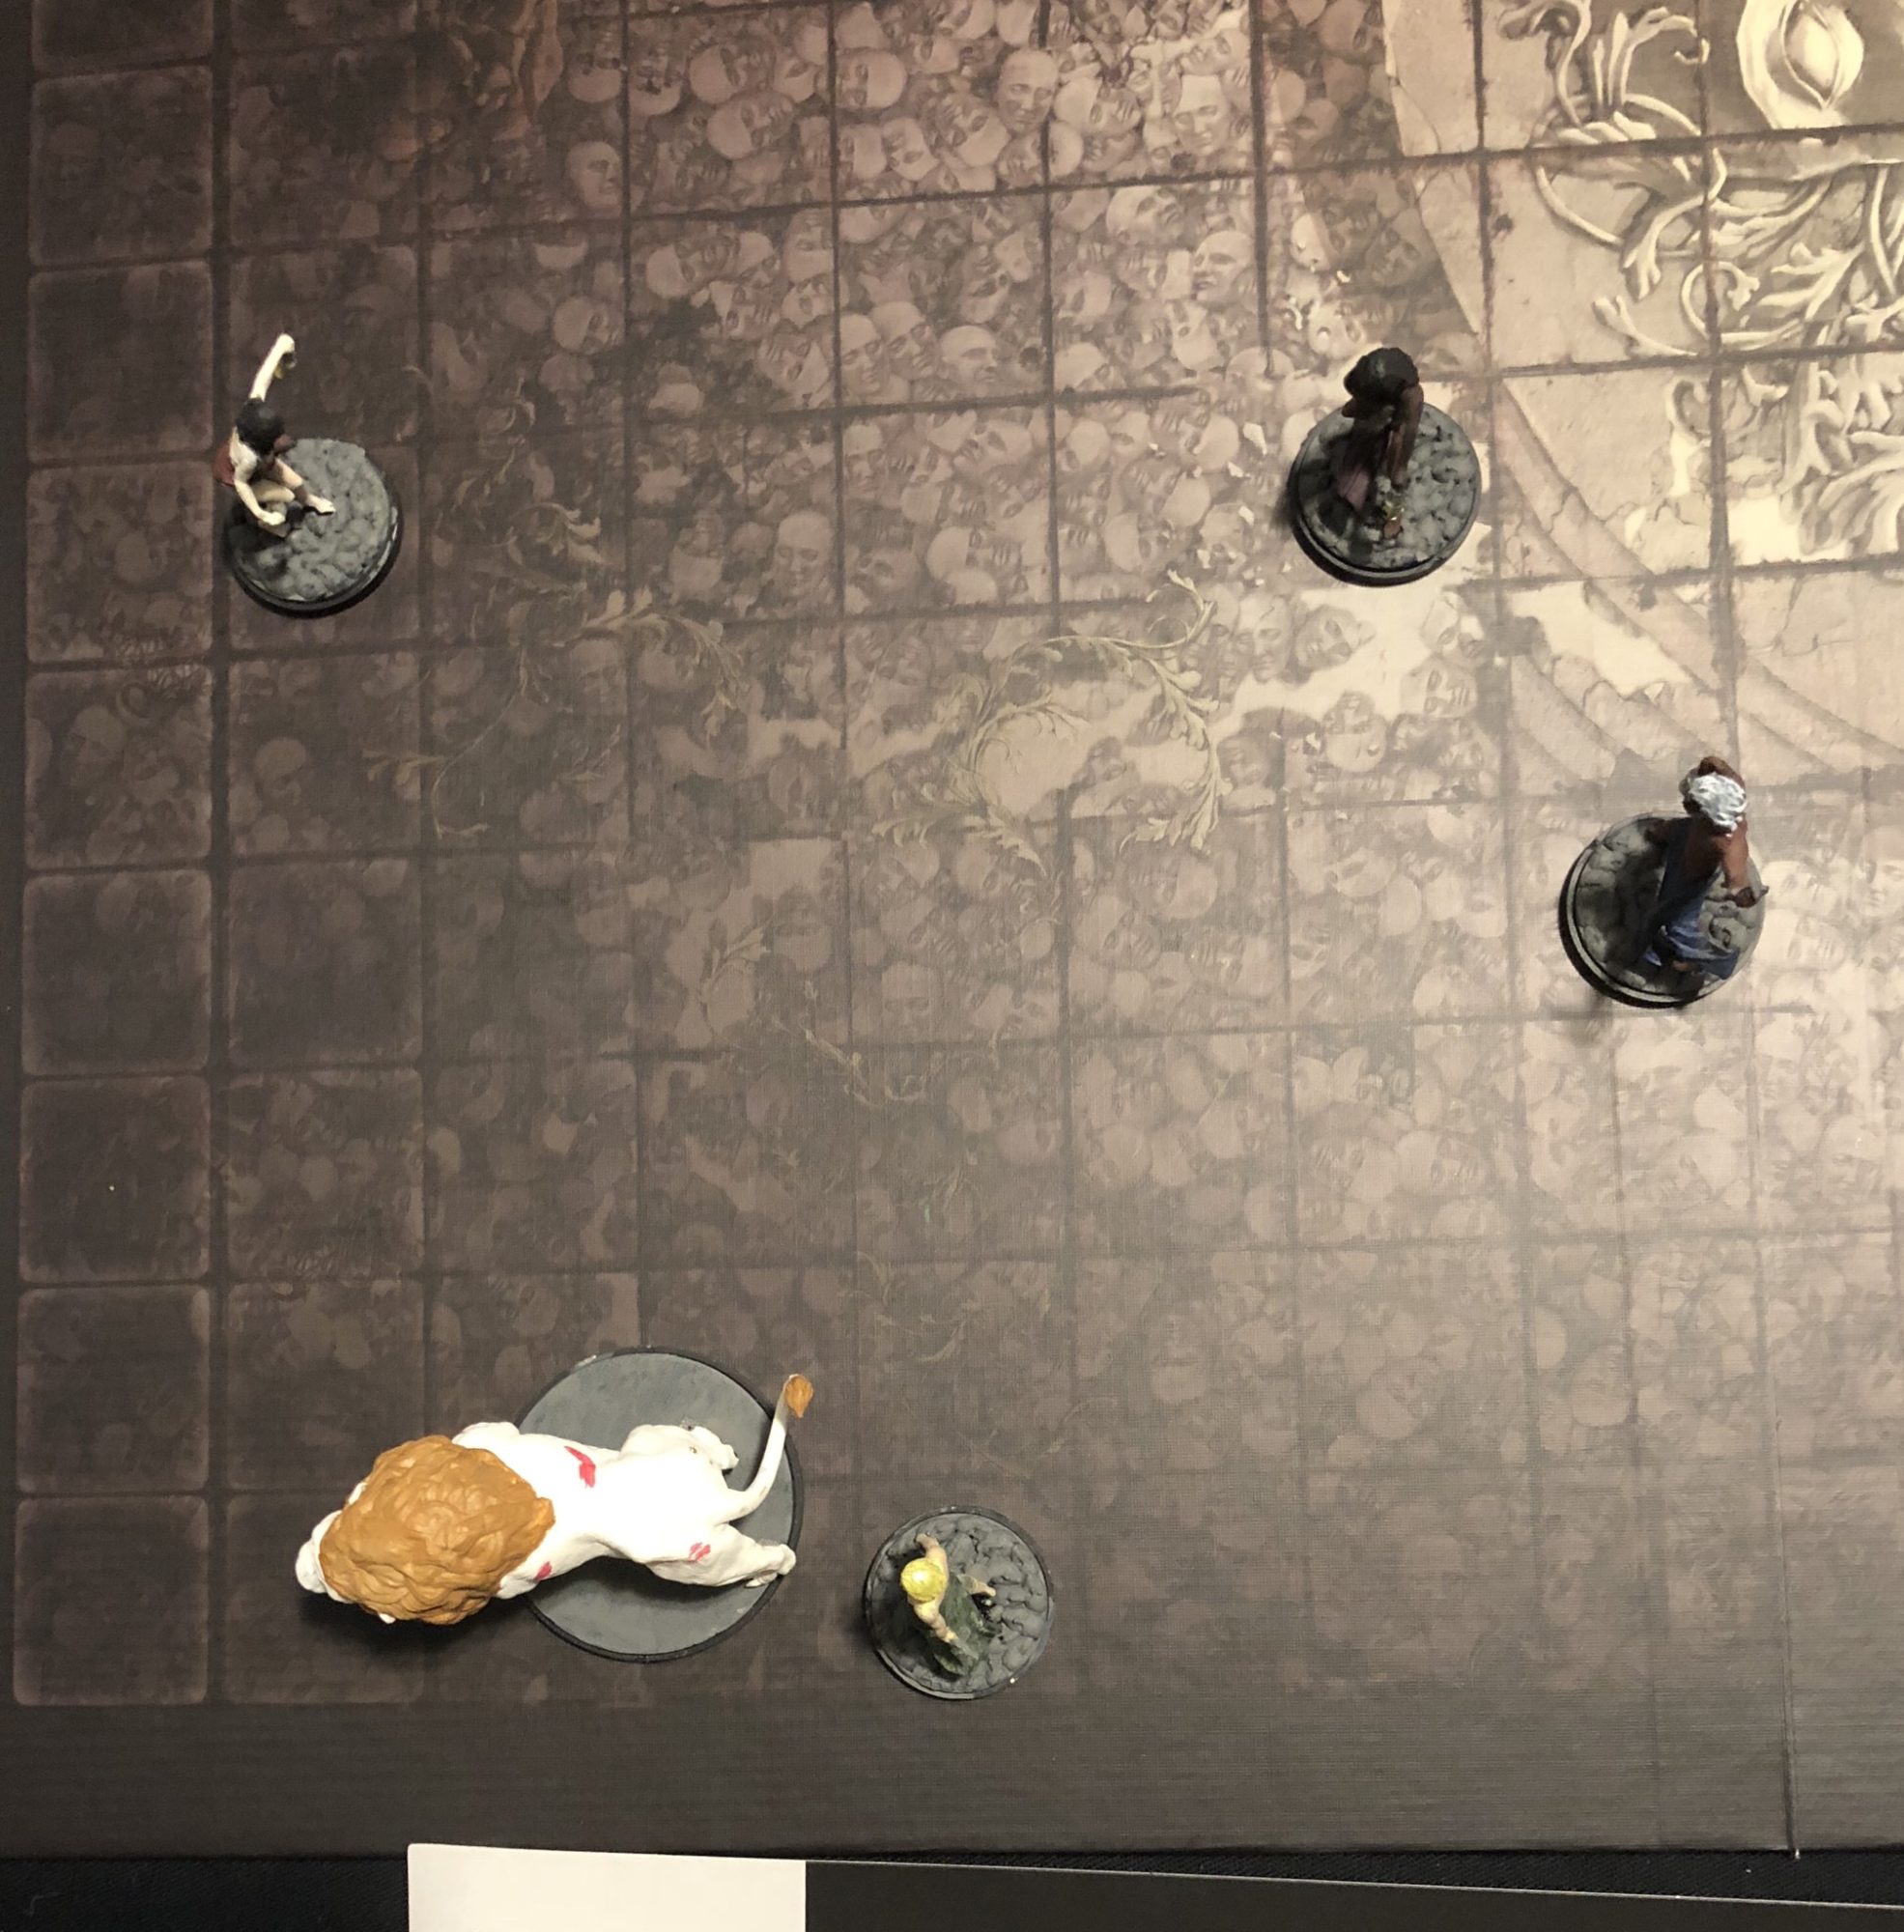
Finally, you place your 5 miniatures on the board. You start with the White Lion and then put the 4 survivors down and they can be up to 5 squares away from the White Lion. Considering that you need to attack and kill the lion and it can move 6 and you can move 5, I thought that being as close as possible made more sense.
The White Lion also has a blindspot in the two squares immediately behind it, which looked like a good place to get to if you are wounded.
Since I wanted to make sure I could approach the White Lion and attack not matter what, I placed all survivors within 2 squares of the White Lion. Again, this is my very first time playing, so I am not sure if that is the best play.
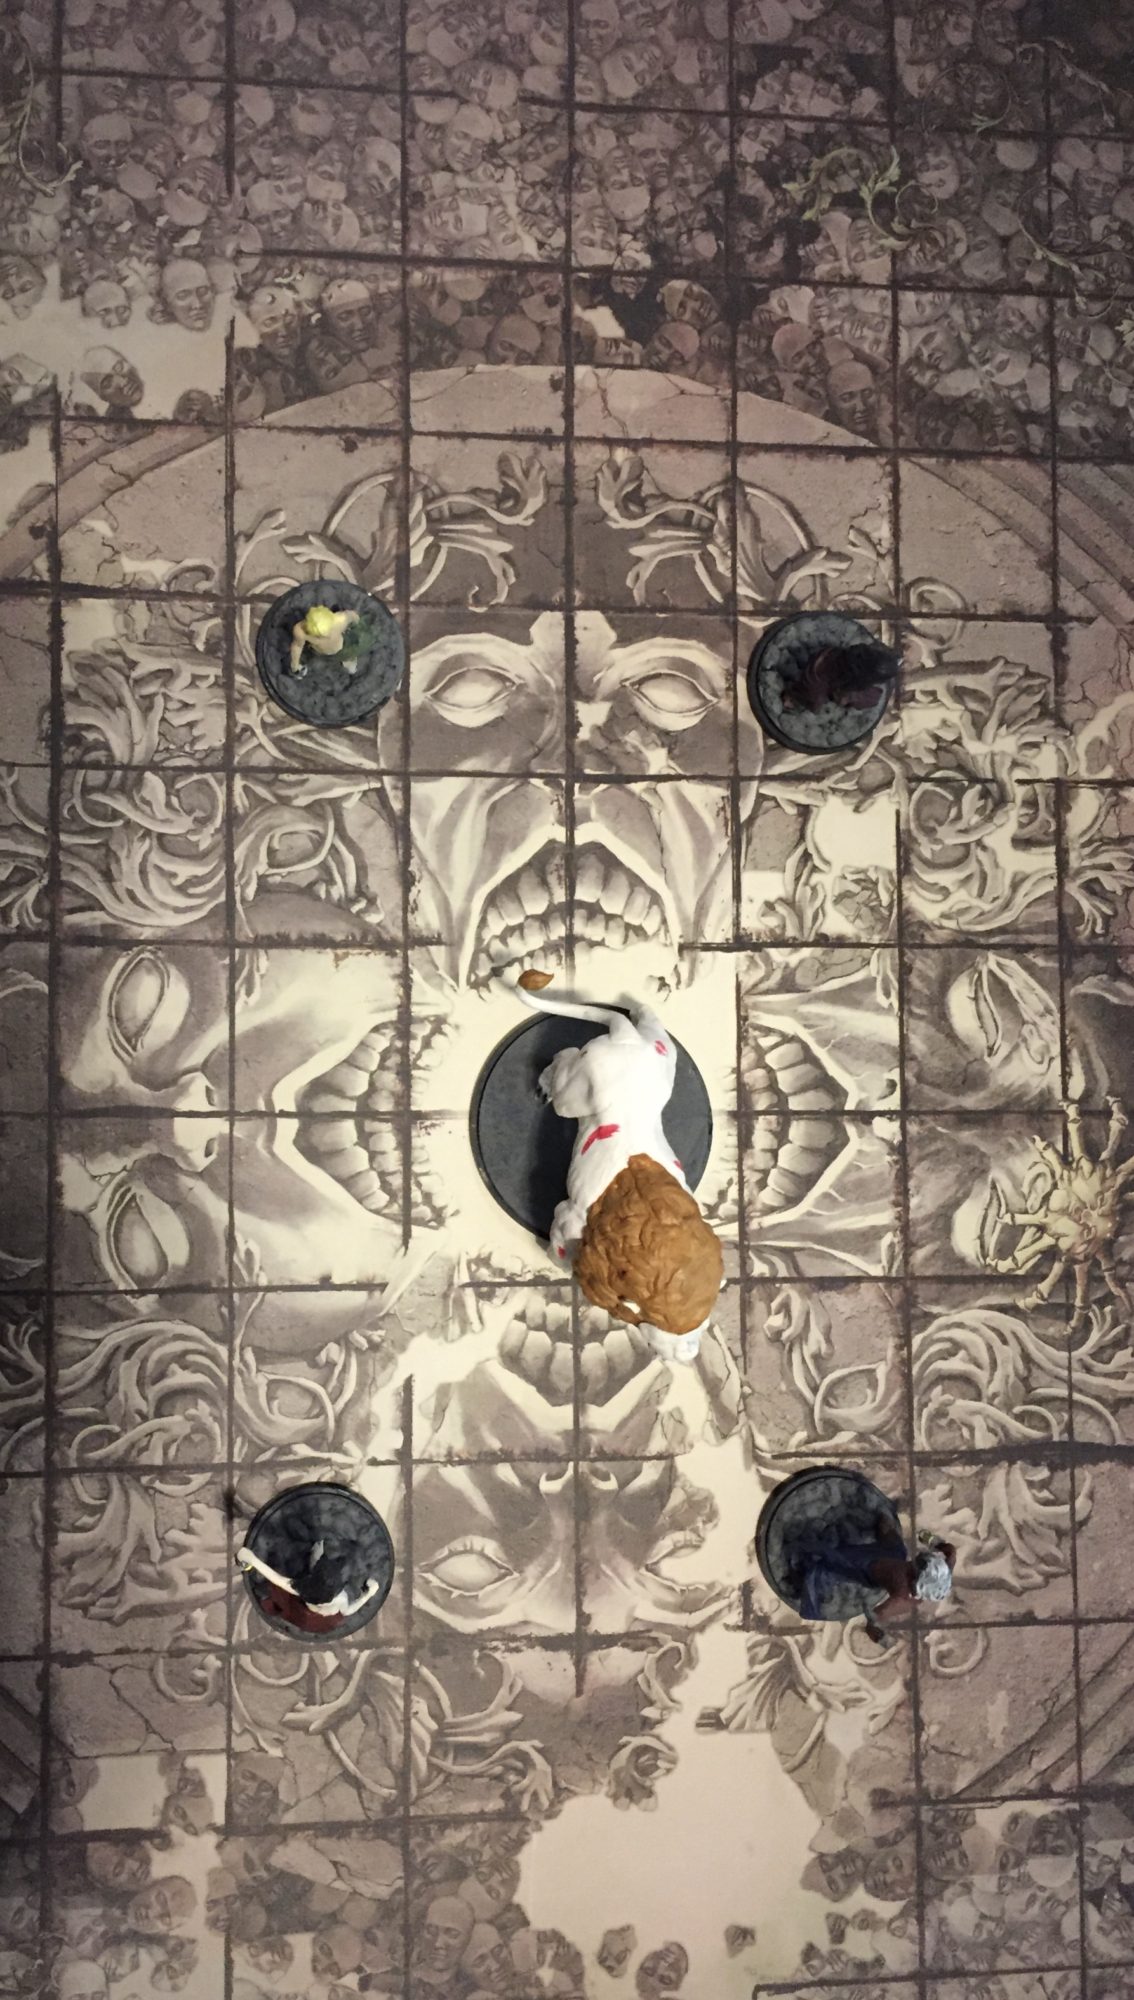
Starting Set-up
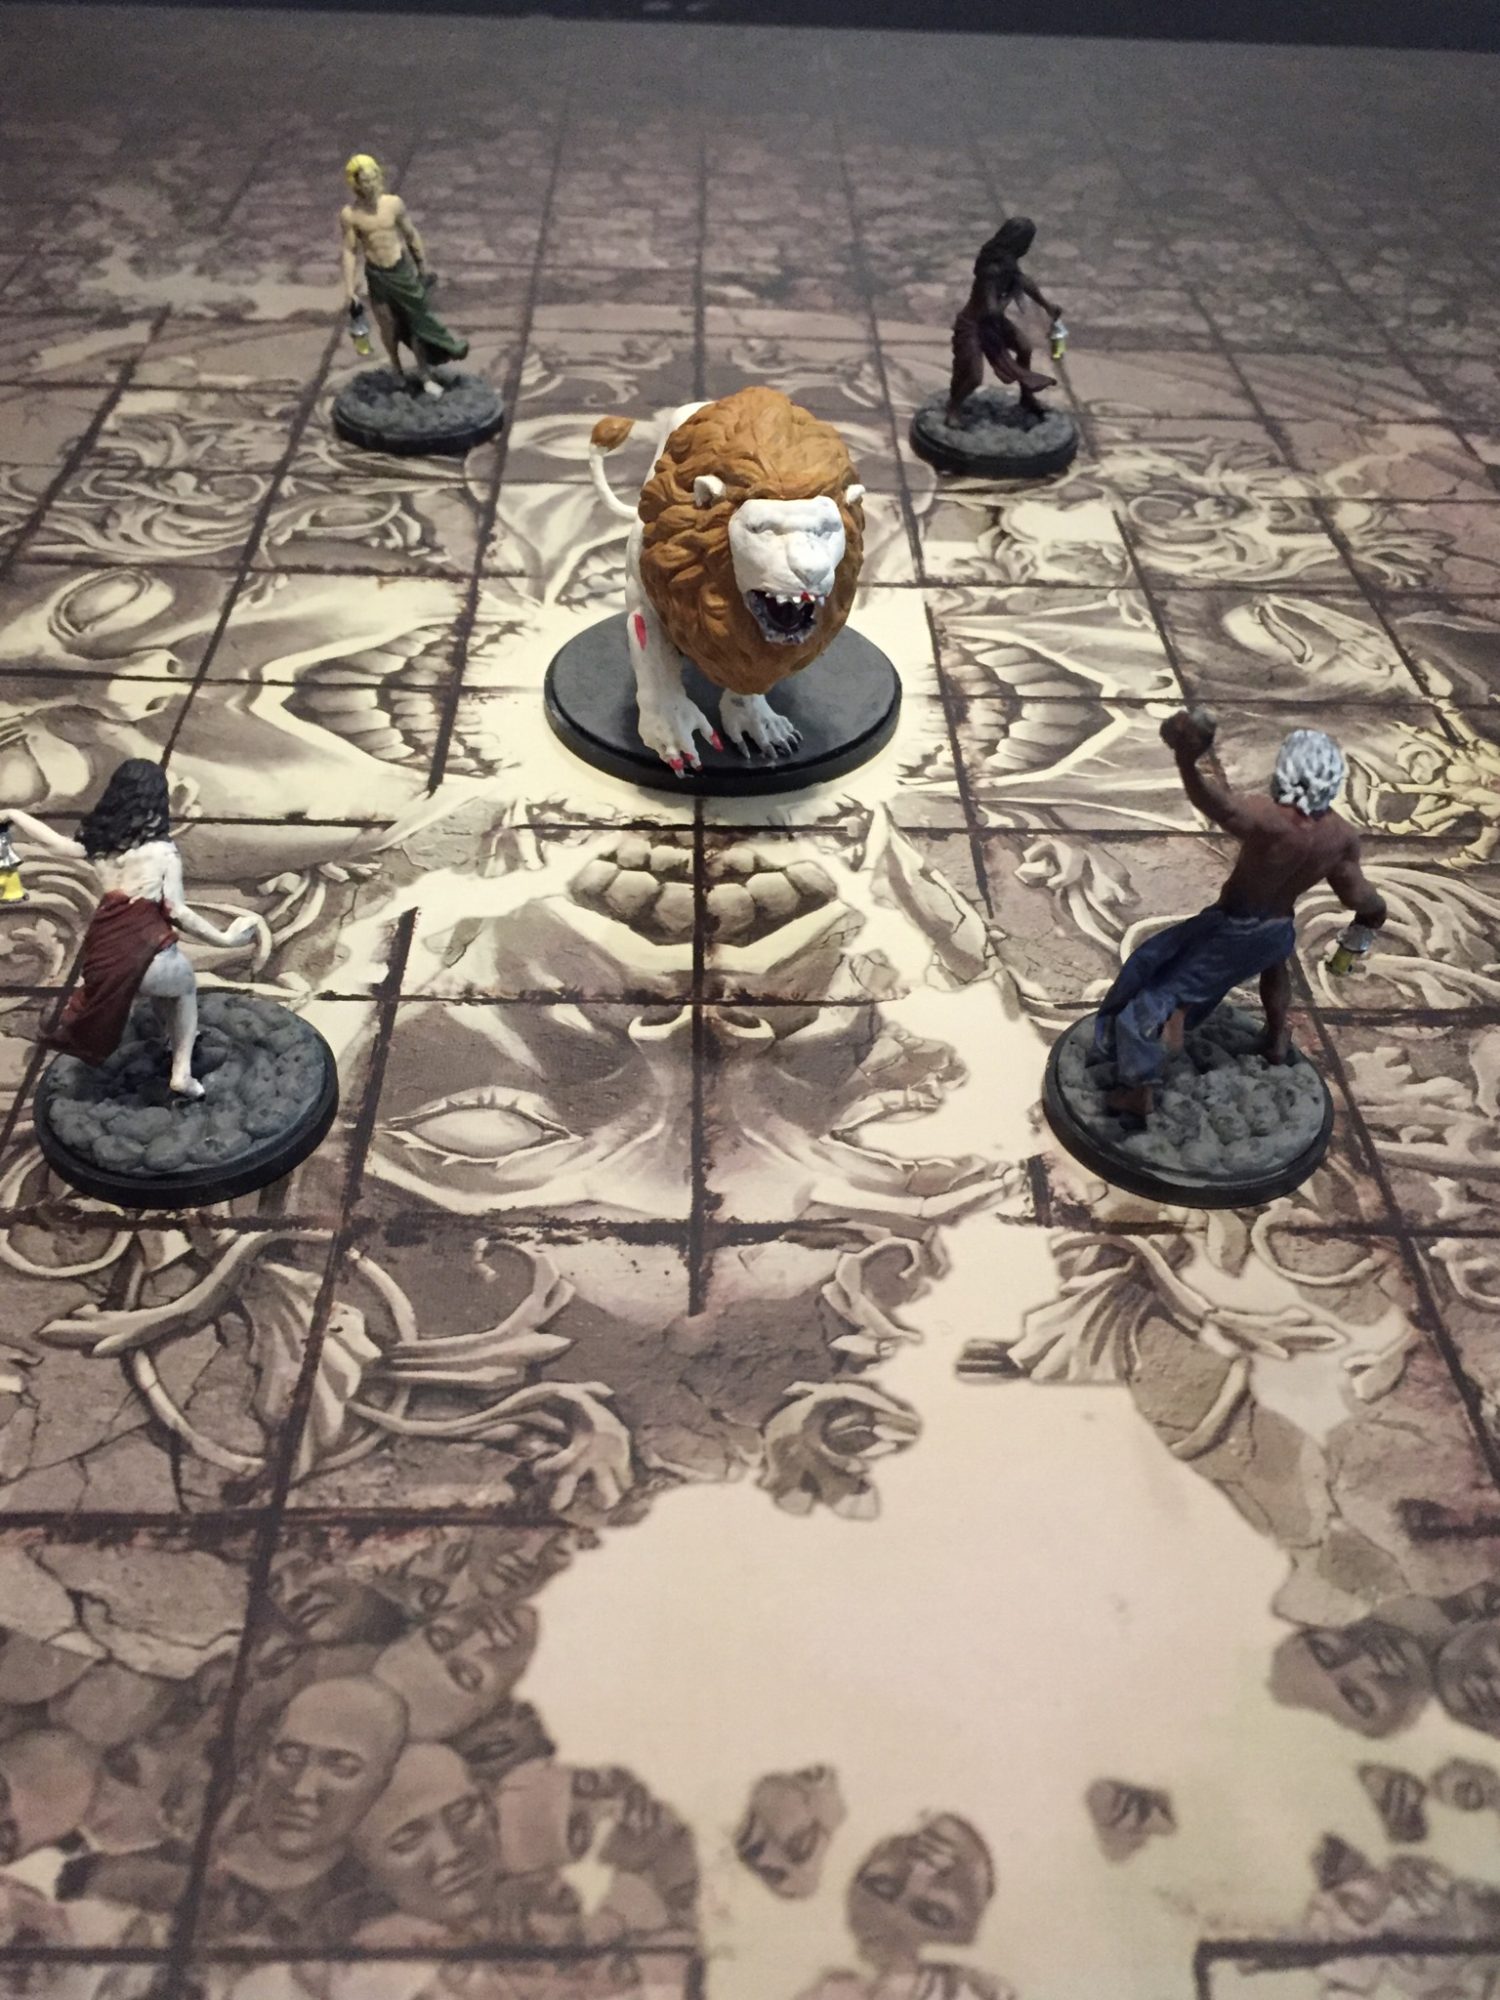
Starting Set-up (front view)
The first session alternates between the White Lion (control of the non-player characters alternates between however many players you have and you get a bonus if you attack yourself, well a bonus if increasing insanity can be considered a bonus) and the players. Each player (survivor) acts each turn. For the first session, you follow specific instructions in the rulebook for the first turn and then play on based on the cards you draw.
Game Ready to Play
First turn
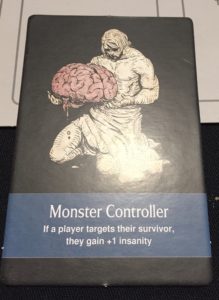
Select the monster’s controller. Since I am running solo, it will be me throughout this example (my painting assistant Rachel did follow along). Since there is a bonus for targeting yourself, I kept the character sheets in order and assumed that I was running through 4 controllers.
Monster Controller
You start the actual turn by drawing the top card. I know it is Claw and I am playing Imani as the nominal character this turn.
Card says Pick Target and lists closest threat, facing, in range, closest threat, in field of view, and sniff if no target. Sniff means even if everyone is knocked down (not a threat) or hiding in the blindspot (the two squares immediately behind the White Lion), they are all considered threats until end end of the next turn.
As can be seen from the initial placement photo, Neo and Linhong are both equally placed in front as threats. I decided that the target was Linhong.
One the target is chosen, next up is to move and attack.
White Lion’s First Attack
Claw attack speed is 2 and accuracy is 2+. So I need to roll 2 dice and anything 2 or above is a hit. I rolled 2 4’s, which means 2 hit.
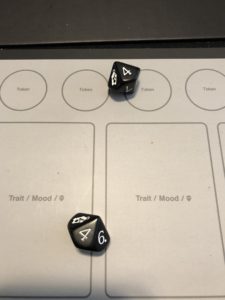
Since there are 2 hits, I need to roll 2 hit location dice to see where they hit. The dice roll result was legs and body. The only location with armor is the waist. I could use a survival point and avoid one hit, but neither hit dehabilitates the survivor, so I recorded a light wound onto each location.

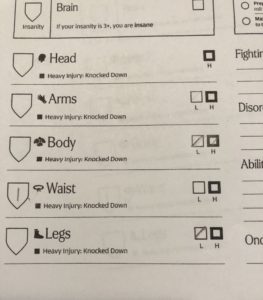
Recording Wounds
It is now the survivors’ turn. Each one gains an action activation and a movement activation. It does not matter what order they are activated in. Attacks from blindspot have a better chance to hit (+1). Next up in my order is Myrdin and I will want to target him to gain the Insanity “benefit”, so I need to make sure Myrdin ends up in front.
I started with Linhong as she was wounded and I do not want her subject to attack next turn. I do not know what all the potential actions could be, but I am hoping most target survivors in front of the White Lion.
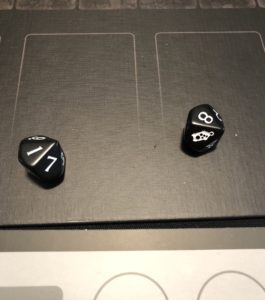
I move Linhong directly behind the White Lion and attacked with the Founding Stone. It has a speed of 2, so 2 dice are rolled and a base accuracy of 7, so with the +1 bonus it hits on a 6 or better. With a roll of an 8 and a 1, there is one hit.
First Attack Rolls
I draw a hit location card and get Strange Hand (this has already been placed on top). The back of the White Lion card says that it has a toughness of 6, so I roll another die to see if the hit wounds. I roll a 1, add 1 for the strength of the weapon, and the result is 2 which is a failure. The Strange Hand says perform a basic action and target the survivor.
White Lion
This is where I was confused a little. Basic Action is Pick Target, and I just moved Linhong into the Blindspot. I did a little online research and the ruling is that the card overrules the target rules. So the lion spins around and attacks again. I roll 2 9’s and two more wounds are applied. Hit locations are leg and head. Both result in Linhong being heavily wounded. I could use a survival point and avoid one wound, but not worth it as either results in her being knocked down.
Imani is next up and she hits with 1 of 2 attacks. Hit location is Fuzzy Groin. I roll a 3 in the attempt to wound which results in a 4 which is a failure.
Myrdin attacks from in front and rolls an 8 and a 3 for 1 hit. Hit location is Straining Neck and the wound attempt is successful with an 8 rolled which becomes a 9. An AI card is placed in the wound stack to represent the wound. This is placed face down so I do not know what it is.
Finally, Neo attacks and attacks from the blindspot. I roll 2 7’s, which become 2 eights and represent 2 hits. The hit location cards are Beast’s Maw and Beast’s Ribs. There is no downside to failing the Ribs wound attempt, so I pick it first, rolling a 4 which becomes a 5 and fails. The attempt to wound the Maw works with a 7 becoming an 8.
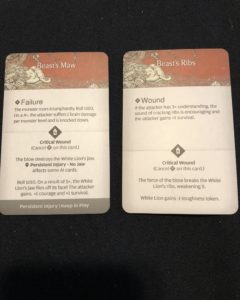
The White Lion has suffered 2 wounds this turn and needs a total of 9 to die (AI deck size plus one).
End of Turn 1
Turn 2
I draw an AI card for the White Lion and get Terrifying Roar. The targets are all non-deaf survivors. Usually Linhong would not be targeted as she is not a threat, but the target instructions do not mention threat. The White Lion is level 1. I go through each survivor and roll a d10. On a 2 or more the bad effect happens. Imani gets an 8, suffers 1 brain wound, and is knocked back 6. Myrdin gets a 9 and is knocked back 6. Linhong gets a 7 and is knocked back 6. Finally Neo gets a 9 and is knocked back 6.
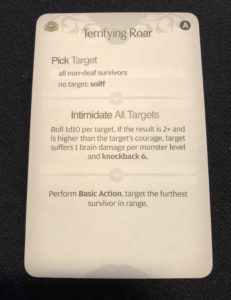
Terrifying Roar
The lion then targets the furthest survivor in range. All are the same distance, so I pick Myrdin. Since it is his turn, I get +1 insanity. The lion then performs a basic action, moves next to Myrdin (movement is 6) and attacks. I roll a 1 and a 4, so one attack misses. The wound location is leg.
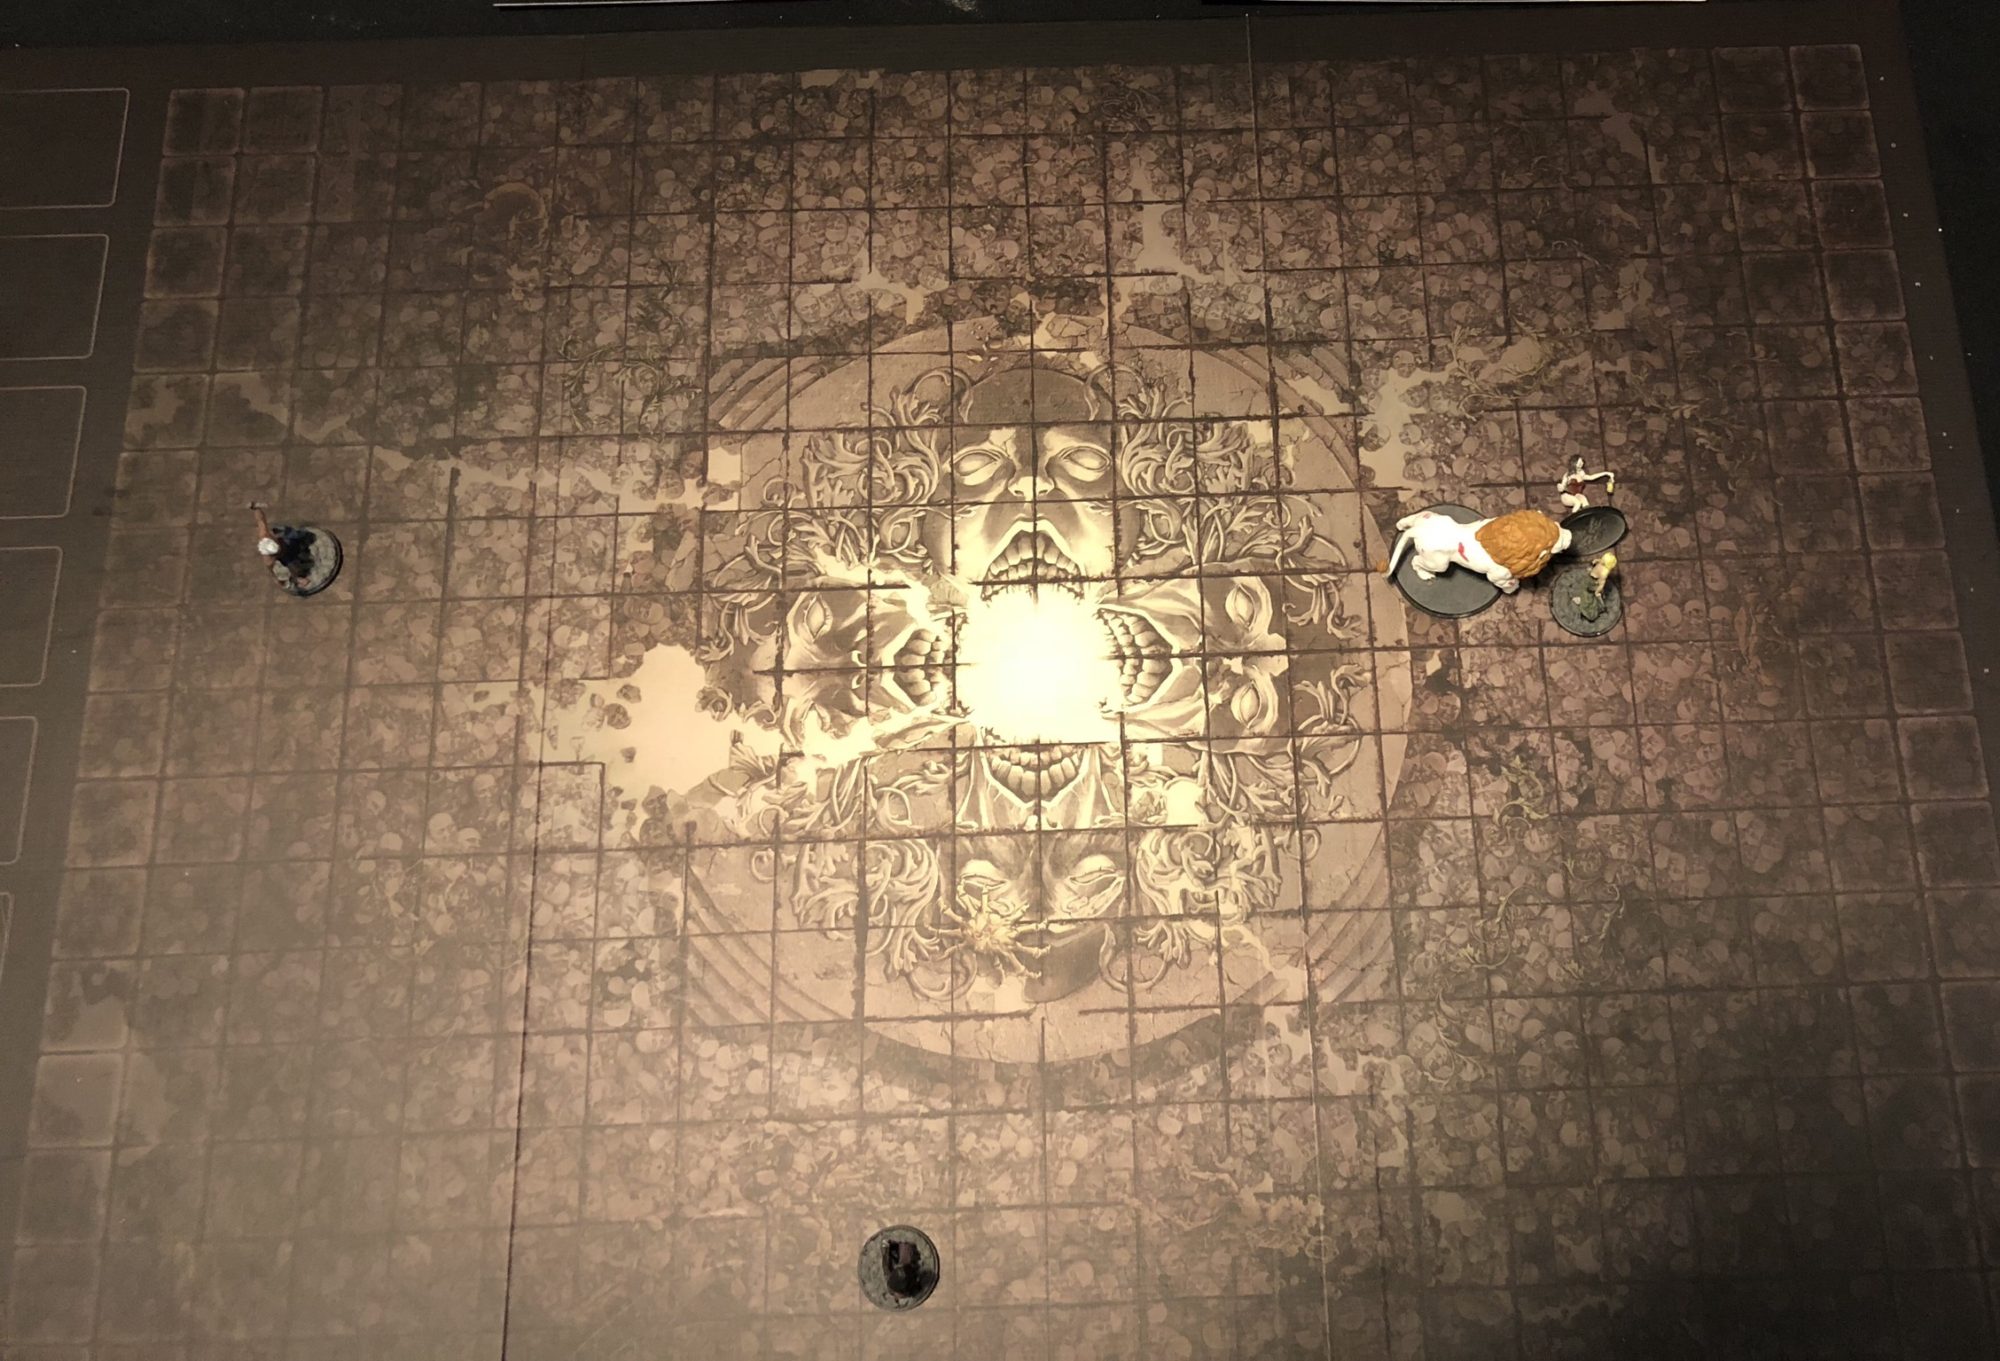
Widely Scattered Forces
Since it is the end of the monster’s turn, Linhong stands up.
Other than the roll of a 1 to hit, not the greatest of turns as my forces are scattered all over the board and the best I can do is attack twice. I also have a quandary as I want to move behind the monster but I need to make sure the monster does not turn around and move over my survivors as that will knock them down and I will lose an entire turn. So I need to move both the other survivors to force sideways movement.
I move Linhong directly behind the White Lion and attack. I roll a 6 and a 2 which becomes a 7 and a 3 and hit once. Location is Beast’s Ear. I roll a 6 which becomes a 7 and a wound, which is fortunate as a failure would have made the lion jump away and trample Myrdin.
I move Myrdin behind the White Lion and attack. My rolls are 6 and 4 which is 7 and 5, so one hit. Hit location is Clever Ploy, which means that Myrdin has fallen into the White Lion’s trap (it is a trap card).
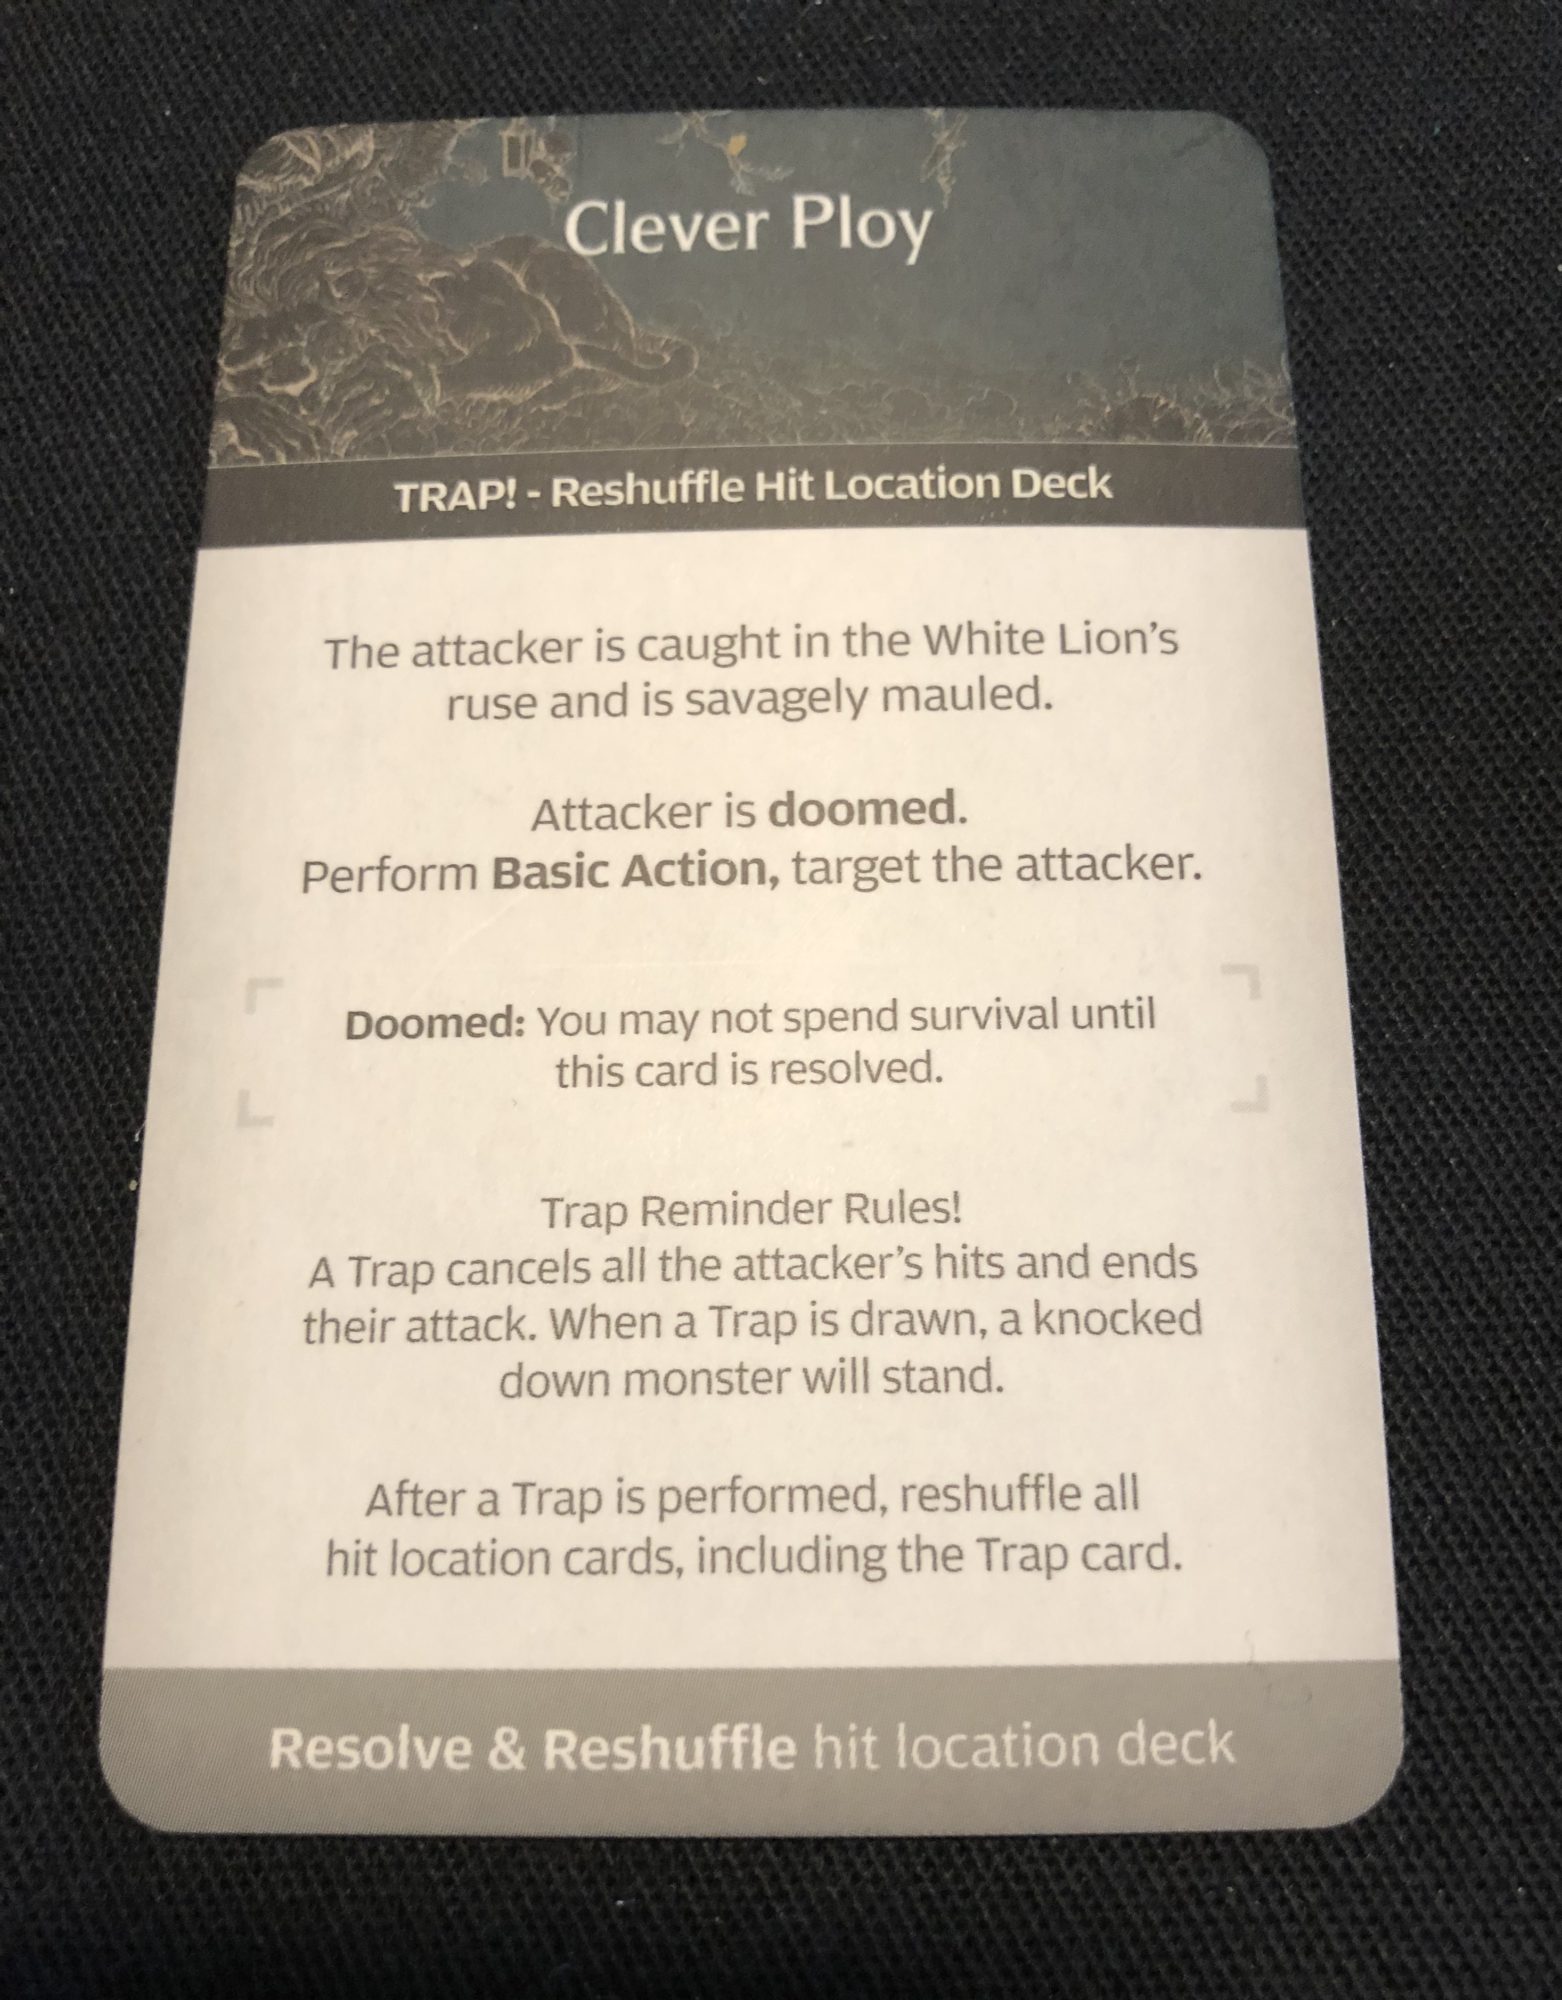
Clever Ploy
Myrdin is also doomed and cannot use any survival points until the card is resolved.
The White Lions spins around and attacks, which negates my previous plans.
An 8 and a 3 is 2 hits. Hit location is waist and body. Waist armor absorbs 1 and the body hit results in a light wound.
I reshuffle the hit location deck.
Turn 3
I would say that the situation seems pretty bad to me. White Lion starts its next turn and the AI card is Grasp. It has only suffered three wounds so far and my survivors are pretty scattered. This is nominally Linghong’s turn.
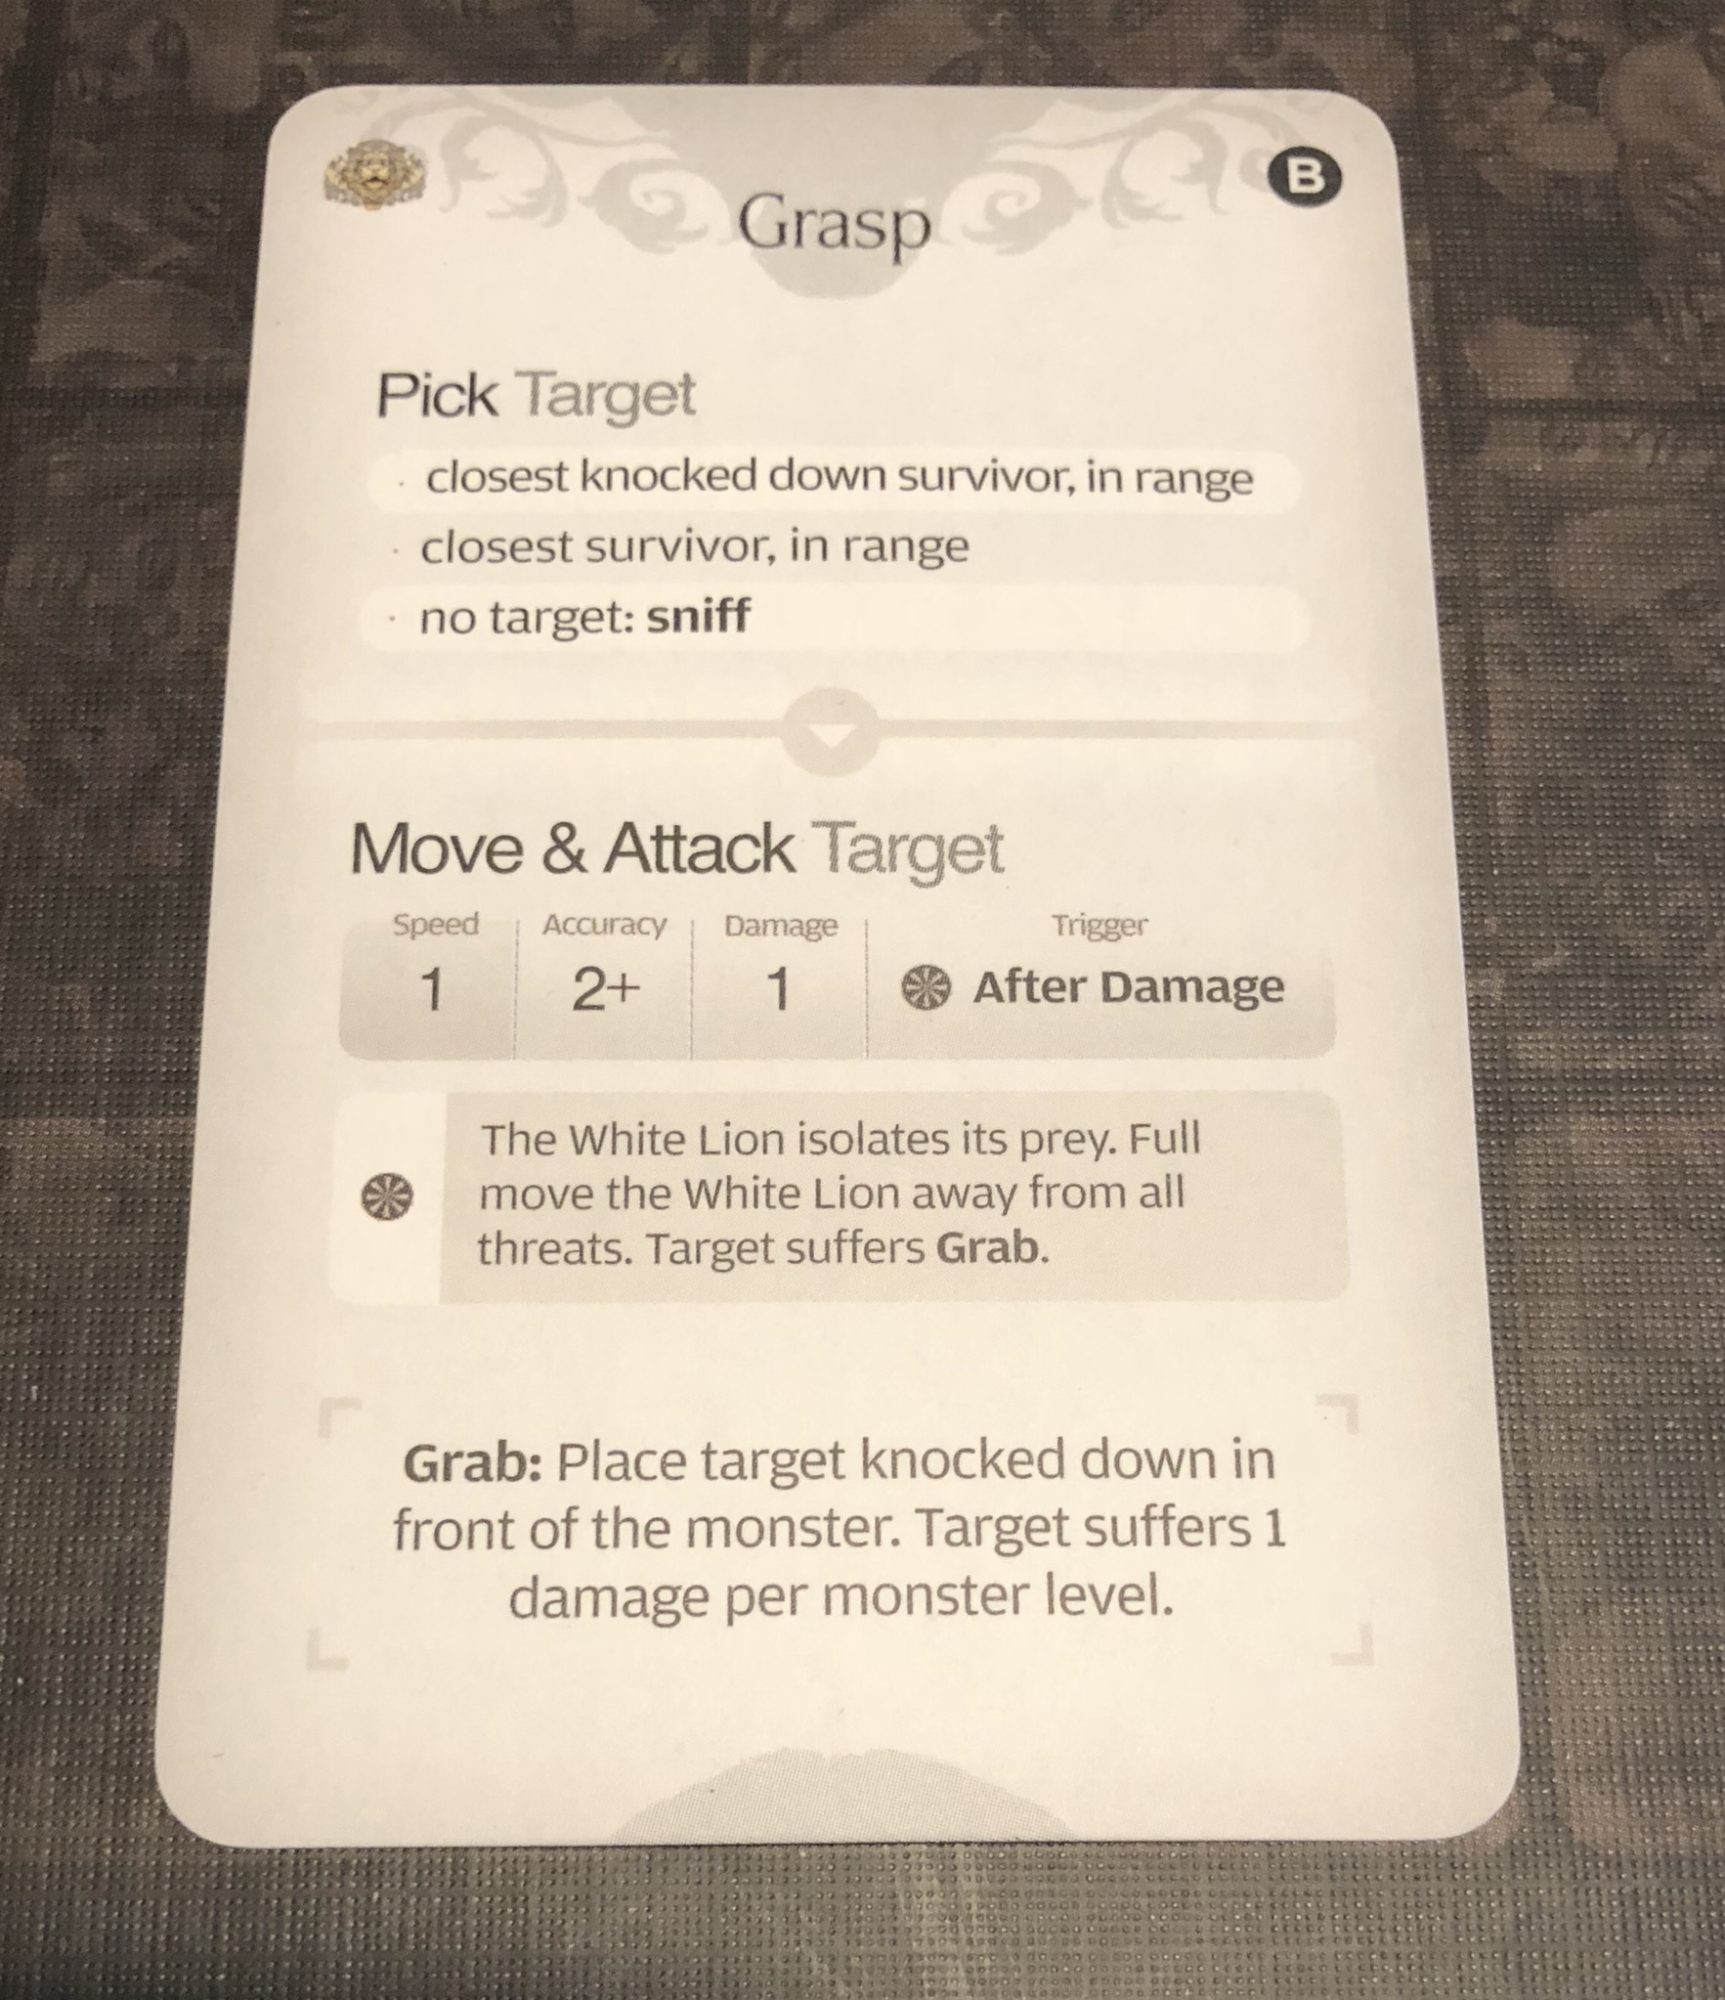
Grasp
Since Myrdin and Linhong are both directly in front of the White Lion, I choose Linhong and get one insanity as it is her turn as Monster Controller.
Grasp is one attack and then a trigger after damage. I roll an 8 for the speed one attack and take a hit. Hit location die is a leg. That will result in a heavy wound, but she will be knocked down by the after damage trigger anyways, so I save the survival point.
Linhong is grabbed and suffers another hit as the White Lion is level 1. Body Hit Location, so heavy wound there but already knocked down.
White Lion makes a full move away. The rules are not super specific about facing but you turn the way you are moving as a general rule, so I turned the White Lion away from the rest of the survivors.
From Bad to Worse
Non of the survivors could get into range (except to throw their Founding Stones which would not kill the White Lion), so I moved as close as I could and it went to the next turn.
Turn 4
AI card chosen was Maul. The first target listed was victim of Grab last round, so Linhong was attacked again. Both attacks hit her, and each does 3. Plus a bleed token. Does not look good for Linhong. I roll arms and waist. Arms has no armor and only 2 hit locations. I expend my one survival point to dodge it. Linhong still takes another heavy wound, but was already knocked down so cannot be knocked down again.
Mauling Its Victim
Now Myrdin moves into the blindspot and attacks. I roll a 2 and a 1 and miss with both. Linhong stands up. She is limited by the board edge and cannot move behind the White Lion, so she attacks. She rolls a 6 and an 8 and hits once. Hit Location is Beast’s Ribs. Wound roll is a 5 which becomes a 6 and a wound.
The rest of the survivors move as close as they can and the turn ends.
Turn 5
AI deck is depleted, so I need to reshuffle the 4 cards in the discard pile. I draw Terrifying Roar, which again is bad news.
Imani takes a brain wound and is already wounded there so rolls on the brain trauma table (p. 89 of the rule book). She rolls a 6 and gets danger seizure as the result. She takes a damage to her arms (no other survivor is close), rolls a 9 and gains 5 insanity (3 and over is insane), and gains a disorder. I shuffled the disorder cards and drew Vestiphobia which prevents her from wearing armor at the body location. She is also knocked back 6 squares.
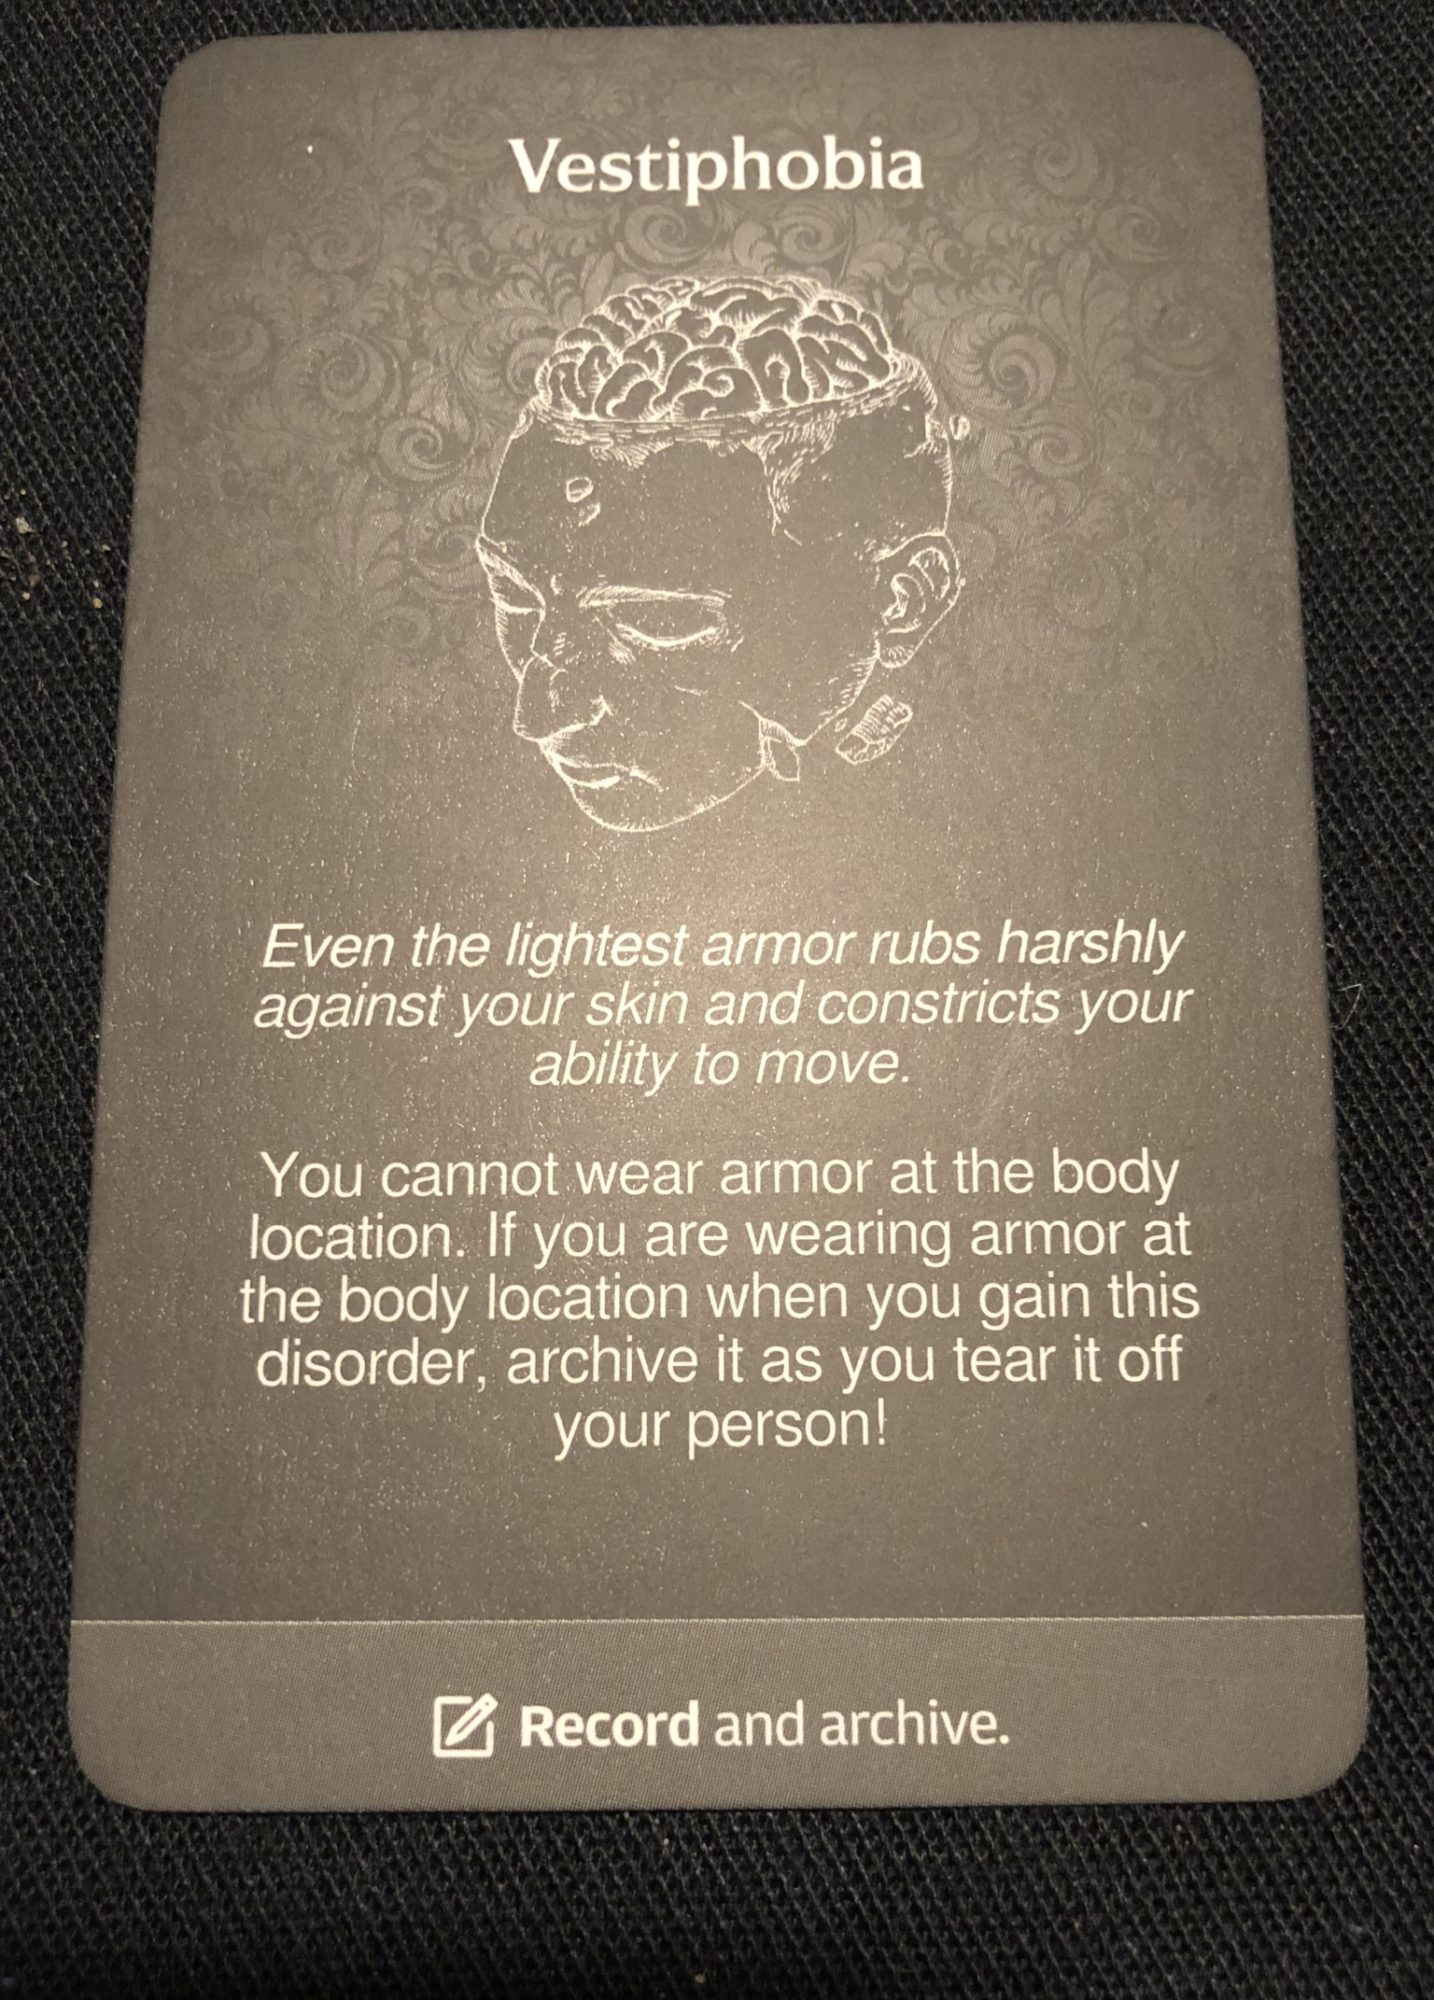
Phobia
Myrdin has insanity of 1, so that is reduced and no damage (roll was a 6).
Neo had a lantern roll (10) and no insanity. Rolls another lantern on the brain trauma table which is Frenzy. Gains 2 insanity, and a speed and a strength token.He cannot use weapon specialization or mastery, but that does not apply in this first session.
Linhong also rolls a lantern but has an insanity point and is just knocked back 6.
The White Lion then moves and attacks Myrdin, who is the furthest in range. Both rolls hit. One to the arms, one to the body. Myrdin spends a survival point to avoid the body damage and stays on his feet.
He attacks and gets a 7 and a lantern, both are hits. I draw Beast’s Maw and Beast’s Tricep. I choose tricep first and roll a 2 (becomes 3) and fail. The White Lion counter attacks and hits twice. Arms and head are the result, both are heavy wounds and Myrdin is knocked down. Under the knock down rules, any unresolved wound attempts are wasted.
Neo moves in, using 6 movement. Cannot get to the blindspot, but he attacks with a speed of 3. Rolls 9,8, and 5 and hits twice. Hit locations are Soft Belly and Beast’s Scapular Deltoid. No failure trigger for soft belly, so I try that first. I get an additional +1 from the Strength token and roll an 8, +2 is 10. One wound. Second roll is a 3 and the resulting 5 is a failure.
The White Lion now moves 6 straight forward and grabs both Myrdin and Neo. Myrdin takes a waist hit, Neo takes a waist hit which is expended on the armor (Myrdin had no more armor).
The White Lion moving forward allows Imani to attack from the blindspot. She rolls an 8 and a 9, hitting twice. Hit location cards are Fleshy Gut and Beast’s Brow. I go for the Gut first and roll a 1, failure. The White Lion attacks and hits twice. The hits are body and head. Spend a survival to get rid of the head wound. The second wound attempt fails as well.
Linhong throws her stone and autohits. When a Founding Stone is thrown, it auto-criticals as well (if applicable) for the wound. Beast’s Temple is drawn as the hit location, and the Critical Wound description has a persistent injury that potentially (roll of 1-2) negates the White Lion’s action on a turn. One interesting feature of the Founding Stone is that if you draw a hit location card without a Critical Wound text/rule, it does not cause a wound.
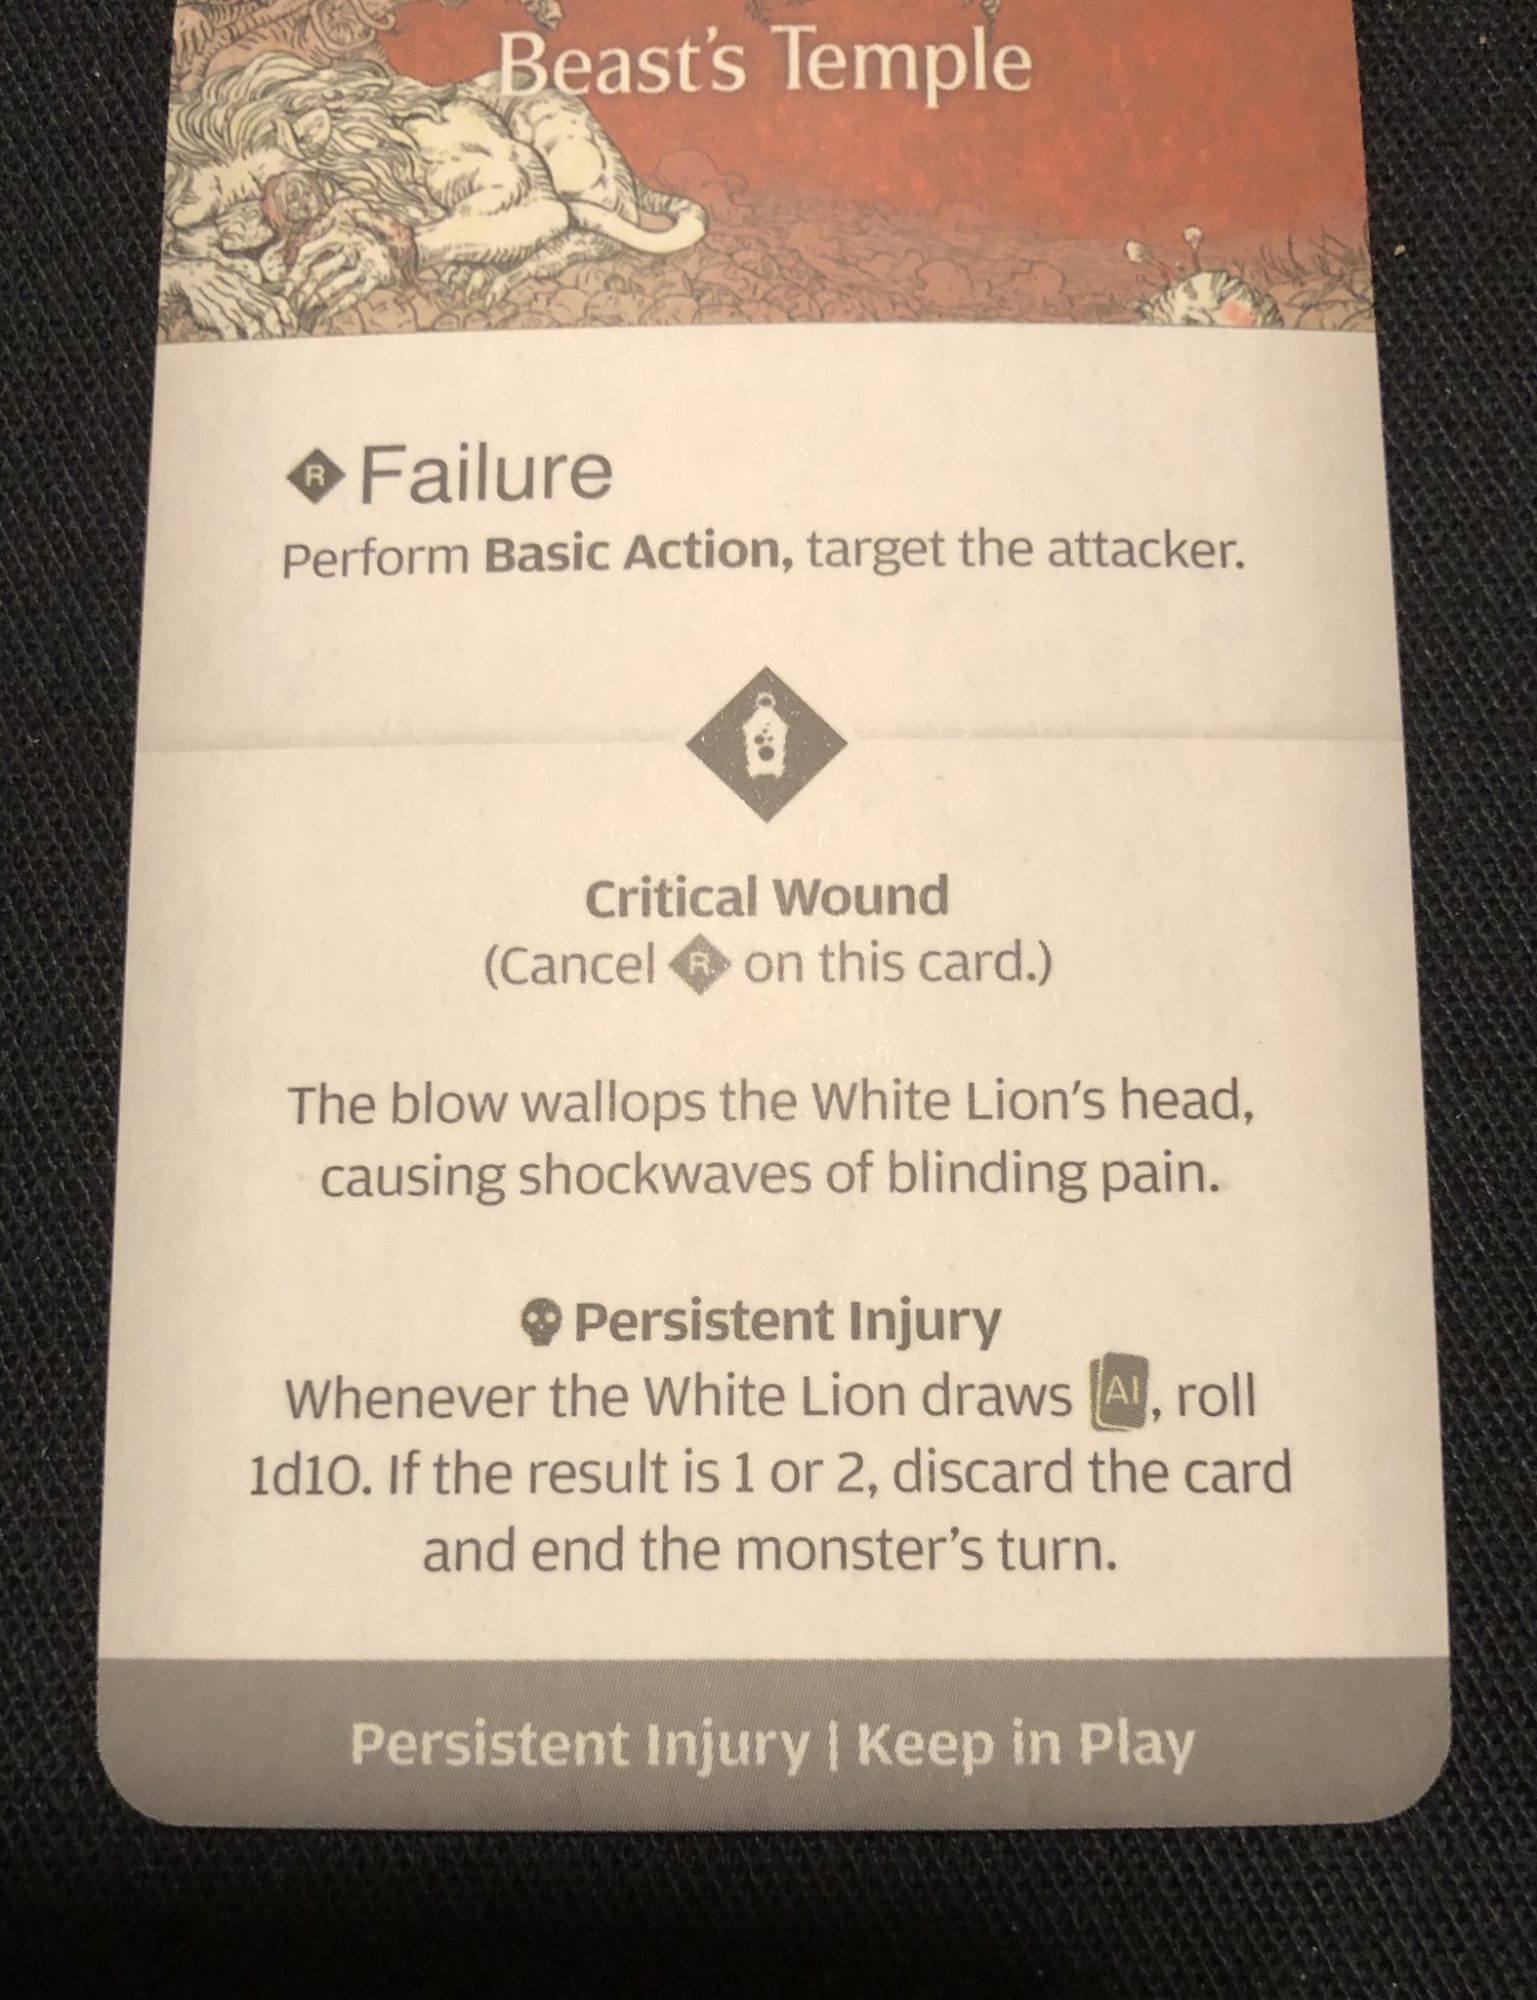
Beast’s Temple
So at the end of Turn 5, I have done 6 wounds and the White Lion is down to 2 AI cards. One is Tremendous Roar. One is unknown as of now. I need to do three more wounds to kill it.
Turn 6
AI card is grasp and the injury roll is over 2. That means that last wound was Claw. Both Neo and Myrdin are knocked down and same range. Myrdin is the nominal Monster Controller. I pick him as the target and he gains one Insanity.
Myrdin is hit with the first attack and takes 1 damage to body. That inflicts a heavy wound, but he is already knocked down. The second step of the card also creates a collision with Neo. However, he is already knocked down so nothing further happens to Neo. Myrdin takes one more damage to Body location. That exceeds the number of spaces, so I roll on the table on page 88 to see what happens. I roll a 10 (lantern) and the effect is that Myrdin knocked down. Since Myrdin is already knocked down, nothing happens.
At the end of the monster turn, Myrdin and Neo stand up.
Myrdin goes into the blindspot and and attacks, rolling a 1 and an 8. I draw Glorious Mane, which is Impervious and cannot be wounded. I do not do a critical wound. Neo then moves and his three speed gives three dice plus he is in the blindspot. He rolls a 4, 5 and 6. The +1 gives him one hit. Hit Location is Beasts Heel and the wound roll is a 2. The resulting 4 does not wound the White Lion.
The other 2 survivors move closer.
Turn 7
I draw Terrifying Roar for the AI card. I roll a 9, so the Temple persistent injury does not apply.
Imani reduces Insanity by 1 (to 4) and is knocked back. Myrdin reduces insanity by 1 (to zero) and is knocked back. Linhong takes a brain injury and I roll a 2 on the table on page 89. She dies. Neo reduces his insanity by 1 (to 1) and is knocked back. I choose Myrdin to be the target and he is hit twice. Both are to the waist and he is knocked down and suffers a roll on page 87. I roll a 5. His pelvis is warped, he gains -1 Luck permanently and a bleeding token.
Neo moves into the blindspot and attacks. I roll a 1, 4 and 9 giving 1 hit. Hit location is Beast’s Ear. I roll a 1 to wound, +2 is a 3 which fails. The White Lion moves one space forward, colliding with and ending in the space with Myrdin and knocking him back 5.
This allows Imani to get into the blindspot. I roll a 3 and 4 so the resulting 4 and 5 miss.
Turn 8
I draw Grasp as the AI card and roll a 6, so Temple persistent wound does not count. white Lion moves to Myrdin and attacks. One hit to the legs. Heavy wound, but Myrdin is already knocked down. Myrdin then takes a head hit from the Grab. Since the head is already wounded, I roll on the table on page 86. I roll a 4 and Myrdin is decapitated and dies.
During their turn, the survivors move toward the White Lion but cannot reach it. I make sure to be 8 spaces away.
Turn 9
I shuffle the AI deck again and draw Terrifying Roar. I roll a lantern 10, so the persistent injury does nothing. Imani and Neo get their insanity reduced to 3 and 1 and are knocked back. The White Lion moves up 6, but no target is in range for an attack. I am a little confused by the wording here as I am supposed to perform a basic action (which has a target in range) but there also is target furthest survivor in range, which there is none. I played it as the basic action card if none are in range.
As both the survivors are out of range, they do not move.
Turn 10
I draw grasp. According to the target choices, no knocked down, no closest in range, so it it sniffs.
I start edging the survivors to make a run for the blind spot.
Turn 11
Shuffle AI deck and draw terrifying roar. Roll a 3 on the injury check, so it roars. Reduce insanity (Neo now has none left).
Because of the interplay between the two cards and the knockback, I decide I need to close the distance.
Turn 12
Draw Grasp. Roll a 3 on the injury roll. Target Imani. Attack and hit. Damage location is legs. Grab location is body, which is a heavy wound, but grab knocks her down anyways.
Move Neo into blindspot (6 move). roll 3 dice to attack with 10, 10 and 4 (2 hits). Hit location is a trap – clever ploy. He is hit to waist and body, both do light wounds. I reshuffle hit location.
Turn 13
Reshuffle AI deck. Draw Grasp. Injury roll of 6. Imani is hit. Body location, so I roll on table on page 87 as it is full. I roll an 8. Broken rib, -1 speed (permanent) and bleed token.
Imani stands up. Neo rolls 3 dice in his attack and hits all three times. Locations are glorious mane and then Clever Ploy. I stop there as trap card’s stop all hits. Neo is hit twice to body. I use his survival and the heavy damage knocks him down.
Imani cannot make it to the blindspot and the roar is dangerous, so she throws the founding stone. Hit location is Beast’s Knee. Critical wound gives the White Lion a shattered knee and a -1 movement token.
Turn 14
Draw grasp. Targets Neo. Injury roll does nothing. Damage is to legs and arms (both light). Neo stands up.
Neo moves to blind spot. Hits once with 3 dice, hit location is Beast’s flank. Wounded. Neo now has priority target token. Imani moves closer.
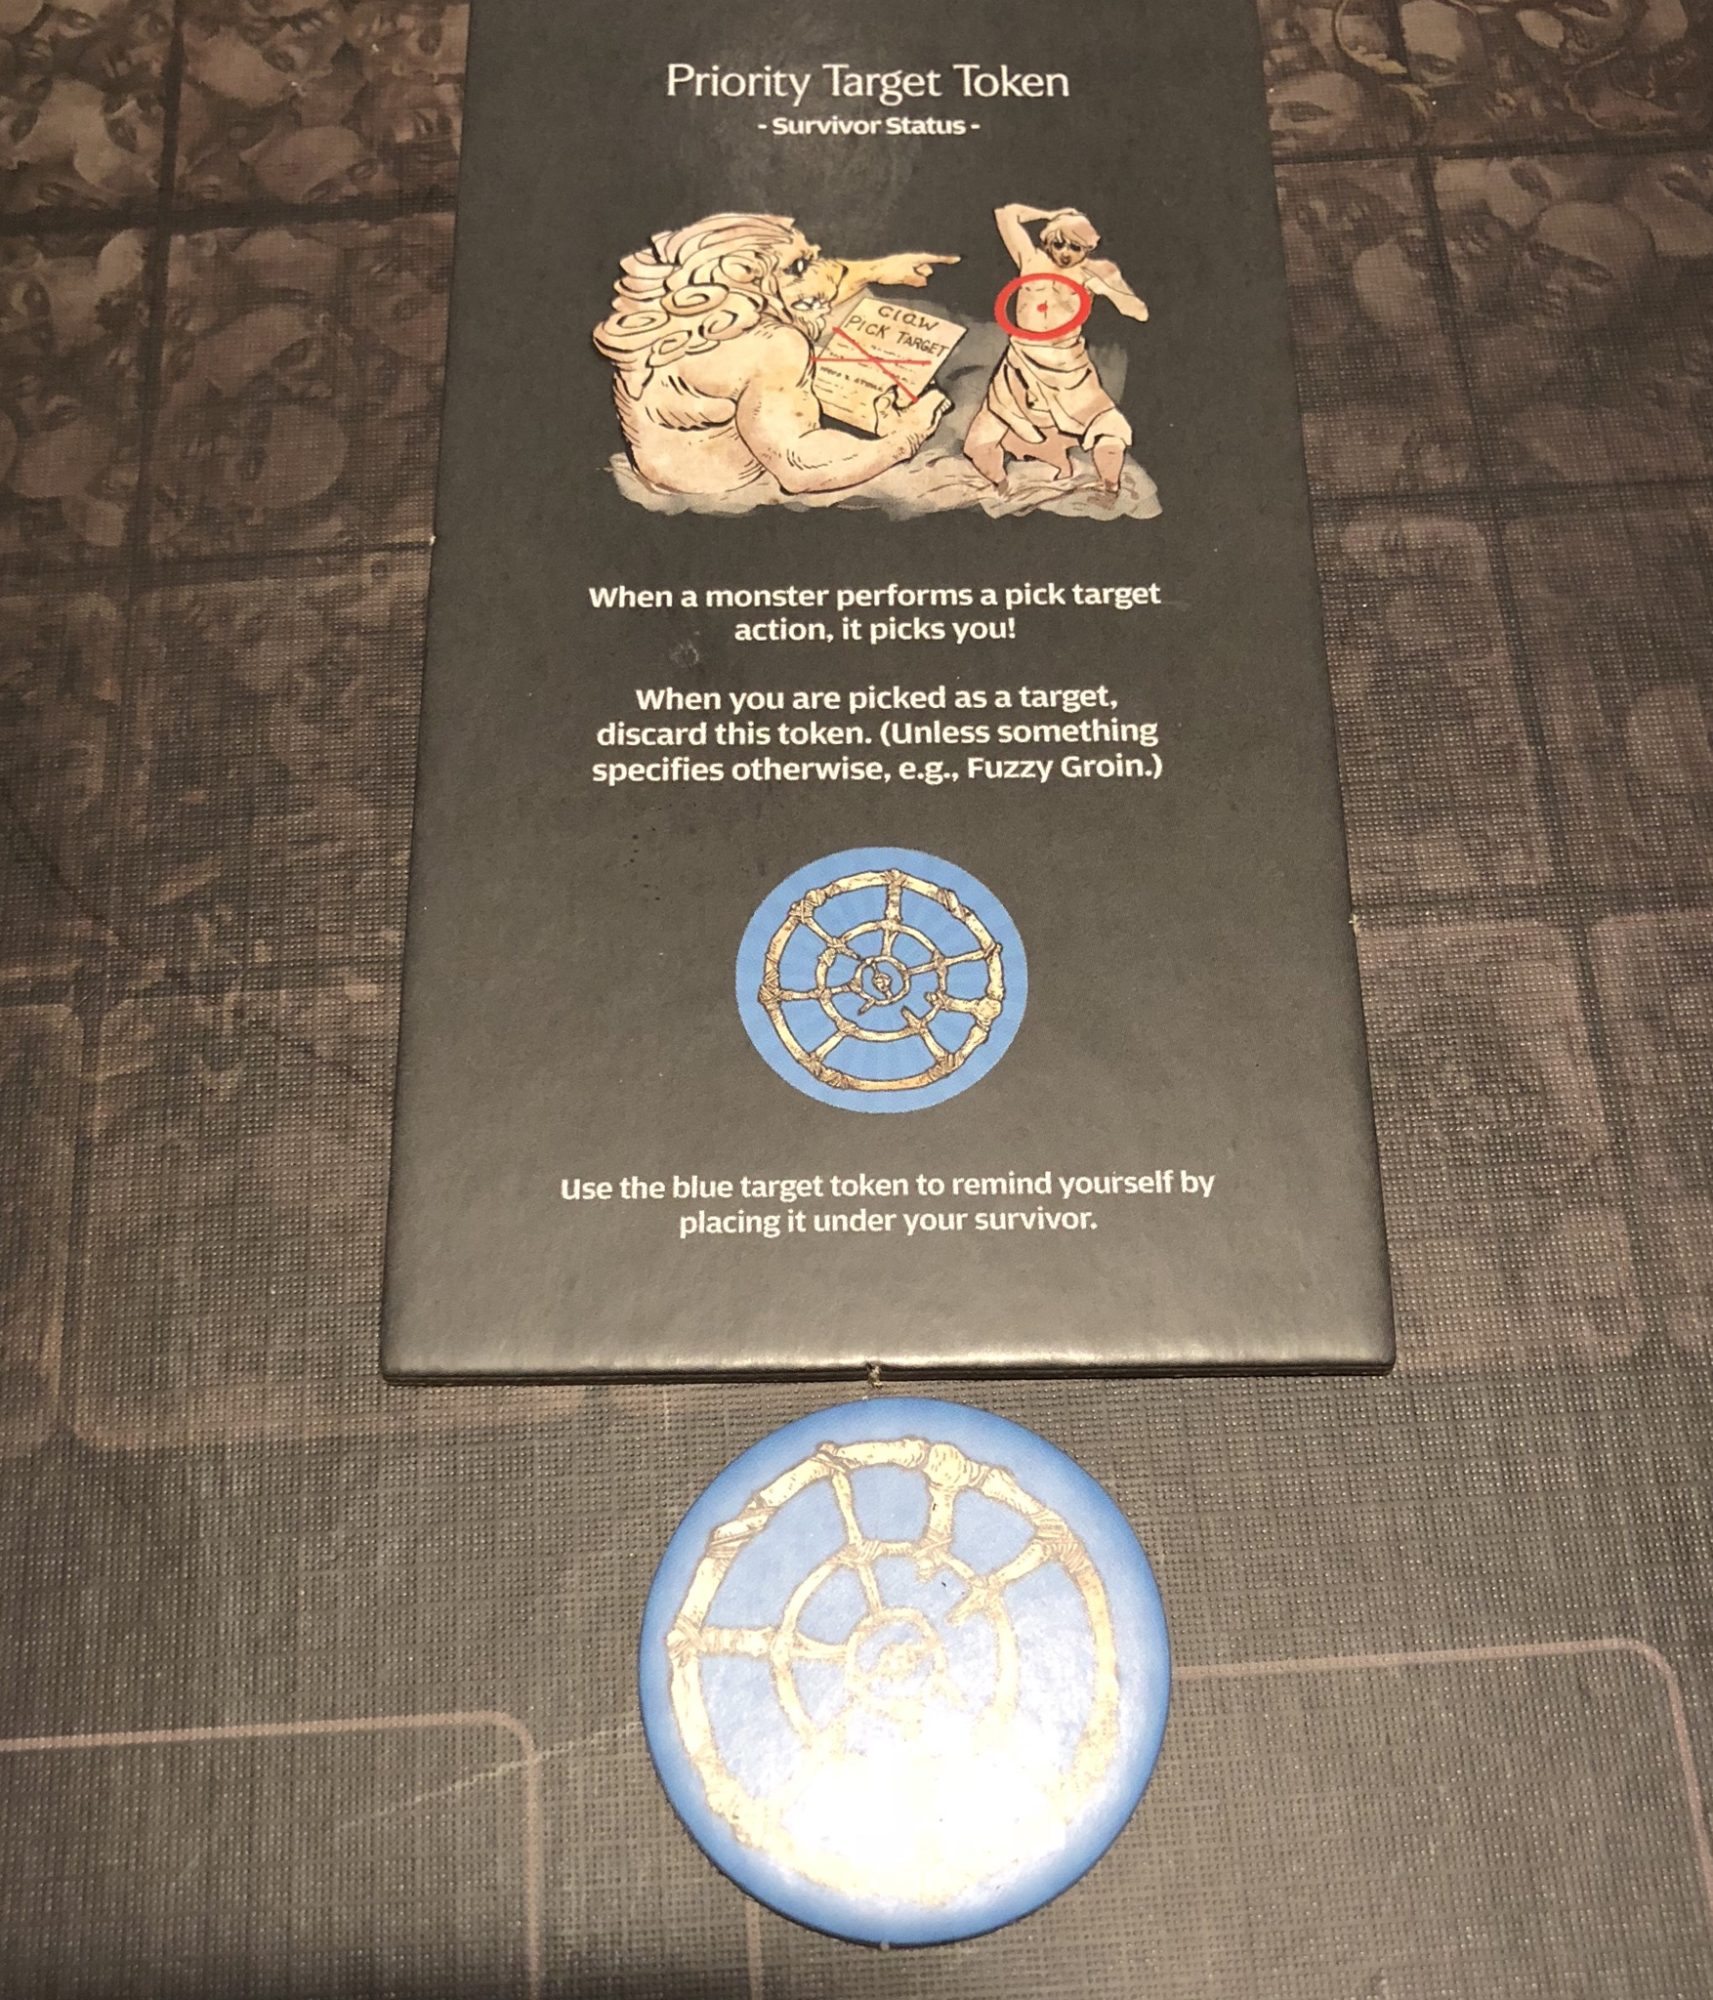
Priority Target
Turn 15
Perform basic action as there are no more AI cards left in the deck, Neo is in blind spot, cannot be picked (I assume this is right, possible that Priority Target means you are picked no matter what, even if not a legal target), so White Lion goes after Imani. It collides with Neo and ends turn in his space, he is knocked back 5. White Lion hits arms twice.
Imani is knocked down and rolls on page 86. I roll a 7 and she suffers a broken arm and permanent -1 Strength and Accuracy.
Neo moves up and misses with all three attacks.
Turn 16
Perform basic action. Neo is chosen and loses priority target token. He is hit 2 times to the body and I roll a 10 on the table on page 86 and he is knocked over. Imani stands up.
Imani misses with Tooth and Claw (unarmed attack).
Turn 17
Imani is targeted and hit twice. I roll 2 on the arm table and she dies. Neo stands up and enters the blind spot. He hits twice. Hit Location is Straining Neck and Beast’s Elbow. Straining Neck is not wounded. elbow suffers a critical wound (rolled a Lantern). White Lion dies and Neo gains 3 Insanity.
Victory!
First encounter ends.
The Rewards
Basic Rewards
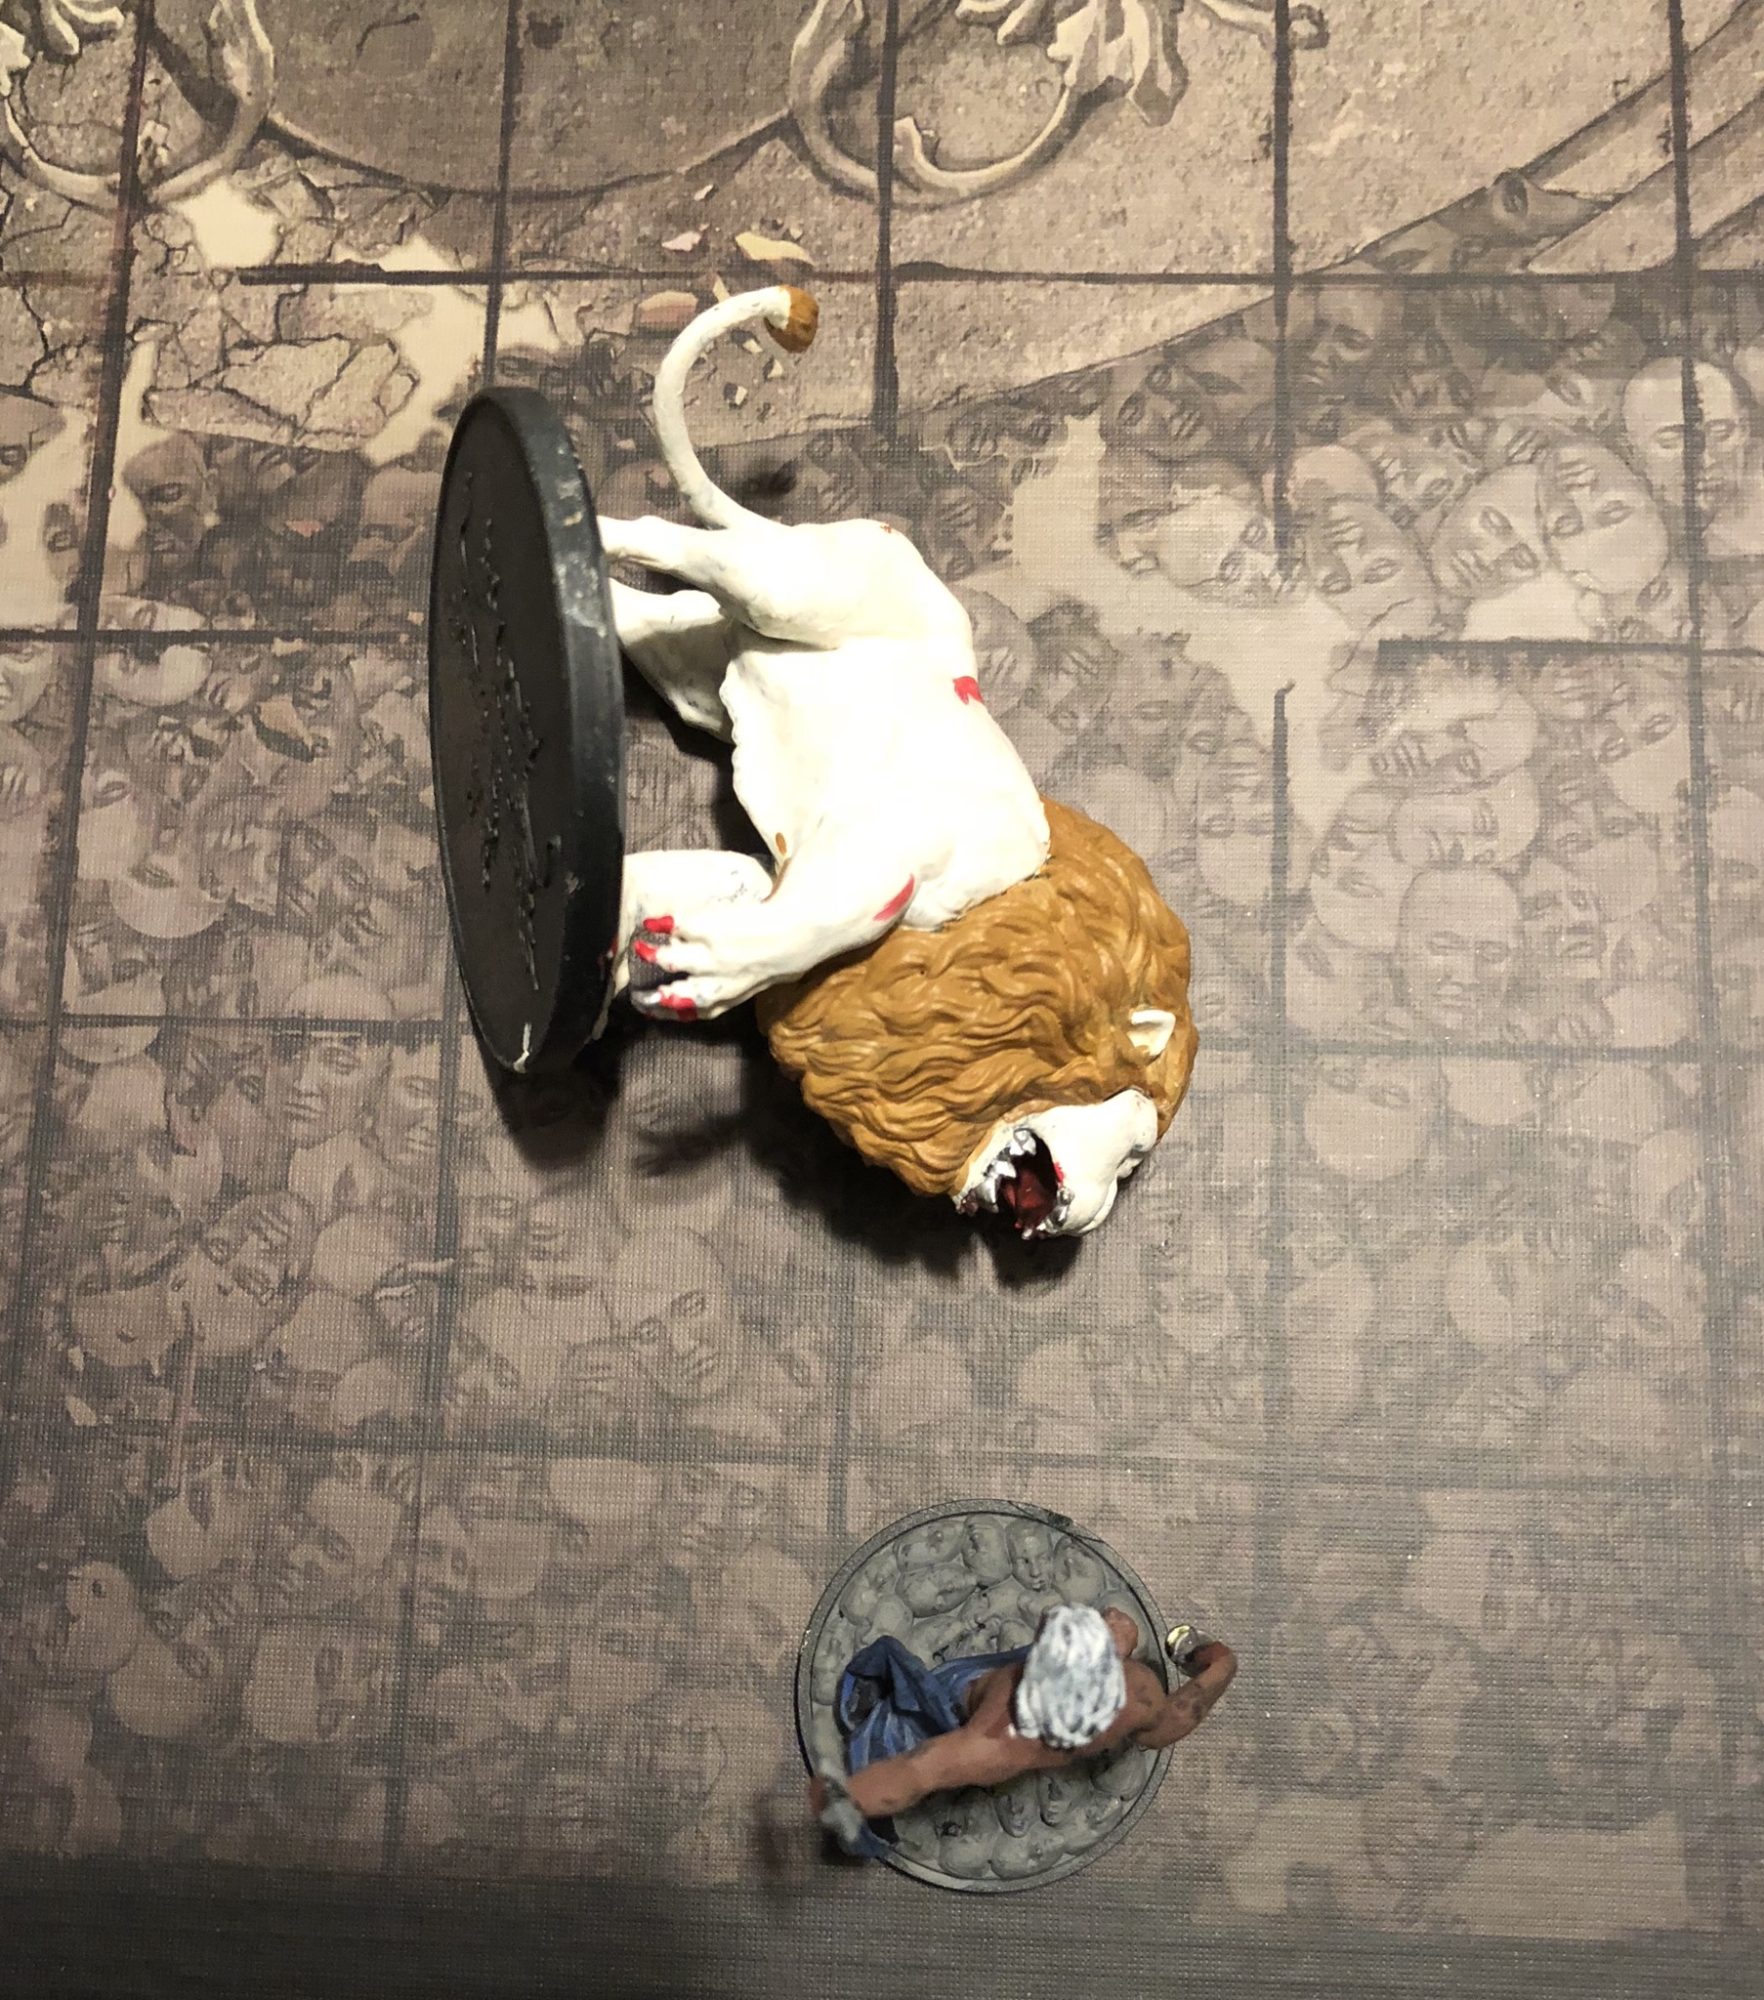
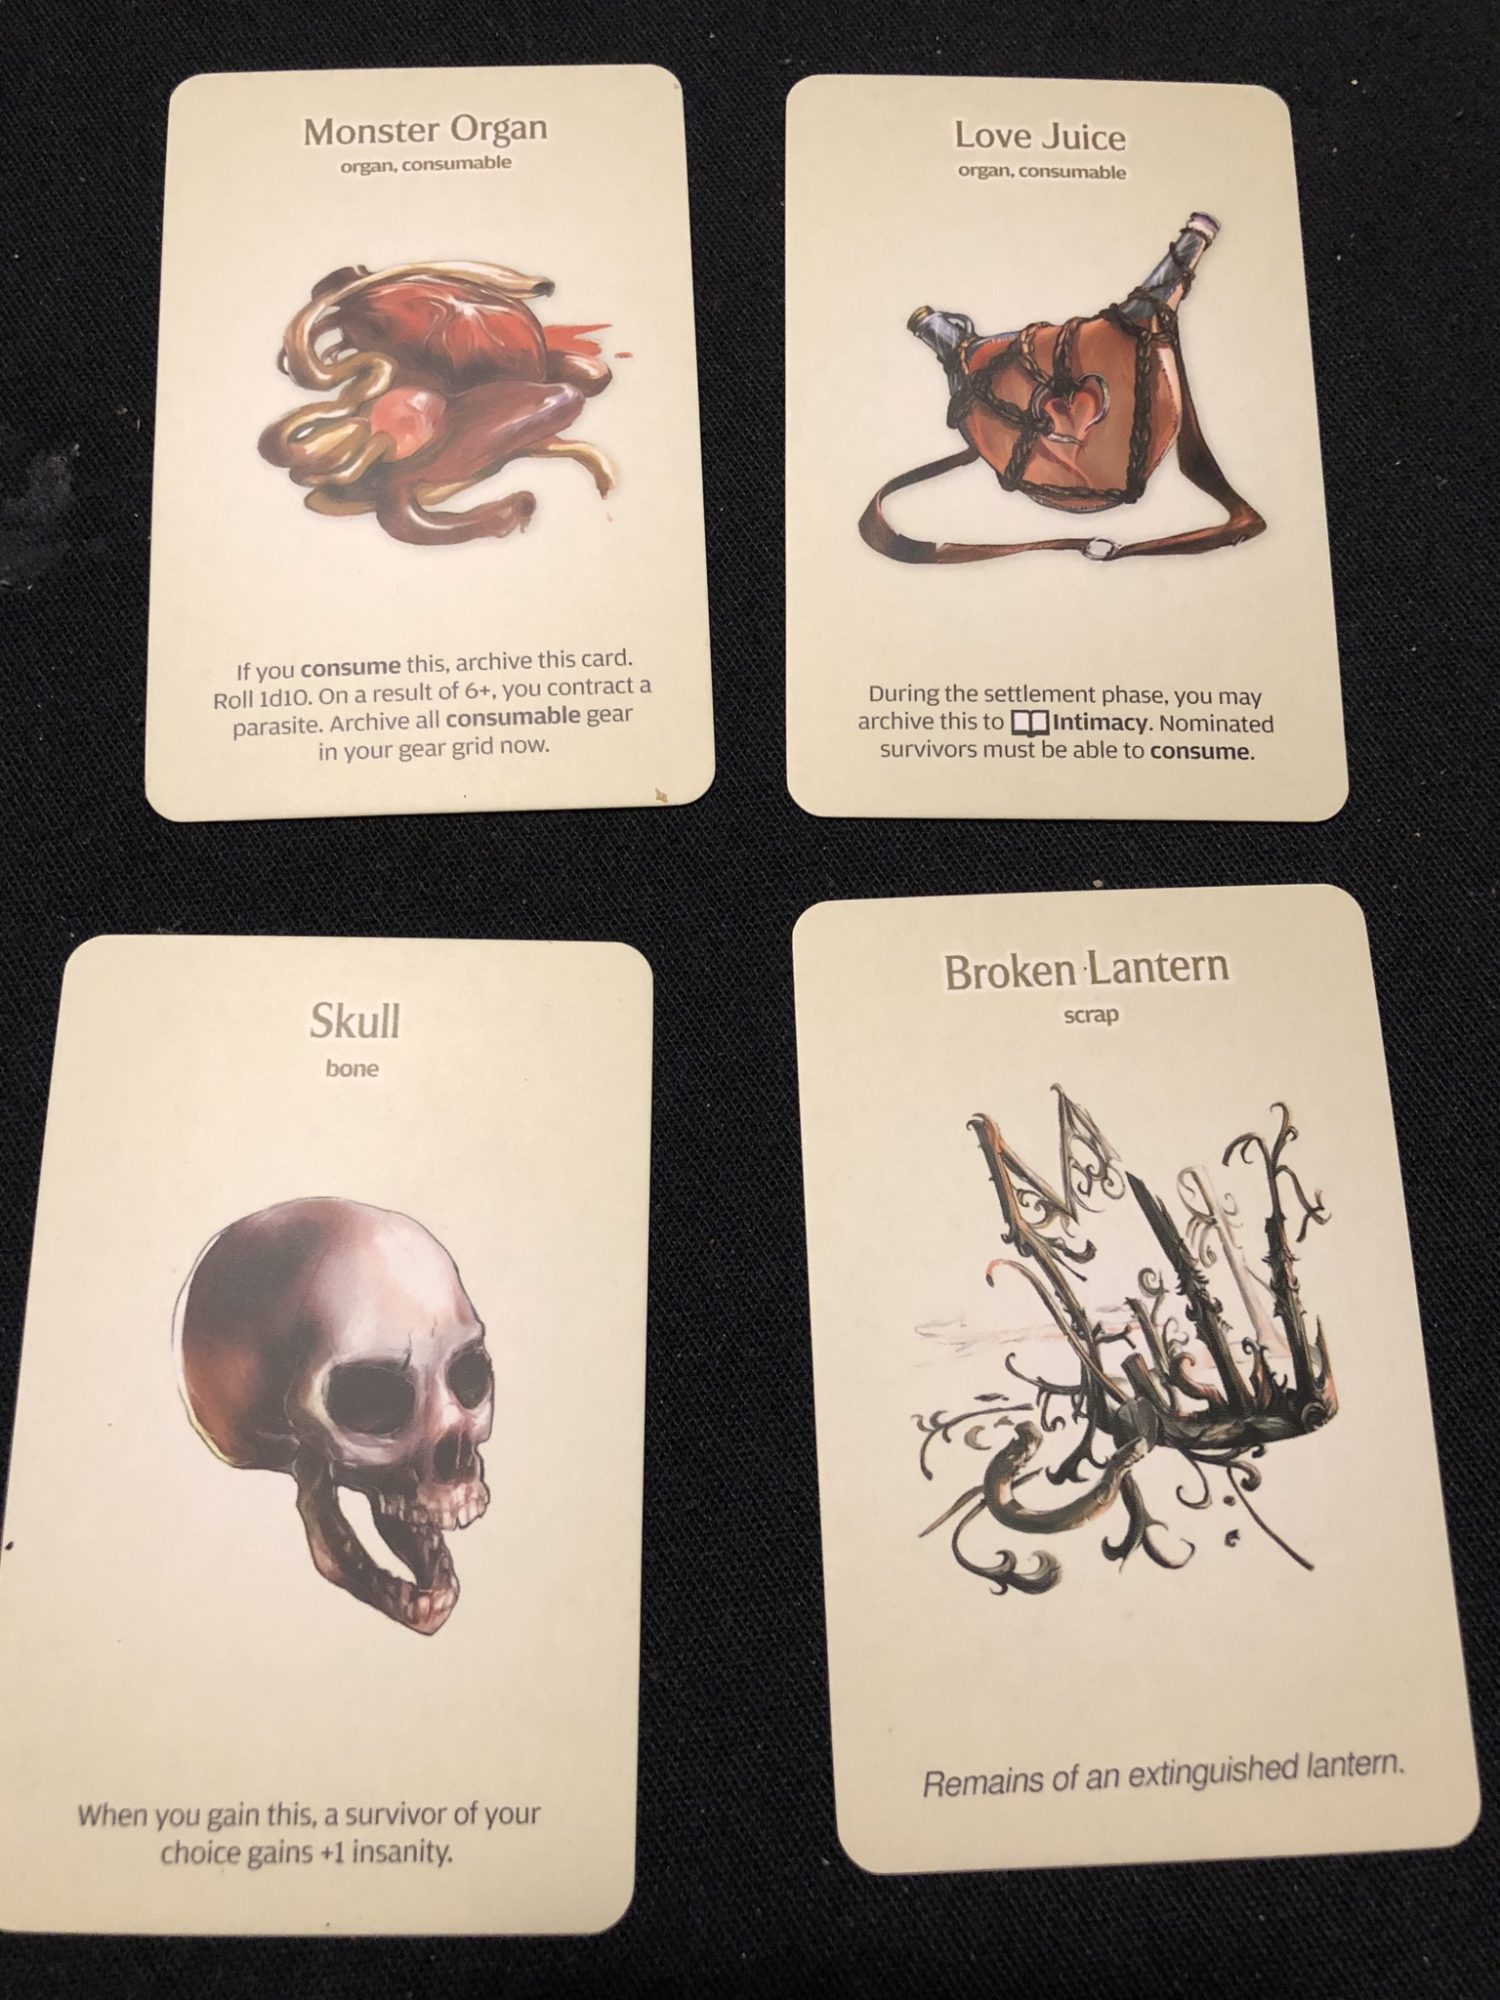
As a reward, you get 4 White Lion resources and 4 basic resources. the White Lion resources I drew were: 2 x Lion Claw, 1 x Shimmering Mane and 1 x Great Cat Bones. The Basic Resources were: Broken Lantern, Skull, Love Juice, and Monster Organ. None of these are explained in the first rule section.
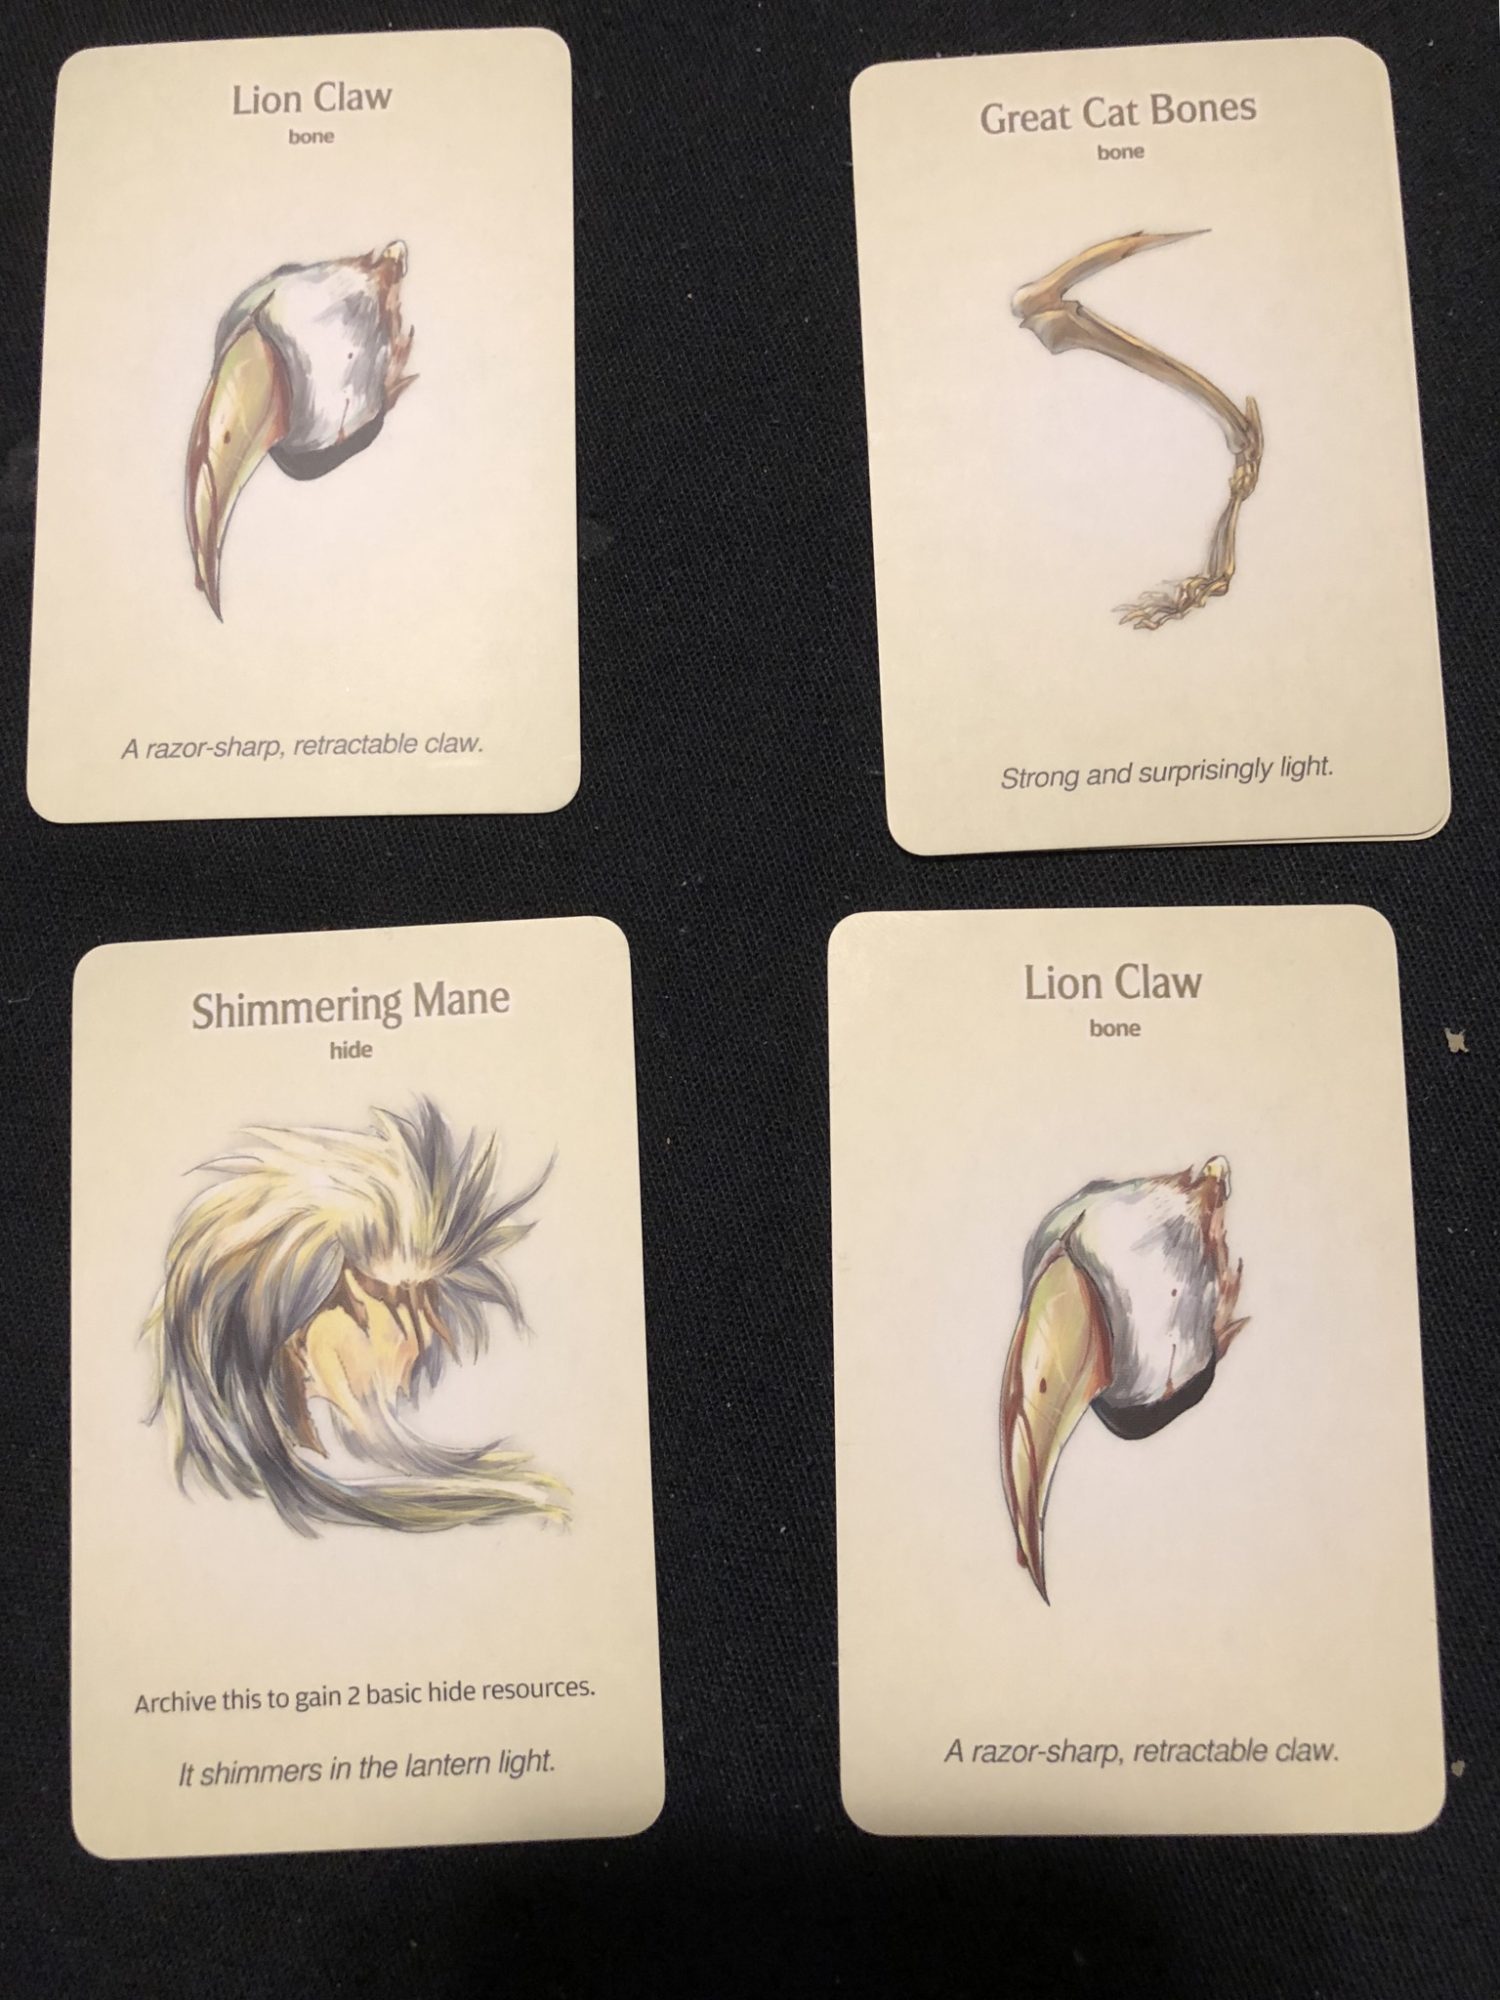
White Lion Rewards
My Impressions
As you can tell from the session play through above, the game lasted quite a long time. I am not sure if it was just a combination of bad dice rolls and the card sequence, but I was quite tired of chasing down the White Lion by the end of the session. 3/4 of the survivors players died, and I can imagine that would have been disappointing in a live session.
The obvious strengths of the game are the detailed miniatures and the fairly straightforward rules. There were a few times when I was a little confused, but I did a google search each time and easily found what I was looking for. The general advice here is follow the cards or the rules as closely as they are written and don’t try and read too much into it. The game also drips atmosphere.
I also had some bad rolls and bad luck on card drawing, which extended the game. I think ending it around turn 10-12 would have made the experience more fun.
There are a lot of cards, hundreds and hundreds, and the rule book also extends the story, so there is a lot of game play ahead of me.
The only disappointment I had with the game components was the card stock used. The backs don’t seem to have any coating or lamination. That means they absorb oils from your fingers pretty easily and they do not shuffle very well as they do not glide across each other. They also scratch pretty easily and their edges are not strong. I am not sure why in such an expensive game put together with a very good insert and box, would not have used better card stock. I highly recommend using cards sleeves. Standard European Board Game sleeves should work for the AI and Hit Location cards, the gear cards are not a standard size. The Kingdom Death store carries sleeves.
The tokens are well printed on good stock and the cards are easy to read (important for an older gamer like me). The rule book is a hard cover and the pages are good quality glossy paper and in full color. The huge game board suffers a little from not having a protective coating and also picks up stains from your hands pretty easily. I also noticed a little warping after it had been on the table for a while.
Discover more from Being a CFO and other topics
Subscribe to get the latest posts sent to your email.