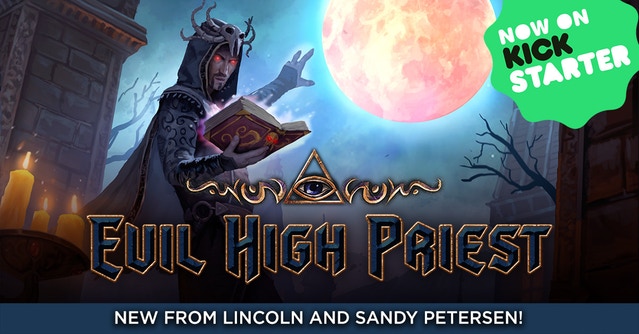
Not just finance, hobbies too ....

Category: 3D Printing

My experiences with 3d printing

Evil High Priest – First Impressions


Might as well lead with the main link. This is my quick review of Evil High Priest that I used their print and play preview to try out at the local board game Meet-Up that I go to every week. This is a new game by noted game designer Sandy Petersen which he co-designed with his son, Lincoln Petersen.

The game is a worker placement game for 2-5 players. You are all part of an evil cult trying to summon your patron Great Old One from the Cthulhu Mythos. There are two cult boards included in the print and play (Cthulhu and the Black Goat) plus all the boards, cards and tokens you would use in the basic game.

The object of the game is to have the most resources (the best places High Priest) when the Great Old One is released. All players are working to summon the Great Old One, no player is working to stop it. Other than the normal worker placement rule of only one worker (cultist in this game) per space, the other interaction is to trigger raids when they are not convenient to the other players.

Before I discuss the game mechanics, a few things about the print and play. The boards are not set to standard paper sizes, so make sure you have a plan on how to print them (I used “poster” settings for the cult boards and then cut the pieces out and taped them together, for example). You can take the files to your local office supplies / printing shop, but color printing on non-standard paper sizes can be pricey. I managed to print everything on my home printer, it just took a little bit of work. Petersen Games should take a look at paper sizes for a print and play file and a printing instructions page would help, especially if you have to explain it to a copy shop. Also, be careful when saving the file. I saved from Adobe Reader, and it flattened the file and I lost an icon on one of the boards when it did that.

I used light card stock and then laminated it using this machine:

AmazonBasics Thermal Laminator

I bought it a while ago for a print and play and card stock terrain projects and for around $20 it does a good job.

The game needs some game pieces and 3 6-sided dice. I have plenty of dice and I could have repurposed some Cthulhu Wars cultist figures, but I didn’t want to take them back and forth to the Meet-up. Instead, I did a quick search and for a design for some meeples I could print on one of my 3D printers. I used these ones, but there really are many, many choices:

Meeples!

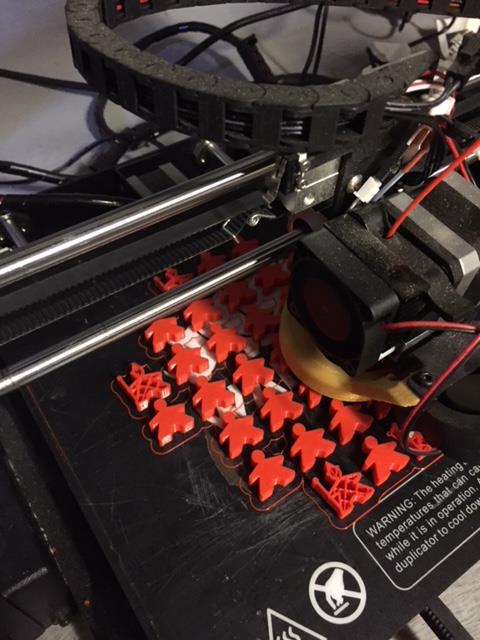
I used 2 different types – the wizards with a staff to be the high priests and the regular ones to be the acolytes. I wish I have made the wizards about 15% larger than the others, but they served well enough. I also did not want to switch out colors 5 times and print 5 times, so instead I did this:

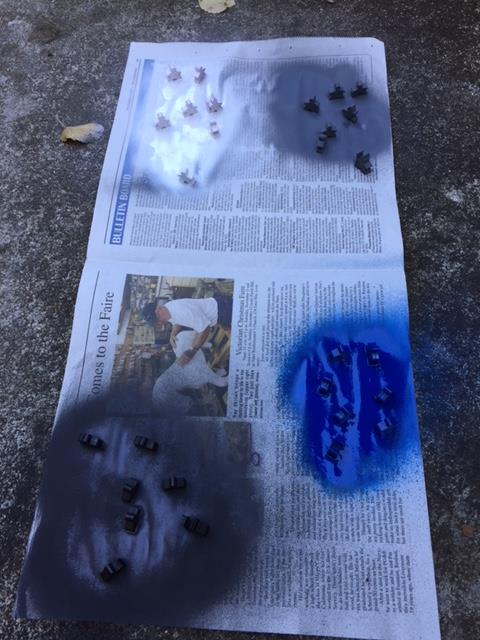
Once the paint dried I ended up with 5 different colors of meeples (red, white, bluse, black and gray). I used spray paint, but model paint for miniatures would work just as well.

I happened to have a 1″ circle punch, so that made punching out most of the circular tokens quick. That was a little large, you could use a 3/4″ one for the smaller tokens and the 1″ one for the larger tokens worth 3 units each if you wanted. A circular punch is a lot faster and neater than using scissors, but not needed if you do not have one. There are punches in all sorts of shapes, check out the scrapbooking section of your local crafts store.

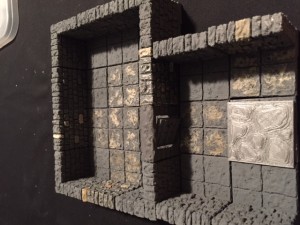
In the end, it ended up looking something like this in the Meet-up:

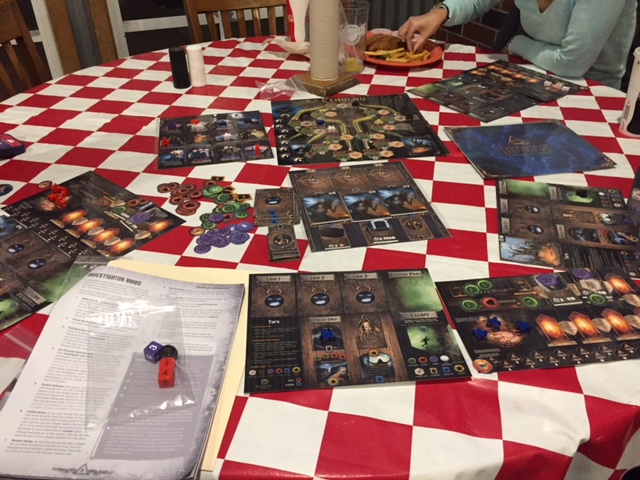
Overall, it looks good and helps in playing. I like the fact that the turn order and the victory point values are on each priest card.

The game itself

Like almost all worker placement games, you pick a turn order and then each player places a worker and then you rotate with each other player in turn placing workers until there no more workers to be placed. You then resolve the skulk action and the action phase ends. You then resolve the preparation phase which involves one of the boards (ritual board) and return cultists that were used back to their pool unless they are still performing a ritual.

There are 5 resources in the game – treasure, blood, magic, spellbooks and Elder Signs and that is the ascending order of victory point value as well, with treasure only valuable in the end game if you have the most. Different action squares cost different (or no) resources in addition to having a cultist placed there and sometimes the cultists themselves are the cost (except there is a no self sacrifice rule so one of their companions is sacrificed).

There are three main boards and a player board that you can perform actions on. These are the Town board (get or exchange resources or become first player), the Cult board (get Elder Signs), the Ritual Board (gain more resources at the cost of 2 or more turns use of your cultist), and the Priest board (everyone has one, only the priest can be used). The ritual board only becomes active after the first raid by investigators occurs.

In the basic game, you only get generic monsters. There are no unique Priests, Monsters or Investigators. These will be added to the game via an expansion and potentially via stretch goals unlocked in the campaign. This made the first play through somewhat generic. An easy fix for the monsters would be to name them and add flavor text with no rules text and the 5 power. *poof* you are now summoning Sandy’s Dark Young instead of a generic monster. Same for the 5 starting high priests. Give them each a name and flavor text and no ability. Vary the art on the cards making, some women and some men and maybe even non-human and you instantly have a game with more flavor with just a little effort and cost.

The game itself played well. We played 4 players and first time for this game for all of us, but we all have played worker placement games before. It took us 2.5 hours and we were all pretty even until about 2 hours in and an ill-timed raid against me knocked me so far back that I never recovered. The designers say 60 to 90 minutes play time and I would add 15 minutes to set-up and tear down the game. We got faster as we learned the game, so 90 minutes is probably doable.

The mechanics tie into the genre. As you break more and more seals, you attract the attention of investigators that raid you. Your cultists start in the asylum (you have 6 and 4 start there) and are not available until they “escape”. You sacrifice cultists (goes back to asylum) and monsters to stop raids and once they penetrate those defenses, the innate defenses you build up slow down and hopefully stop the investigators. If not, they destroy resources. The raids hit everyone, not just the person that triggered it and it is a nice touch. It also adds some chance for all players to do something, even in other peoples turns.

Unless you use your priest to Chant (action on the Priest board) or otherwise gain a Chamber card, any resources you gain are unprotected. You use resources to get Elder Signs which are worth the most victory points but it is not the only way to win.

I liked the different areas to play in, but thought that only having chambers vary made it a little to plain. Switching out Cult boards (2 in the basic game plus 4 more in the expansion) will make the game suitably different each time. The dice are only used to set raid strength (1 to 3 dice so from 1 to 18 total).

All 4 of us liked the game and want to play it again, so it passed the first test. Compared to other “premium” worker placement games, the base game looks shy on components. very few cards and the resources being tokens (most premium games use wooden tokens of some kind at least). I know of a few rules we got a little wrong the first play through, but I found the rule book well done in general.

Since this is still in Kickstarter while I write this, they still have time to add more marketing elements to it. The design looks very solid, but I expect that from Petersen games. They just need to add extra sparkle and fun to the game to make it stand out a little. The extra miniatures you can add do not count for me as I think the boards will need to be much bigger else they will block game text. I also found some of the shadowed white print on parchment background a little hard to read.

Also, since this is a Kickstarter, Petersen Games has a reputation for delivering what they promised  (Sandy Petersen even mortgaged his house to make sure that happened one early Kickstarter) but they are generally late in delivering (not worse than the average Kickstarter). They say they have changed it this time and are ready to produce, but they are not great at delivering on time but good at delivering great games.


Other good Worker Placement games

Lords of Waterdeep

Viticulture – Essential Edition

Scythe


My Technology Life – An Update

I recently built myself a new computer after using the last one for almost 5 years.  My old computer was able to run all the programs I had without any real issues, but it was slowly getting more unstable over time, and the update to Windows 10 had been rough.

The Computer

This time I wanted to build a computer that could run the latest virtual reality headsets and I wanted to have something that again would last me quite a while.  I typically buy the second fastest consumer CPU that is available as the fastest is normally at a high premium in cost but with little extra speed, but the Intel 6700K had finally come down to suggested retail price.  I wanted the modern chipset that went with it so something on the Z170 chipset was what I looked for in a motherboard.  My timing was not that great for a video card in that both NVIDIA and AMD were about to release their latest generation, so I actually waited over a month after buying the rest of my components before fully setting the computer up.  The motherboard did have built in graphics and the CPU did as well, so I was able to test everything except for the new card.

I will make two observations.  The first is that I have always felt it important to be agnostic about brands when making choices on most of the components.  Years ago there was a great deal of variety in motherboards and how features were implemented on them.  Today, the two main CPU makers (Intel and AMD) release a new chipset with each new CPU generation and that chipset is very full featured.  I have almost always used Intel CPUs because for many years, they have been the best performing.  AMD often wins on the cost to performance basis, but it has been quite a while since they have had a chip that can compete for pure performance.  I did build an AMD-based computer a few computers ago because that generation they did have the best CPU.

CPUs are fairly quiet, but there often are techie “holy wars’ over video cards.  I admit to have fought a little in them back when 3DFX and their voodoo chips revolutionized 3D, but I got over it.  Now I just buy the card that I think does the best for me.  The two main graphics processor unit (GPU) providers are NVIDIA and AMD (they bought ATI years ago).  My last generation computer has an AMD video card (a 370) and that was based on AMD having better multi-monitor technology at the time as I like running 3 monitors.  There are edge cases where AMD has had better chips, but for the most part, NVIDIA has had the highest performing chips for a while.

Unlike CPUs, the price jump to the most powerful GPU to the second best is still enormous and unless you really are a power gamer or power user, there is little need to get the best GPU.  For the computer I just built, I ended up with an NVIDIA 1070 based video card (the board maker was MSI).  I had considered the AMD RX 480 as it was a lot less expensive, but the demand was so high that cards were hard to find and the custom cards had not come out yet.  So I went with the 1070.

I could write pages and pages on the latest and greatest differences between the board makers and the different CPU and GPU you could choose, but this blog entry will exist for a long time and tech sites are always much more current (I go to anandtech.com but ownership changes have made it less useful in the last year).  So I will give some more general observations.

The premium priced components in the consumer space are all aimed at gamers.  This tends to result in multi-color LED lights and a black (and usually red highlights) color scheme.  There actually is very little value add from what I can tell from my research for the extra price you pay.  There certainly is much less bang for the buck.  The video card I bought is branded as an MSI “gaming” card and it looks nice but does not really offer any performance improvements over non-gaming cards.

Motherboards are similar.  The Z170 chipset has plenty of solid boards that cost around $150 (can be found for less during sales).  You can spend $250 to $300 and just get a few extra bells and whistles that you may never use.

One final comment, if you build the computer yourself, be prepared to troubleshoot yourself and to have to refresh your knowledge.  I had a faulty power supply and it took me quite a while to track the problem down.  Google and technology forums are your friends here.

This is the system I ended up putting together:

Intel Skylake Core i7-6700K
– the fastest CPU currently available. Depending on luck, can be overclocked a fair amount
Cooler Master Hyper 212 EVO – CPU Cooler with 120 mm PWM Fan
– One of the bestselling coolers. Quite tall, was interesting to install
ASUS Z710 – AR
– all of the modern features of the chipset and none of the “gamer” bells and whistles that jack up the price. PCI-e sharing (which is common for the chipset) so might be a concern for dual GPU use but I plan on only using one GPU.
GPU – MSI Gamer NVIDIA GTX 1070.  As I mentioned, both the main GPU companies just released new cards and it is hard to find cards priced at regular retail prices.

G.SKILL TridentZ Series 16GB (2 x 8GB) 288-Pin DDR4 SDRAM DDR4 3733 (PC4 29800)
– this is actually somewhat of a waste. Super-fast RAM that I probably would not need and I could of gone down a few notches in speed and double the amount for the same price as I will not heavily overclock
CM Storm Scout 2 Advanced – Gaming Mid Tower Computer Case with Carrying Handle and Windowed Side Panel – Black
– This is an updated version of the case I have been using the past 5 years. Roomy and has a handle on top which comes in handy more often than not. Plenty of room for fans, and a good front panel for USB
Antec 750 Gamer power supply.  I originally had a corsair power supply but it was faulty.
– Should be way more power than I need, especially if I do not have 2 x GPU
SAMSUNG 950 PRO M.2 256GB PCI-Express 3.0 x4 NVMe Internal Solid State Drive (SSD)
– Very fast SSD (motherboard supported) that will be my boot drive and will have some applications on it
Mushkin Enhanced Reactor 2.5″ 256GB SATA III MLC Internal Solid State Drive (SSD)
– Secondary SSD for often accessed files and other applications
Seagate 3TB Desktop HDD SATA 6Gb/s 64MB Cache 3.5-Inch Internal Bare Drive
– Should be plenty of room, especially since I have a 16TB NAS
LG Black 16X BD-R 2X BD-RE 16X DVD+R 5X DVD-RAM 12X BD-ROM 4MB Cache SATA Blu-ray Burner
– I debated if I really needed an optical drive and finally decided to get one as I can see myself watching movies on the computer and I have a lot of Blueray disks (PS4 is my main player)
Razer BlackWidow Ultimate Stealth 2016 – Backlit Quiet Mechanical Gaming Keyboard with 10 Key Rollover
– Decided to try a mechanical keyboard. These have Razer designed mechanisms, not sure if as good as Cherry-MX switches. Quieter version.
Logitech G600MMO Gaming Mouse – Black
– Will move over from my existing computer. I do not use all the buttons and may look at another mouse

VR Headset

The latest technology that is just starting to go mainstream is Virtual Reality.  There are two main contenders for the headset market right now – the Oculus Rift (which is backed by Facebook) and the HTC Vive which has teamed up with Steam (owned by a company called Valve and the main marketplace to buy PC games online).

If I had to sum up the main differences between the two headsets, I would say that the HTC Vive comes with two controllers and can be used standing and moving (called room-scale) and sitting down while the Oculus Rift is mainly meant to be used sitting down and does not as of now come with VR controllers.  The Vive has a lot more content available for it now, but many programs are made for both headsets and there are not many non-game programs available.

I got to try out the Vive at uploadvr.com ‘ s offices in San Francisco when I was there for a meeting with a McGill University representative who wanted me to help in their entrepreneur program.  I had read that the room-scale made a big difference and when I tried it out I agreed.

The experience in both headsets is pretty good and you do really get a sense of immersion far beyond what looking at a screen will give you.  The Oculus Rift is about $600 and the HTC Vive is about $800, but the Vive comes with two controllers and two sensor boxes that enable the room scale VR.

I picked the HTC Vive as it has more software available today and because the built in ability to move around instead of just sitting down sold me on the system.  The actual graphics capability is about the same between the two controllers and both are just emerging, so the “best” choice may change rapidly.

I have only used the headset for a few days., so I will hold off on a detailed review, but I can tell you that the base experience lives up to the hype.

I am waiting to see what non-game uses there are for the headsets.  There is a fair bit of work being done to develop approaches and applications for the virtual world the headsets put you into that make it useful for non-games, but there are not that many real life examples yet.  I will be attending a meeting on that topic in a few weeks and will update and right a new blog after I have more information.

Getting the headset to work was somewhat of a struggle and the programs are all new and very much “early access”, so I hesitate to recommend it for everyone, but it has been quite fun so far.  One of my friends brought his young son over (son is around 10 years old) and the son was fascinated with the headset and wore it for hours.

3D Printing

As I mentioned in an earlier blog, 3D Printers are technology that is still not quite ready for mainstream use.  They still take a lot of fiddling with to get to work well and consistently and you need to be comfortable with at least some light mechanical work.  I recently bought another 3D printer, the Wanhao Duplicator 6.  It is over twice the price of the Wanhao Duplicator i3 I started with (and that is an excellent starter machine), but it is much more capable as well.  I will do an update just on the new printer and what I have learned since I bought my first one.  This update will include using a raspberry pi mini-computer to remotely control and monitor the printer.

The raspberry pi mini-computer part of my coming update will be extensive as well.  Quite remarkable what you get for around $50.

Why Bother?

This is a blog on being a CFO and I usually have Tuesdays are purer “CFO” topics and Thursdays are where my occasional other blogs show up.  So you may be wondering why I am writing on building a PC or VR headsets or 3D printers.

My reasons are quite simple – career growth and personal growth.  I live in the Silicon Valley area and there is a lot of interest in the technology around computers, VR and 3D Printers.  More and more, companies are looking for CFOs that are more than just the accounting and numbers person.  IF I don’t expand my mind and learn by doing in areas like this, then how can I be credible when I claim to be a good fit for a technology company CFO role?

I get personal satisfaction on learning new things, but with the competition out there today, I really think that you need to keep actively learning.  If you stop and rest on your laurels, you will be passed by.  I often have had staff ask me how I got to know our company’s products, and it is the same drive that makes me want to understand VR Headsets that made me dig into how electricity comes from a solar panel.

So try not to dismiss other people trying to learn and very importantly, encourage your staff to do so.


3D printers are not ready for prime time

The news quite often mentions 3d Printers. 3D printer companies were the darlings of the stock market not too long ago. Mainstream press is full of little interest stories of the latest thing to be printed out. Technology websites and social networks have many mentions of the “Maker” movement and that movement includes 3D printing and printers.

I am somewhere in the “tech” scene or at least in a few smaller segments. You can tell that by a few things), but having the username “michael” on the an old school computer technology site (Anandtech) is a good sign of how long I have been involved. I have seen mentions of 3D printers for years and occasionally checked prices to buy a printer, but they were always well over $1,000 which seemed too much to me.

One day I noticed this campaign on Kickstarter:

The Kickstarter ended a while ago, you can find the products for sale here:

http://www.drivethrurpg.com/product/166074/DRAGONLOCK-Dungeon-Starter-Set

For those of you too lazy to click the first link, it is plastic terrain used when playing a roleplaying game to build up a dungeon. If you are not familiar with tabletop roleplaying games like Dungeons and Dragons, the players often use 28mm scale miniatures to more easily run the fights that happen within the game rules. I guess you can say they are the
dolls the players use but the players tend to be men so they would at least claim action figures.

If the miniatures are the dolls, then products like Dragonlock are the dollhouses. I have played in a couple of games where the DM had very nice hand drawn maps that were drawn to scale and I have played in a couple of games with folding cardboard terrain, but I had only seen the full out plastic modeled dungeons in pictures from conventions. The existing products are interesting in theory but quite expensive and hard to use because you never seem to have exactly the right combination of pieces to build what you want. A set that is meant to be 3D printed solves those two problems. The cost per piece is small and you can custom print what you need.

I signed up for the Kickstarter and then started researching the current state of the 3D printer market. I quickly discovered two things. There were a fair number of printers below $1,000 today and that reviews on them were all over the map.

I will save myself typing a long description of the different printers out there. Here is a fairly representative list with examples from owners actually using the printers:

http://fatdragongames.proboards.com/board/24/3d-printers

I selected the Wanhao Duplicator I3 V2. I mainly selected it for two reasons. The first is the cost (it was under $300 for me) and the other was the strong user community that could be found in a Google Group. The brand was recommended to me by my friend Gabriel who runs a small drone business in Singapore called Sensory Robotics (www.sensoryrobotics.com ). I had asked him for an inexpensive printer that would meet the specifications needed and he said if I was willing to tinker the Wanhao printers were popular. I was able to find them direct from the manufacturer via Taobao in China for just under $300 shipping included (they are between $350 and $400 in the USA) so I decided to give them a try. The Wanhao I3 is basically a pre-built open source kit printer. It really is not much different in price than buying parts and assembling it yourself, and the design itself is somewhat well tested.

Before I pulled the trigger and bought the Wanhao, I looked through Amazon.com and read the message boards of many of the more popular printer brands. I was quite surprised at the results. For a product that had been sold to consumers for several years and had made it into popular press, reviews were surprisingly bad every printer brand out there.

I am not talking the occasional disappointed buyer on a crusade, I am talking about bad review after bad review. Even even the Printerbot Simple that is recommended by the Fat Dragon, the company that made the Dragonlock pieces, has quite a few bad reviews on Amazon and in the Dragonlock boards. Some printers appear to pretty much never work. Some printers use proprietary printing materials that are much more expensive than standard printing materials. All the printers I researched had very disappointed customers.

Why so much disappointment? Let me explain a little how 3D printers work and what easily goes wrong with each step.

The first is that all of the consumer level printers (under $1,000 and meant to be used at home) are made by smaller companies. The bigger companies that make printers for commercial use all have quite expensive models that are far out of reach of the average consumer. A cottage industry sprung up around some of the older technology that was open sourced by larger commercial companies, and lots of little start-up, mainly of pretty young entrepreneurs were created. Kickstarter still sees 3D printer designs show up on a semi regular basis and two years ago they were very popular on the crowdfunding sites. So that means lots of people with little or no real manufacturing experience started modifying designs or trying new but pretty much untested designs out on the public. Full of Open Source circuit boards and designs that sort of worked but that really were not close to optimal and often had serious flaws.

Before I get to some of the flaws of my particular printer, let me give an overview of the printers and what is done to make a 3D print.

The first thing you need is an actual object to print. This comes in the form of a computer aided design (CAD) file. Typically this is in an .STL format. You can find these files on various internet sites or you can create them yourselves. Many of the people making the files are new to CAD, are using free and not so powerful CAD programs, and probably do not have a lot of 3D printing experience. That means you get a lot of files that very honestly are not set up well to be printed in the first place.

You load the computer design into a program called a slicer. 3D printing is done layer by layer, and a slicer takes the CAD file and slices it into as many thin layers as you have instructed the printer to use. It then generates a series of commands that tells the printer what to do to actually print the device (generally in the form of a printer language called GCODE) and saves that file. A popular free slicer is called Cura. A more powerful but costly program is called Simplify 3D.

Right away, you may have ruined your print. The programs need to have the exact right settings or the code they write does not work. Some files are not well set up to print but an experienced user of the slicer can either change the orientation, break the object into smaller and easier to print. None of this is well documented and the documentation that does exist is written using terms that someone new to 3D printing is unlikely to understand. You even need to measure the diameter of the filament and input it into the slicer program. I hope you have a digital caliper.

Once you have the file ready to print, you then are faced with the printer itself. 3D printers work by melting plastic and depositing it in thin layers. The printer head (the part that melts and deposits the plastic) needs to move in all three dimensions in a consistent and controlled manner. The surface needs to be flat and level to the printhead and the starting distance between the print head and the surface needs to be small but not zero. The basic way of setting the distance is using a piece of paper to slide under the print head and go by feel.  If you are a beginner, you have no real idea what it is suppsoed to feel like.  The surface must have something to help the first few layers of plastic stick. The print head will move in at least two and maybe three dimensions on rods, gliding on bearings or moved by what essentially are large screws, The file with the instructions needs to be read from a memory card or the computer needs to maintain a good connection for what might be 24 hours or even more.

The rods I mentioned about are often held in place by just a little set screw. Shipping the printer has a good chance of working a rod loose or maybe even bending it. The electronics and cabling are so so on average and shipping may jostle a connection loose.

The standard advice for the printer I bought is to take the extruder assembly apart and replace the gear that moves the plastic filament through it with another one. While you are at it, rotate the heating block to give more clearance when it is at the top. Before you print one item, you have already taken the printer apart. I guess I should mention that the wiring in the older models is defective and can cause a fire. Plus it has been determined that the main circuit board does not properly ground the electricity running through it and it causes temperature readings to swing by about 10 degrees when the heater switches on and off. The suggested fix is to solder a wire from one place on the board to another.

I wish that these types of issues are only from a cheaper kit based one like the Wanhao I bought. However, I would be lying if I said that. I could not find one printer aimed at consumers that did not have a large number of design issues and frustrated users.

Now if you ask me if I like the printer I bought, the answer would be yes. Once I learned and worked through some things, I actually was able (very quickly) to print out the Dragonlock pieces with no issues at all and other files as well. A 3D printer is a fun thing to have and my kids like it and want me to print more things for them. However, these are not even close to being a consumer product. Be prepared to spend time scouring the internet for training tips, to be watching youtube videos showing you how to use your computer and software, and generally spending a lot of extra effort to make the device that you paid for work.

Here are a few pictures of what I have been able to do with my printer.  A well known space ship, some Dragonlock pieces (painted and unpainted) and the printer itself.

image image image

Powered by WordPress & Theme by Anders Norén